
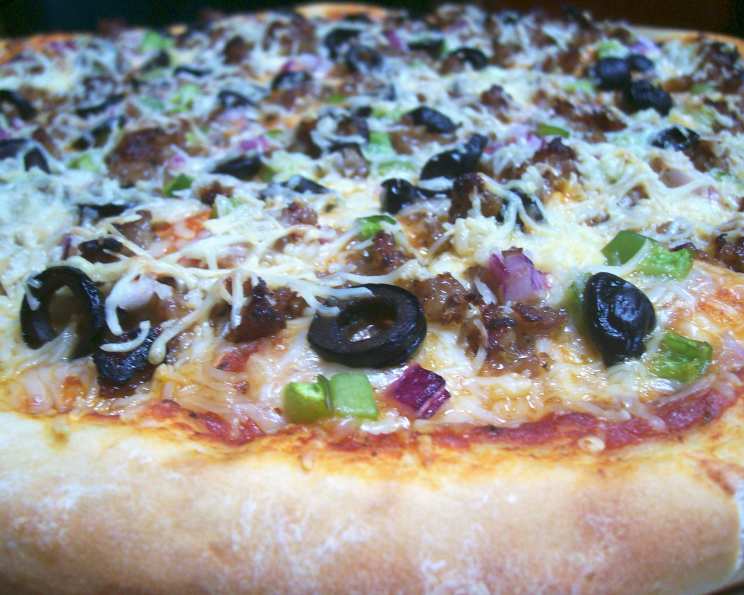
No-Knead Food Processor Thin Crust Pizza Dough
I remember the first time I attempted homemade pizza dough. It was a sticky, frustrating mess, and I almost gave up entirely. My Nonna, bless her heart, just chuckled and said, “Patience, cara! And maybe a little help from technology.” She then revealed her trusty food processor, a tool she swore made pizza night a breeze. This recipe, inspired by her wisdom (and a little nudge from the Canadian Living Cookbook), is a testament to that: unbelievably simple, incredibly fast, and yields a perfectly crisp, thin crust every time.
Recipe Overview
- Prep Time: 5 minutes
- Rise Time: 10 minutes
- Cook Time: 10-12 minutes
- Total Time: 25-27 minutes
- Yield: One 12-inch pizza crust
- Servings: 2-4
- Dietary Type: Vegetarian
Ingredients
- 2 cups all-purpose flour
- 1 ½ teaspoons instant fast rise yeast
- ¾ teaspoon salt
- ¾ cup hot water (not boiling, but warm to the touch)
- 2 teaspoons olive oil
Equipment Needed
- Food Processor
- Pizza pan or baking sheet
- Greased bowl
- Measuring cups and spoons
Instructions
- Begin by combining the dry ingredients. In your food processor, pulse together the all-purpose flour, instant fast rise yeast, and salt until they are thoroughly blended. This ensures that the yeast is evenly distributed throughout the flour, which is crucial for consistent rising.
- With the food processor motor running on low, gradually add the hot water and olive oil in a steady stream. Continue to process the mixture for about 1 minute, or until the dough comes together and forms a ball. It should pull away from the sides of the bowl.
- Using floured hands, carefully remove the dough ball from the food processor. Gently form it into a round shape.
- Grease a bowl with a little olive oil. Place the dough ball in the greased bowl, turning it over to ensure it’s coated on all sides. This prevents the dough from drying out during the short rise.
- For a thin crust, let the dough rise for just 10 minutes. If you prefer a slightly thicker crust, you can extend the rising time to 45 minutes or more. The longer it rises, the airier the crust will be.
- After the rising time, stretch the dough out to fit your pizza pan or baking sheet. If the dough is too elastic and keeps shrinking back, let it rest for a few more minutes before continuing to stretch it.
- Top the stretched dough with your desired pizza toppings. Get creative with your sauces, cheeses, vegetables, and meats!
- Bake in a preheated oven at 450°F (232°C) for 10-12 minutes, or until the crust is golden brown and the cheese is melted and bubbly. Keep a close eye on it, as oven temperatures can vary. The crust should be crisp and slightly charred in places.
Expert Tips & Tricks
- Flour Power: The amount of flour needed can vary depending on the humidity. If the dough seems too sticky, add a tablespoon of flour at a time until it forms a cohesive ball.
- Hot Water Matters: Make sure the water is warm, but not scalding hot. Too hot, and you risk killing the yeast. Think bathwater temperature.
- Pre-Baking for Extra Crispness: For an extra crispy crust, pre-bake the dough for 5 minutes before adding the toppings. This will help prevent a soggy bottom.
- Don’t Overload: Avoid overloading the pizza with too many toppings. This can make the crust soggy and difficult to cook evenly.
- Make Ahead: The dough can be made ahead of time and stored in the refrigerator for up to 24 hours. Just wrap it tightly in plastic wrap. Let it come to room temperature before stretching.
Serving & Storage Suggestions
Serve your freshly baked pizza immediately for the best flavor and texture. A simple green salad or a side of roasted vegetables makes a perfect accompaniment.
Leftover pizza can be stored in the refrigerator for up to 3 days. Reheat it in a preheated oven, a toaster oven, or a skillet for the crispiest results. You can also microwave it, but the crust will be softer.
For longer storage, you can freeze leftover pizza slices. Wrap them individually in plastic wrap and then place them in a freezer bag. Frozen pizza can be reheated directly from the freezer in a preheated oven.
Nutritional Information
(Estimated, per slice based on 8 slices per pizza, without toppings)
| Nutrient | Amount per Serving | % Daily Value |
|---|---|---|
| Calories | 180 kcal | 9% |
| Total Fat | 4g | 6% |
| Saturated Fat | 1g | 5% |
| Cholesterol | 0mg | 0% |
| Sodium | 200mg | 8% |
| Total Carbohydrate | 32g | 11% |
| Dietary Fiber | 1g | 4% |
| Sugars | 0g | 0% |
| Protein | 5g | 10% |
Variations & Substitutions
- Gluten-Free: Substitute the all-purpose flour with a gluten-free all-purpose flour blend. You may need to adjust the amount of water slightly.
- Whole Wheat: Replace half of the all-purpose flour with whole wheat flour for a nuttier flavor and added fiber.
- Herb-Infused: Add a teaspoon of dried herbs, such as oregano, basil, or rosemary, to the flour mixture for extra flavor.
- Garlic Crust: Mix a clove of minced garlic into the dough for a savory garlic crust.
- Sweet Pizza Dough: Add a tablespoon of sugar and a teaspoon of vanilla extract to the dough for a sweet pizza crust, perfect for dessert pizzas.
FAQs (Frequently Asked Questions)
Q: Can I use active dry yeast instead of instant yeast?
A: Yes, you can. But you’ll need to proof the active dry yeast in warm water first before adding it to the flour. Use about ¼ cup of the hot water to proof the yeast with a pinch of sugar for about 5-10 minutes, or until foamy.
Q: My dough is too sticky. What should I do?
A: Add a tablespoon of flour at a time until the dough forms a cohesive ball and pulls away from the sides of the food processor.
Q: My dough is too dry. What should I do?
A: Add a teaspoon of water at a time until the dough comes together.
Q: Can I freeze the pizza dough?
A: Yes, you can freeze the dough after it has risen. Wrap it tightly in plastic wrap and place it in a freezer bag. Thaw it in the refrigerator overnight before using.
Q: Why is my pizza crust not crispy?
A: Make sure your oven is hot enough (450°F or 232°C). You can also pre-bake the crust for a few minutes before adding the toppings to help crisp it up.
Final Thoughts
So, ditch the delivery apps and embrace the joy of homemade pizza! This no-knead food processor dough is a game-changer, making pizza night a breeze. Don’t be afraid to experiment with different toppings and flavors to create your own signature pizza. I encourage you to try this recipe, share your creations with friends and family, and let me know how it turns out. Pair it with a crisp Italian salad and a glass of your favorite wine for the ultimate pizza night experience. Buon appetito!