
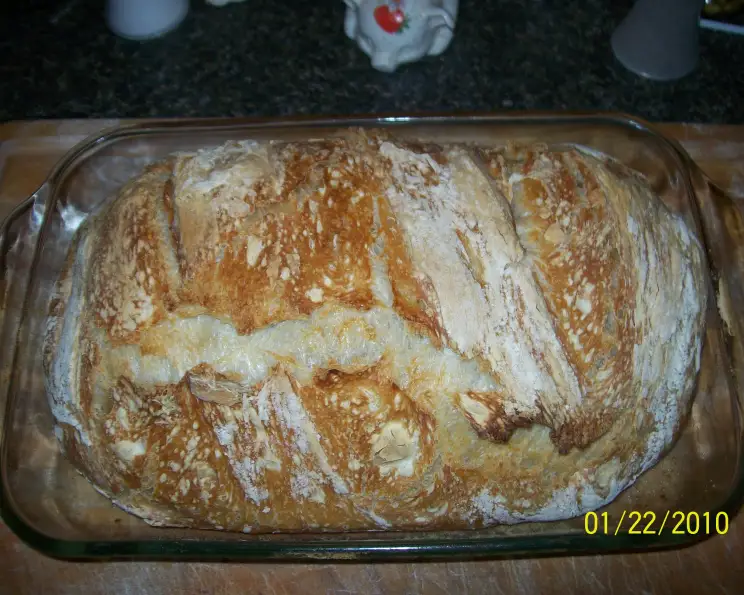
No-Knead Italian Rustic Bread (Recipe Has Been Corrected!)
The scent of baking bread has always been synonymous with home for me. I remember as a child, my Nonna Emilia would fill her tiny Brooklyn apartment with the most incredible aroma. It wasn’t some fancy bakery loaf; it was always a rustic, crusty bread, the kind you tear apart with your hands and dip in olive oil. I can still picture her flour-dusted hands expertly shaping the dough, and the contented sighs of family gathered around her table, sharing stories and laughter as we devoured the freshly baked bread. This no-knead recipe brings back those cherished memories, and allows me to recreate that simple, comforting magic in my own kitchen.
Recipe Overview
- Prep Time: 15 minutes
- Cook Time: 45 minutes
- Total Time: 18 hours 45 minutes (includes rising time)
- Servings: Varies depending on slice thickness
- Yield: 1 loaf
- Dietary Type: Vegetarian
Ingredients
- 3 cups all-purpose flour, preferably Robin Hood Nutri Flour Blend
- 1 1/4 teaspoons salt
- 1/4 teaspoon sugar
- 1/4 teaspoon dried yeast granules
- 1 5/8 cups water (remember, 1/8 cup is equal to 2 tablespoons)
Equipment Needed
- Large mixing bowl (or KitchenAid mixer bowl)
- Dough hook attachment (optional)
- Wooden spoon or spatula
- Clean cotton towel
- Non-stick ‘Silpat’ mat (optional)
- Dutch oven or heavy pot with lid (cast-iron, steel, enamel, or ceramic)
Instructions
- If using a KitchenAid mixer, place the flour, salt, sugar, and yeast in the mixer bowl. Alternatively, use a large mixing bowl.
- Add the water to the dry ingredients.
- If using a KitchenAid, use the dough hook attachment and the “stir” setting to combine the dry and wet ingredients. Mix until all the flour is incorporated; this should take about a minute. If using a bowl, mix with a wooden spoon or spatula until the ingredients are just combined. Avoid overmixing.
- Cover the bowl with a towel and place it in a warm place to rest for 12 to 18 hours. During this time, the dough will double in size, bubble, and form long gluten strands.
- Lightly flour your hands and a clean work surface. Gently remove the dough from the bowl.
- Quickly form the dough into a ball. Be careful not to deflate the dough too much.
- Thoroughly flour a cotton towel. Place the dough on the floured towel.
- Cover the dough with another floured cotton towel (or a single towel if using a Silpat mat).
- Rest the dough a second time for 2 to 3 hours. It will rise again and double in size once more.
- A half an hour or so before the dough is ready, preheat your oven to 450 degrees Fahrenheit (232 degrees Celsius). Place your Dutch oven (or heavy pot with lid) inside the oven to preheat as well. Using a preheated pot is crucial for achieving a good crust. You may use cast-iron, steel, enamel, or ceramic.
- When the dough has fully risen for the second time and the pot is hot, carefully slide your hand under the towel and quickly invert the delicate dough into the hot pot. Be extremely cautious, as the pot will be very hot.
- Shake the pot gently to settle the dough.
- Place the lid on the pot and bake for 30 minutes.
- Remove the lid and bake for an additional 15 minutes, or until the crust is deeply golden brown.
- Carefully remove the bread from the pot and place it on a cooling rack.
- Let the bread cool completely before slicing and serving. This is important for allowing the crumb to set properly.
Expert Tips & Tricks
- Don’t overmix the dough. The beauty of no-knead bread is in the slow fermentation process, which develops flavor and gluten without excessive handling.
- The warmer the resting place, the faster the rise. However, avoid direct heat, which can dry out the dough.
- If your kitchen is cold, you can place the dough in a slightly warmed (but turned-off) oven to help it rise.
- Be generous with the flouring of the towel. This will prevent the dough from sticking, making it easier to transfer to the hot pot.
- Don’t be afraid of a dark crust! The dark crust is what gives this bread its characteristic flavor.
- If your bread is browning too quickly, lower the oven temperature by 25 degrees Fahrenheit for the last 10 minutes of baking.
- For a crispier crust, try placing the baked loaf directly on the oven rack for the last 5 minutes of baking after removing it from the pot.
- If you don’t have a Dutch oven, you can bake the bread on a baking sheet lined with parchment paper. However, you won’t achieve the same level of crustiness. You can simulate the steamy environment of a Dutch oven by placing a pan of hot water on the bottom rack of the oven.
- Using a Nutri Flour Blend will give the bread a unique flavor and texture, but regular all-purpose flour will also work.
Serving & Storage Suggestions
This rustic bread is best served fresh, still slightly warm from the oven. Tear it apart with your hands and serve with:
- High-quality olive oil and balsamic vinegar for dipping.
- A selection of cheeses and cured meats.
- Homemade soup or stew.
- Bruschetta toppings like chopped tomatoes, basil, and garlic.
Store leftover bread in a paper bag at room temperature for up to 2 days. For longer storage, wrap tightly in plastic wrap and freeze for up to 2 months. To reheat frozen bread, thaw completely and then bake in a preheated 350°F (175°C) oven for 10-15 minutes, or until warmed through.
Nutritional Information
Please note that these values are approximate and can vary based on specific ingredients and serving size.
| Nutrient | Amount per Serving | % Daily Value |
|---|---|---|
| Calories | 150 kcal | 8% |
| Total Fat | 1g | 1% |
| Saturated Fat | 0g | 0% |
| Cholesterol | 0mg | 0% |
| Sodium | 290mg | 12% |
| Total Carbohydrate | 31g | 10% |
| Dietary Fiber | 1g | 4% |
| Sugars | 1g | 2% |
| Protein | 4g | 8% |
Variations & Substitutions
- Whole Wheat Version: Substitute up to half of the all-purpose flour with whole wheat flour for a nuttier flavor and denser texture.
- Herb-Infused: Add 1-2 tablespoons of dried herbs like rosemary, thyme, or oregano to the flour mixture.
- Cheesy Bread: Sprinkle the top of the dough with grated Parmesan or Asiago cheese before baking for a savory twist.
- Garlic Bread: Brush the baked loaf with garlic-infused olive oil for a delicious appetizer.
- Seed-Crusted: Sprinkle the top of the dough with sesame seeds, poppy seeds, or sunflower seeds before baking for added flavor and texture.
- Spicy Kick: Add a pinch of red pepper flakes to the flour mixture for a subtle heat.
FAQs (Frequently Asked Questions)
Q: Why is my dough so sticky?
A: No-knead dough is naturally sticky due to the high hydration level. Make sure to flour your hands and work surface generously when handling the dough.
Q: Can I use active dry yeast instead of instant yeast?
A: Yes, but you will need to proof the active dry yeast in warm water for 5-10 minutes before adding it to the flour mixture.
Q: My bread is dense and not airy. What did I do wrong?
A: The most common cause is not allowing the dough to rise for long enough. Make sure to give it the full 12-18 hours for the first rise and 2-3 hours for the second rise.
Q: Can I bake this bread without a Dutch oven?
A: Yes, but the crust won’t be as crusty. Bake on a baking sheet lined with parchment paper and consider placing a pan of hot water on the bottom rack of the oven to create steam.
Q: How do I know when the bread is done?
A: The bread is done when the crust is deeply golden brown and the internal temperature reaches 200-210°F (93-99°C).
Final Thoughts
This no-knead Italian rustic bread is a testament to the idea that incredible food doesn’t have to be complicated. It’s a simple recipe that yields a loaf of bread with incredible depth of flavor and a satisfyingly crusty exterior. I encourage you to try this recipe and experience the joy of baking your own bread at home. Don’t hesitate to experiment with different variations and share your creations with loved ones. Pair it with a hearty bowl of minestrone soup and a glass of Chianti for a truly unforgettable Italian meal. Buon appetito!