
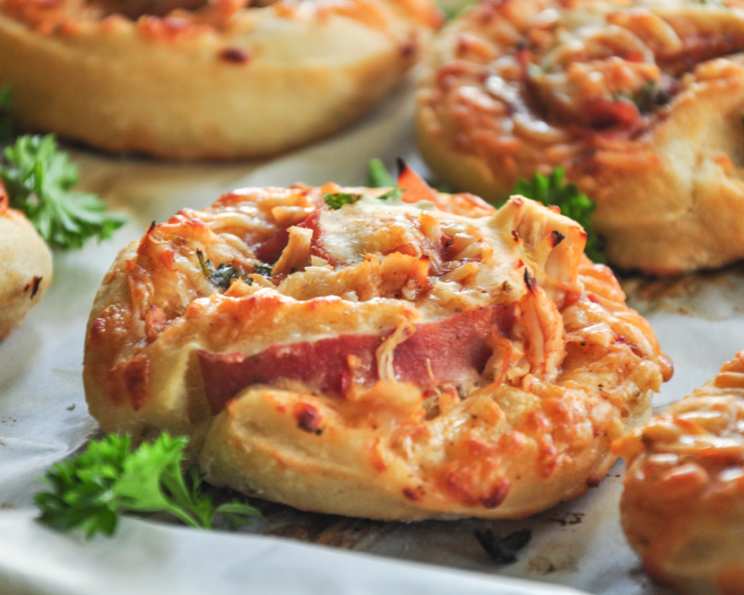
No-Knead Pizza Rolls: Pepperoni, Hawaiian, or BBQ Chicken
The aroma of baking pizza dough has always been a siren song to me, transporting me back to my childhood. My Nonna Maria, a culinary force of nature, would spend hours kneading dough for her famous family pizzas. While I cherish those memories, the reality is, sometimes life demands shortcuts. That’s where these incredibly easy, no-knead pizza rolls come in – they deliver that same comforting flavor with a fraction of the effort, and are perfect for a quick lunch or a crowd-pleasing appetizer.
Recipe Overview
- Prep Time: 20 minutes
- Cook Time: 18 minutes
- Total Time: 38 minutes
- Servings: 24 rolls
- Yield: 24 rolls
- Dietary Type: Varies by filling
Ingredients
- 1 lb refrigerated bread dough (No-Knead Flatbreads – Master Recipe (Pizza, Naan, Focaccia), grapefruit size piece)
Pepperoni Rolls
- 1/2 cup pizza sauce
- 1 1/2 cups mozzarella cheese, shredded
- 4 ounces pepperoni, sliced (to taste)
- 1/2 cup parmesan cheese, grated
BBQ Chicken Rolls
- 1/2 cup barbecue sauce
- 1 cup diced chicken breast, cooked
- 1 cup mozzarella cheese, shredded
- 1/2 cup Fontina cheese, shredded
- Pickled jalapeno pepper (to taste)
- 2 tablespoons cilantro, chopped (to taste)
Hawaiian Rolls
- 1/2 cup pizza sauce
- 1 (8 ounce) can pineapple tidbits, drained
- 1 1/2 cups mozzarella cheese, shredded
- 4 ounces deli ham, sliced
Equipment Needed
- 2 large baking sheet pans
- Parchment paper or Silpats
- Rolling pin
- Kitchen shears
Instructions
-
Use the refrigerated pre-mixed dough from the No-Knead Flatbreads Recipe #387518. This recipe creates a simple and delicious dough perfect for these rolls.
-
Prepare 2 large baking sheet pans by lining them with parchment paper or Silpats. Set them aside. This will prevent the rolls from sticking and make cleanup a breeze.
-
Preheat your oven to 400 degrees F (200 degrees C). Ensuring the oven is properly heated is crucial for even baking and perfectly golden rolls.
-
Remove the Olive Oil Flatbread dough (Recipe #387518) from the refrigerator. Lightly dust your work surface with flour. Cut off a 1 pound (grapefruit size) piece of dough.
-
With lightly floured hands, quickly shape the dough into a ball. Do this by stretching the surface of the dough around to the bottom on all four sides, rotating the ball a quarter turn as you go. This develops surface tension and creates a smooth ball, resulting in a better texture when rolled out.
-
On a lightly floured board, flatten the dough with your hands and a rolling pin into a 1/4 inch thick rectangle, dusting with minimal flour if necessary to keep the dough from sticking to the rolling pin. Aim for an even thickness for consistent baking. If you experience difficulty rolling out the dough, allow it to rest for a few minutes. I’ve found that gently pulling the dough with my hands also works well, especially if it’s a little elastic.
-
Now comes the fun part: adding the fillings! Choose your desired flavor combination and spread the sauce evenly over the dough. Then, add the cheese and top with the meat or other toppings, leaving some of the cheese exposed near one edge. The cheese will help hold the roll together as it bakes and create a lovely caramelized edge.
-
For Pepperoni Rolls: Spread 1/2 cup pizza sauce, then top with 1 1/2 cups shredded mozzarella cheese, 4 ounces sliced pepperoni (to taste), and 1/2 cup grated parmesan cheese.
-
For BBQ Chicken Rolls: Spread 1/2 cup barbecue sauce, then top with 1 cup diced cooked chicken breast, 1 cup shredded mozzarella cheese, 1/2 cup shredded Fontina cheese, pickled jalapeno pepper (to taste), and 2 tablespoons chopped cilantro (to taste).
-
For Hawaiian Rolls: Spread 1/2 cup pizza sauce, then top with 1 (8 ounce) can drained pineapple tidbits, 1 1/2 cups shredded mozzarella cheese, and 4 ounces sliced deli ham.
-
-
Starting with the long end, roll the dough into a log. Roll it tightly to ensure the filling stays secure and the rolls have a nice shape.
-
NOTE: Only cut the number of pieces you want to bake immediately. The remaining log can be wrapped tightly in plastic wrap and stored in the refrigerator for up to 5 days, or frozen for up to 2 weeks. This allows you to enjoy freshly baked pizza rolls whenever the craving strikes!
-
Using kitchen shears, cut the dough into 1/2 inch pieces. Kitchen shears are the perfect tool for this because they create clean cuts without squishing the dough.
-
Place the rolls on the prepared baking sheets, leaving plenty of space for them to expand when they bake. Overcrowding the pan will result in steamed rolls instead of nicely browned ones.
-
Bake for 15-18 minutes, or until golden brown and the cheese has melted and caramelized a bit. Keep a close eye on them during the last few minutes to prevent burning. The internal temperature should reach 190°F (88°C).
Expert Tips & Tricks
- For an extra crispy bottom, place a pizza stone in the oven while it preheats. This will provide intense direct heat.
- Brush the tops of the rolls with melted garlic butter before baking for an even richer flavor.
- If you don’t have kitchen shears, a sharp serrated knife can be used to cut the rolls, but be careful not to compress the dough too much.
- Don’t be afraid to experiment with different cheeses! Provolone, Monterey Jack, or even a sprinkle of feta can add unique flavors.
- For a spicier kick, add a pinch of red pepper flakes to the filling.
Serving & Storage Suggestions
Serve the pizza rolls warm, straight from the oven. They are delicious on their own as a snack or appetizer, or alongside a fresh salad for a light meal. A side of marinara sauce or ranch dressing is always a welcome addition for dipping.
Leftover pizza rolls can be stored in an airtight container in the refrigerator for up to 3 days. To reheat, bake in a preheated oven at 350°F (175°C) for about 5-10 minutes, or until heated through. You can also microwave them, but they may become a bit softer. For longer storage, freeze the baked rolls in a freezer-safe bag for up to 2 months. Reheat directly from frozen in the oven.
Nutritional Information
(Estimates will vary based on specific ingredients used)
| Nutrient | Amount per Serving | % Daily Value |
|---|---|---|
| Calories | 122.7 kcal | N/A |
| Calories from Fat | 72 g | 59% |
| Total Fat | 8.1 g | 12% |
| Saturated Fat | 4.1 g | 20% |
| Cholesterol | 27.1 mg | 9% |
| Sodium | 369.3 mg | 15% |
| Total Carbohydrate | 4.8 g | 1% |
| Dietary Fiber | 0.4 g | 1% |
| Sugars | 2.7 g | N/A |
| Protein | 7.6 g | 15% |
Variations & Substitutions
- Vegetarian: Substitute the meat fillings with roasted vegetables like bell peppers, mushrooms, onions, and zucchini.
- Vegan: Use a vegan-friendly bread dough and vegan cheese alternatives. Load up on the veggies!
- Gluten-Free: Use a gluten-free pizza dough recipe or store-bought option. Be sure to check the labels of all ingredients to ensure they are gluten-free.
- Spicy: Add a pinch of red pepper flakes or a drizzle of hot sauce to the filling.
- Mediterranean: Use feta cheese, sun-dried tomatoes, olives, and spinach for a Mediterranean-inspired filling.
FAQs (Frequently Asked Questions)
Q: Can I use a different type of dough?
A: Yes, you can use any type of pizza dough you prefer, but the no-knead dough is particularly convenient and easy to work with. Store-bought pizza dough is another great option.
Q: Can I make these ahead of time?
A: Absolutely! You can assemble the rolls and store them in the refrigerator for up to 24 hours before baking. Just be sure to cover them tightly to prevent them from drying out.
Q: What if my dough is too sticky?
A: Add a little more flour to your work surface and to your hands. Be careful not to add too much, as this can make the dough tough.
Q: Can I freeze these after baking?
A: Yes, you can freeze the baked rolls in a freezer-safe bag for up to 2 months. Reheat them in the oven for best results.
Q: My cheese is browning too quickly. What should I do?
A: Loosely tent a piece of aluminum foil over the rolls during the last few minutes of baking to prevent the cheese from burning.
Final Thoughts
These no-knead pizza rolls are a testament to the fact that delicious food doesn’t have to be complicated. They’re perfect for busy weeknights, impromptu gatherings, or simply satisfying a craving for warm, cheesy goodness. So, gather your ingredients, preheat your oven, and get ready to enjoy a batch of these irresistible treats. Don’t forget to share your creations and variations – I’d love to see what delicious combinations you come up with! Pair them with a crisp, cold beer or a glass of sparkling lemonade for the perfect casual meal.