
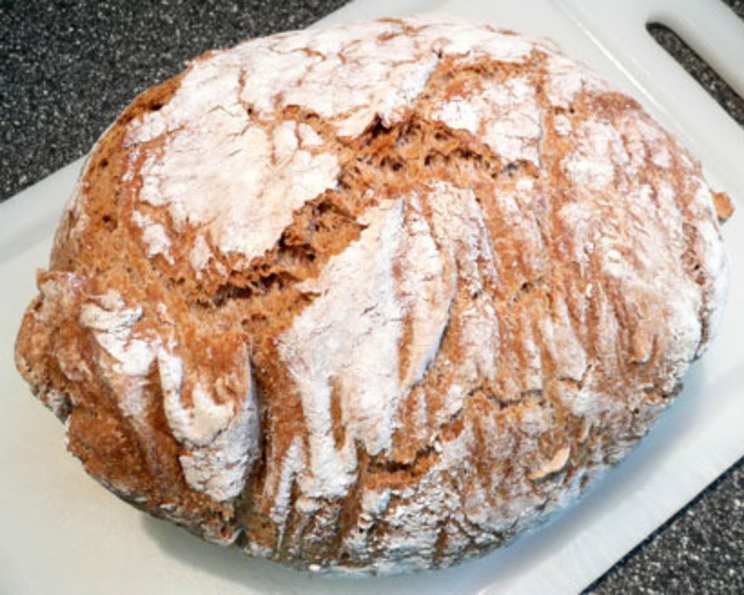
The Soulful Simplicity of No-Knead Whole Wheat Bread
My grandmother, a woman of few words but boundless love, had a knack for making the ordinary extraordinary. One of my fondest memories is the aroma of freshly baked bread wafting through her small cottage. It wasn’t some fancy sourdough; it was a simple, rustic whole wheat loaf. The crust, slightly rough and deeply browned, gave way to a soft, chewy interior. It was the taste of home, of comfort, and of unhurried time – a feeling I try to recreate with every loaf I bake. This no-knead recipe captures that essence, making delicious, wholesome bread accessible to everyone.
Recipe Overview
- Prep Time: 5 minutes
- Cook Time: 45-60 minutes
- Total Time: 18-20 hours (includes resting time)
- Servings: 8
- Yield: 1 loaf
- Dietary Type: Vegetarian
Ingredients
- 4 cups whole wheat flour
- 2 1/4 cups water
- 1/2 teaspoon yeast
- 1/2 teaspoon salt
- 2 tablespoons brown sugar
Equipment Needed
- Large bowl
- Plastic wrap
- Work surface
- Cotton towel (not terry cloth)
- 6- to 8-quart heavy covered pot (cast iron, enamel, Pyrex or ceramic)
- Cooling rack
Instructions
-
In a large bowl, combine the whole wheat flour, yeast, and salt. Add the water and stir until just blended. The dough will be shaggy and sticky – don’t worry, that’s exactly what you want.
-
Cover the bowl tightly with plastic wrap. Let the dough rest at warm room temperature (around 70 degrees Fahrenheit) for at least 12 hours, but preferably about 18 hours. This long fermentation is the key to developing a rich flavor and airy texture.
-
You’ll know the dough is ready when its surface is dotted with bubbles. This indicates that the yeast has been working its magic.
-
Lightly flour a work surface and gently place the dough on it. Sprinkle the dough with a little more flour and fold it over on itself once or twice. This helps to build some structure without excessive kneading.
-
Cover the dough loosely with plastic wrap and let it rest for about 15 minutes. This allows the gluten to relax, making it easier to shape.
-
Using just enough flour to prevent the dough from sticking to the work surface or your fingers, gently and quickly shape the dough into a ball. Be careful not to overwork the dough; you want to maintain the air pockets that have formed during fermentation.
-
Generously coat a cotton towel (not terry cloth, as the terry cloth can stick to the dough) with flour, wheat bran, or cornmeal. This will prevent the dough from sticking during the final rise.
-
Place the dough seam side down on the prepared towel and dust with more flour, bran, or cornmeal.
-
Cover the dough with another cotton towel and let it rise for about 2 hours.
-
When it is ready, the dough will be more than double in size and will not readily spring back when poked gently with a finger. If it springs back immediately, it needs more time to rise.
-
At least a half-hour before the dough is ready for baking, preheat your oven to 450 degrees Fahrenheit (232 degrees Celsius). Place a 6- to 8-quart heavy covered pot (cast iron, enamel, Pyrex, or ceramic) in the oven as it preheats. This step is crucial; the hot pot creates a steam environment that helps the bread rise beautifully.
-
When the dough is ready, carefully remove the hot pot from the oven (use oven mitts!).
-
Slide your hand under the towel and turn the dough over into the pot, seam side up. Don’t worry if it looks like a bit of a mess; it will straighten out as it bakes.
-
Shake the pan once or twice if the dough is unevenly distributed.
-
Cover the pot with the lid and bake for 30 minutes.
-
Remove the lid and bake for another 15 to 30 minutes, or until the loaf is beautifully browned and the internal temperature reaches 200-210 degrees Fahrenheit (93-99 degrees Celsius). The baking time will depend on your oven and the type of pot you are using.
-
Carefully remove the bread from the pot and cool it completely on a rack before slicing and serving. This is important because slicing the bread while it’s still hot will result in a gummy texture.
Expert Tips & Tricks
- Patience is Key: Don’t rush the fermentation or rising times. These long, slow processes are essential for developing the bread’s flavor and texture.
- Temperature Matters: Keep the dough in a warm place (around 70 degrees Fahrenheit) during fermentation and rising. Colder temperatures will slow down the yeast activity.
- Don’t Overwork the Dough: When shaping the dough, be gentle and avoid excessive handling. This will help to preserve the air pockets that have formed during fermentation.
- Scoring the Dough: For a more artisan look, you can score the top of the dough with a sharp knife or lame before baking. This will also help to control the expansion of the bread. Make a single slash or a cross pattern, about 1/2 inch deep.
- Adjusting Hydration: If you find the dough too sticky to handle, you can add a little more flour, 1 tablespoon at a time. However, be careful not to add too much, as this will result in a dry loaf.
- Dealing with a Too-Dark Crust: If your crust is browning too quickly, you can tent the loaf with foil during the last 15 minutes of baking.
Serving & Storage Suggestions
This no-knead whole wheat bread is delicious served warm with butter, jam, or honey. It also makes excellent toast, sandwiches, and croutons.
Store leftover bread in an airtight container at room temperature for up to 3 days. For longer storage, you can freeze the bread for up to 2 months. To freeze, slice the bread and wrap it tightly in plastic wrap and then in foil. Thaw at room temperature before serving. You can also revive slightly stale bread by sprinkling it with water and reheating it in the oven for a few minutes.
Nutritional Information
| Nutrient | Amount per Serving | % Daily Value |
|---|---|---|
| Calories | 218 kcal | – |
| Calories from Fat | 13 kcal | – |
| Total Fat | 1.5 g | 2% |
| Saturated Fat | 0.3 g | 1% |
| Cholesterol | 0 mg | 0% |
| Sodium | 149.6 mg | 6% |
| Total Carbohydrate | 46.7 g | 15% |
| Dietary Fiber | 6.5 g | 25% |
| Sugars | 3.6 g | – |
| Protein | 8 g | 16% |
Variations & Substitutions
- Add Seeds and Nuts: For added flavor and texture, try adding 1/2 cup of seeds (such as sunflower, pumpkin, or flax) or nuts (such as walnuts or pecans) to the dough.
- Herb Infusion: Mix in 1-2 tablespoons of dried herbs like rosemary, thyme, or oregano for a savory twist.
- Sweeten it Up: Instead of brown sugar, use honey or maple syrup for a subtle sweetness. You can also add a handful of raisins or dried cranberries.
- Spelt Flour: Substitute up to half of the whole wheat flour with spelt flour for a slightly nutty flavor.
- Sourdough Variation: To give this bread a tangy sourdough flavor, you can add 1/4 cup of active sourdough starter to the dough along with the yeast. You may need to adjust the amount of water depending on the consistency of your starter.
FAQs (Frequently Asked Questions)
Q: Why is my dough so sticky?
A: Whole wheat flour tends to absorb more water than white flour, resulting in a stickier dough. As long as it doubles in size during the rising period, it should be fine. Use a well-floured surface when shaping.
Q: Can I use instant yeast instead of active dry yeast?
A: Yes, you can use instant yeast. You don’t need to proof it first; just add it directly to the flour.
Q: My bread is dense and doesn’t rise properly. What went wrong?
A: Several factors can contribute to a dense loaf, including using expired yeast, not allowing enough time for fermentation and rising, or using too much flour.
Q: Can I bake this bread in a Dutch oven instead of a regular pot?
A: Yes, a Dutch oven works perfectly for this recipe. It provides excellent heat retention and helps to create a crisp crust.
Q: How do I know when the bread is done?
A: The bread is done when it is deeply browned and the internal temperature reaches 200-210 degrees Fahrenheit (93-99 degrees Celsius) when measured with a digital thermometer. It should also sound hollow when tapped on the bottom.
Final Thoughts
This no-knead whole wheat bread is a testament to the fact that simple ingredients and a little patience can yield truly exceptional results. It’s a loaf that fills your kitchen with warmth, your home with a comforting aroma, and your heart with the satisfaction of baking something truly wholesome. I encourage you to give this recipe a try, experiment with variations, and share your own baking experiences. Pair a slice with a hearty soup on a cold day, or simply enjoy it with a smear of butter and a cup of coffee – either way, you’re in for a treat. Happy baking!