
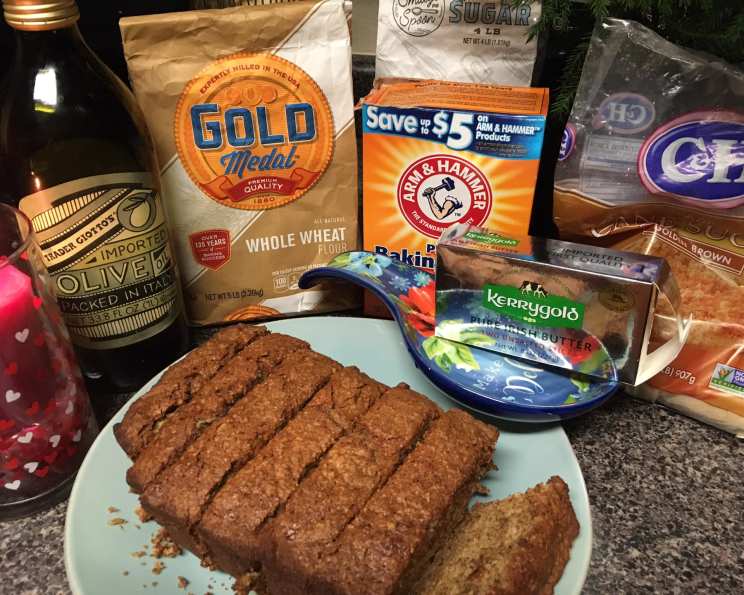
No-Nut Banana Bread: A Deliciously Simple Classic
My grandmother, bless her heart, was famous for two things: her infectious laugh and her even more infectious banana bread. I can still picture her in her floral apron, humming a tune as she mashed bananas with a fork, the sweet aroma filling her cozy kitchen. While her recipe always included walnuts, a staple in her pantry, I’ve adapted it over the years to create a version that’s just as comforting and delicious, but perfectly safe for those with nut allergies or aversions. This no-nut banana bread captures all the warm, nostalgic flavors of my grandmother’s original, without any of the worry.
Recipe Overview
- Prep Time: 10 minutes
- Cook Time: 60 minutes
- Total Time: 70 minutes
- Servings: 10-12
- Yield: 1 loaf
- Dietary Type: Nut-Free
Ingredients
- 3-4 bananas, smashed (the riper, the better!)
- 1/3 cup butter (5 1/3 tablespoons), softened
- 1 cup sugar
- 1 egg
- 1 teaspoon vanilla extract
- 1 teaspoon baking soda
- 1 pinch salt
- 1 1/2 cups all-purpose flour
Equipment Needed
- Mixing bowls (at least two)
- Measuring cups and spoons
- Fork or potato masher
- Whisk or electric mixer
- Spatula
- Greased 9×5 inch loaf pan
- Oven
Instructions
- Begin by preheating your oven to 350 degrees Fahrenheit (175 degrees Celsius). This ensures even baking and a perfectly golden crust.
- In a medium-sized bowl, thoroughly smash the bananas using a fork or potato masher. The bananas should be very ripe, with plenty of brown spots. Overripe bananas are sweeter and contribute to a moist, flavorful bread.
- In a separate, larger bowl, cream together the softened butter and sugar until light and fluffy. This is best achieved with an electric mixer, but a whisk and some elbow grease will also do the trick. Creaming the butter and sugar incorporates air into the batter, resulting in a lighter, more tender crumb.
- Beat in the egg and vanilla extract until well combined. Ensure the egg is fully incorporated to avoid any eggy taste in the final product.
- Add the smashed bananas to the butter and sugar mixture and stir until just combined. Be careful not to overmix at this stage.
- In a separate, clean bowl, whisk together the flour, baking soda, and salt. This ensures that the baking soda and salt are evenly distributed throughout the flour, which is crucial for proper leavening and flavor.
- Gradually add the dry ingredients (flour mixture) to the wet ingredients (banana mixture), mixing until just combined. Avoid overmixing, as this can develop the gluten in the flour and result in a tough bread. It’s okay if there are a few streaks of flour remaining; they will disappear during baking.
- Pour the batter into a greased 9×5 inch loaf pan. A well-greased pan is essential for preventing the bread from sticking. You can also line the pan with parchment paper for extra insurance.
- Bake for 1 hour, or until a toothpick inserted into the center comes out clean. Baking times may vary depending on your oven, so it’s best to start checking for doneness around 50 minutes. If the top of the bread starts to brown too quickly, you can loosely tent it with aluminum foil to prevent burning.
- Once baked, remove the loaf pan from the oven and let the bread cool in the pan for about 10 minutes before inverting it onto a wire rack to cool completely. Cooling the bread on a wire rack prevents it from becoming soggy.
Expert Tips & Tricks
- Use ripe bananas: The riper the bananas, the sweeter and more flavorful the bread will be. If you have bananas that are overly ripe (almost black), they’re perfect for banana bread!
- Don’t overmix: Overmixing the batter develops the gluten in the flour, resulting in a tough bread. Mix until just combined.
- Melted Butter Alternative: For a slightly denser, chewier texture, try using melted and cooled butter instead of softened butter.
- Baking Soda Activation: To ensure your baking soda is still active, mix a teaspoon of it with a tablespoon of vinegar. If it fizzes, it’s good to go!
- Preventing a Soggy Bottom: Place a baking sheet on the rack below the loaf pan. This helps to deflect heat and prevent the bottom of the bread from becoming soggy.
Serving & Storage Suggestions
This no-nut banana bread is delicious served warm or at room temperature. Enjoy a slice on its own with a pat of butter, or pair it with a dollop of whipped cream or a scoop of vanilla ice cream for a more decadent treat. It’s also fantastic toasted for breakfast.
To store, wrap the cooled bread tightly in plastic wrap or store it in an airtight container at room temperature for up to 3 days. For longer storage, you can refrigerate it for up to a week or freeze it for up to 3 months. To freeze, slice the bread first for easier portioning, and wrap each slice individually in plastic wrap before placing them in a freezer-safe bag or container. Reheat frozen slices in the microwave or toaster.
Nutritional Information
| Nutrient | Amount per Serving | % Daily Value |
|---|---|---|
| Calories | 215 kcal | 11% |
| Total Fat | 7g | 9% |
| Saturated Fat | 4g | 20% |
| Cholesterol | 22mg | 7% |
| Sodium | 140mg | 6% |
| Total Carbohydrate | 36g | 13% |
| Dietary Fiber | 1g | 4% |
| Sugars | 20g | – |
| Protein | 3g | 6% |
Note: Nutritional information is an estimate and may vary based on specific ingredients and portion sizes.
Variations & Substitutions
- Chocolate Chip Banana Bread: Add 1 cup of chocolate chips to the batter for a chocolatey twist.
- Spice it up: Add 1/2 teaspoon of ground cinnamon, nutmeg, or allspice to the dry ingredients for a warmer, more aromatic flavor.
- Dairy-Free: Substitute the butter with a dairy-free butter alternative or coconut oil.
- Gluten-Free: Use a gluten-free all-purpose flour blend. You may need to add a binding agent like xanthan gum.
- Vegan: Replace the egg with a flax egg (1 tablespoon ground flaxseed mixed with 3 tablespoons water, let sit for 5 minutes to thicken). Use a dairy-free butter substitute.
- Add Fruit: Incorporate blueberries, cranberries, or chopped dried fruit into the batter.
- Maple Syrup: Substitute up to half of the sugar with maple syrup for a richer flavor.
- Streusel Topping: Create a simple streusel topping with flour, sugar, butter, and cinnamon for added sweetness and texture.
FAQs (Frequently Asked Questions)
Q: Can I use frozen bananas?
A: Yes! Just thaw them completely and drain off any excess liquid before mashing.
Q: My banana bread is sinking in the middle. What did I do wrong?
A: This can happen if the oven temperature is too low, the batter is overmixed, or the bread is underbaked. Make sure your oven is properly preheated, avoid overmixing, and bake until a toothpick inserted into the center comes out clean.
Q: How do I prevent the top of the banana bread from burning?
A: If the top starts to brown too quickly, loosely tent it with aluminum foil during the last 15-20 minutes of baking.
Q: Can I make this recipe in a muffin tin?
A: Yes! Reduce the baking time to about 18-22 minutes, or until a toothpick inserted into the center comes out clean.
Q: Can I add nuts even though the recipe is called “No-Nut Banana Bread?”
A: While this recipe is designed to be nut-free, you can certainly add nuts if you don’t have any allergies or aversions. Walnuts or pecans would be a classic addition.
Final Thoughts
This no-nut banana bread is more than just a recipe; it’s a taste of home, a warm embrace on a chilly day, and a reminder that simple ingredients can create something truly special. I encourage you to give it a try and experience the joy of baking (and devouring!) this classic treat. Feel free to experiment with variations to make it your own, and don’t hesitate to share your creations and feedback. Pair it with a cup of coffee or tea, and enjoy!