
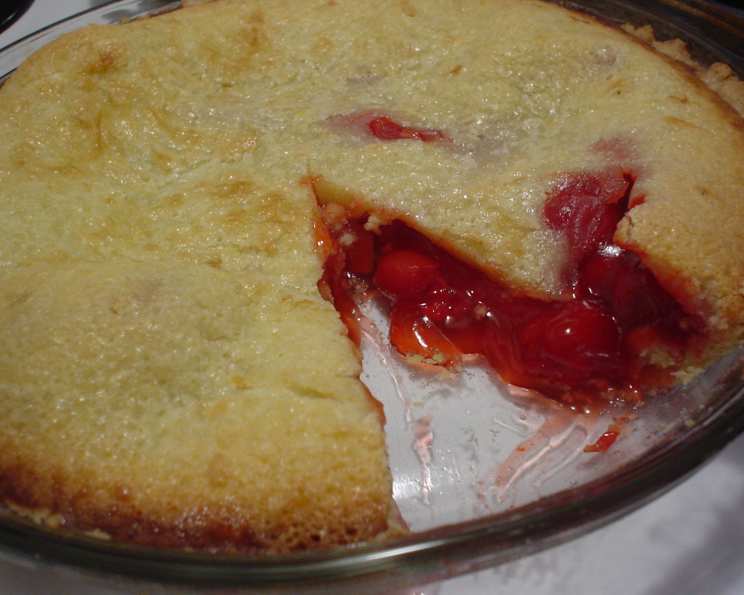
No-Roll Cherry Pie: The Easiest Dessert You’ll Ever Make
My grandmother, bless her heart, was a pie-making machine. But her pies, while delicious, were a multi-day affair involving chilling dough, elaborate lattice tops, and a level of precision I could never quite master. This no-roll cherry pie, however, brings back the comforting taste of grandma’s kitchen without the fuss. It’s a recipe that whispers of simpler times, perfect for those moments when you crave homemade goodness without spending hours in the kitchen. It’s quick, it’s easy, and it always satisfies.
Recipe Overview
- Prep Time: 15 minutes
- Cook Time: 45-50 minutes
- Total Time: 1 hour 5 minutes
- Servings: 8
- Yield: 1 pie
- Dietary Type: Can be adapted to gluten-free
Ingredients
For the Crust:
- ½ cup (1 stick) butter, melted
- 1 cup flour (all-purpose)
- 1 tablespoon sugar
For the Filling:
- 1 (21 ounce) can cherry pie filling
For the Topping:
- ½ cup sugar
- 1 egg
- ¼ cup milk
- ¼ cup flour
Equipment Needed
- 9-inch pie plate
- Mixing bowls
- Whisk or fork
- Measuring cups and spoons
Instructions
-
Preheat your oven to 350 degrees Fahrenheit (175 degrees Celsius). This is crucial for even baking and preventing a soggy crust.
-
Prepare the Crust: In a mixing bowl, combine the melted butter, flour, and 1 tablespoon of sugar. Mix until just combined; do not overmix. The mixture will be slightly crumbly.
-
Press the crust mixture evenly into the bottom of a 9-inch pie plate. You can use the back of a spoon or your fingers to ensure it’s uniformly distributed. The key here is to create a solid, even base for the filling.
-
Pour the entire can of cherry pie filling over the prepared crust. Distribute the cherries evenly across the base.
-
Make the Topping: In a separate mixing bowl, combine the remaining ½ cup of sugar, the egg, milk, and ¼ cup of flour. Whisk well until the topping is smooth and lump-free. This topping creates a delightful, slightly crunchy contrast to the soft cherry filling.
-
Pour the topping mixture evenly over the cherry pie filling. Make sure to cover the entire surface.
-
Bake in the preheated oven for 45 to 50 minutes, or until the topping is golden brown and the filling is bubbling around the edges. To check for doneness, gently shake the pie. If the filling jiggles only slightly in the center, it’s ready.
-
Cool completely on a wire rack before serving. This allows the filling to set properly and prevents the pie from being too runny.
Expert Tips & Tricks
- Preventing a Soggy Crust: While this recipe is designed to minimize a soggy crust, you can blind-bake the crust for 10 minutes before adding the filling for extra insurance. Just prick the crust with a fork a few times before baking.
- Topping Perfection: For a richer topping, try using melted butter instead of milk. A touch of almond extract in the topping can also elevate the flavor.
- Fruit Filling Alternatives: While cherry is classic, don’t be afraid to experiment! This recipe works beautifully with blueberry, apple, or even peach pie filling.
- If the topping is browning too quickly, loosely tent the pie with aluminum foil during the last 15-20 minutes of baking.
- A sprinkle of coarse sugar over the topping before baking adds a delightful sparkle and extra crunch.
Serving & Storage Suggestions
This No-Roll Cherry Pie is best served slightly warm or at room temperature. A scoop of vanilla ice cream or a dollop of whipped cream complements the tartness of the cherries beautifully.
- Storage: Store any leftover pie in the refrigerator, covered, for up to 3 days.
- Reheating: Reheat individual slices in the microwave for 20-30 seconds, or in a preheated oven at 300°F (150°C) for about 10 minutes.
- Freezing: You can freeze the baked pie for up to 2 months. Wrap it tightly in plastic wrap and then in aluminum foil. Thaw overnight in the refrigerator before serving.
Nutritional Information
| Nutrient | Amount per Serving | % Daily Value |
|---|---|---|
| Calories | 327 kcal | N/A |
| Total Fat | 12.7 g | 19% |
| Saturated Fat | 7.7 g | 38% |
| Cholesterol | 58 mg | 19% |
| Sodium | 108 mg | 4% |
| Total Carbohydrate | 50.2 g | 16% |
| Dietary Fiber | 1 g | 3% |
| Sugars | 14.2 g | 56% |
| Protein | 3.5 g | 6% |
Note: Nutritional information is an estimate and may vary based on specific ingredients and preparation methods.
Variations & Substitutions
- Gluten-Free: Substitute the all-purpose flour in the crust and topping with a gluten-free blend. Bob’s Red Mill Gluten Free 1-to-1 Baking Flour works well.
- Dairy-Free: Use a dairy-free milk alternative like almond milk or soy milk in the topping. You can also use a dairy-free butter substitute in the crust.
- Spice It Up: Add a pinch of cinnamon or nutmeg to the topping for a warmer, more complex flavor.
- Citrus Zest: Grated lemon or orange zest added to the topping can brighten the flavor of the pie.
- Different Fruits: Experiment with other canned pie fillings like apple, blueberry, or peach. You can also use a combination of fruits for a unique flavor profile. If using fresh fruit, be sure to cook it down with some sugar and cornstarch to thicken the juices before adding it to the crust.
FAQs (Frequently Asked Questions)
Q: Can I use fresh cherries instead of canned pie filling?
A: Yes, you can! Pit and halve about 4 cups of fresh cherries. Cook them in a saucepan with ½ cup of sugar and 2 tablespoons of cornstarch until thickened before adding to the crust.
Q: My crust is browning too quickly. What should I do?
A: Loosely tent the pie with aluminum foil during the last 15-20 minutes of baking. This will protect the crust from burning while allowing the filling to continue cooking.
Q: Can I make this pie ahead of time?
A: Absolutely! This pie can be made a day or two in advance and stored in the refrigerator.
Q: The filling seems a little runny. What did I do wrong?
A: Make sure the pie is completely cooled before serving. If it’s still runny, you may have slightly underbaked it. Next time, bake for a few extra minutes, keeping an eye on the crust.
Q: Can I add nuts to the topping?
A: Yes, adding chopped nuts like pecans or walnuts to the topping provides a delightful crunch and flavor.
Final Thoughts
This No-Roll Cherry Pie is more than just a recipe; it’s an invitation to slow down, savor simple pleasures, and create lasting memories. Don’t be afraid to experiment with different fillings and toppings to make it your own. Whether you’re a seasoned baker or a kitchen novice, this pie is guaranteed to be a crowd-pleaser. So go ahead, bake a pie, share it with loved ones, and enjoy the sweet taste of homemade happiness. I’d love to hear how yours turns out!