
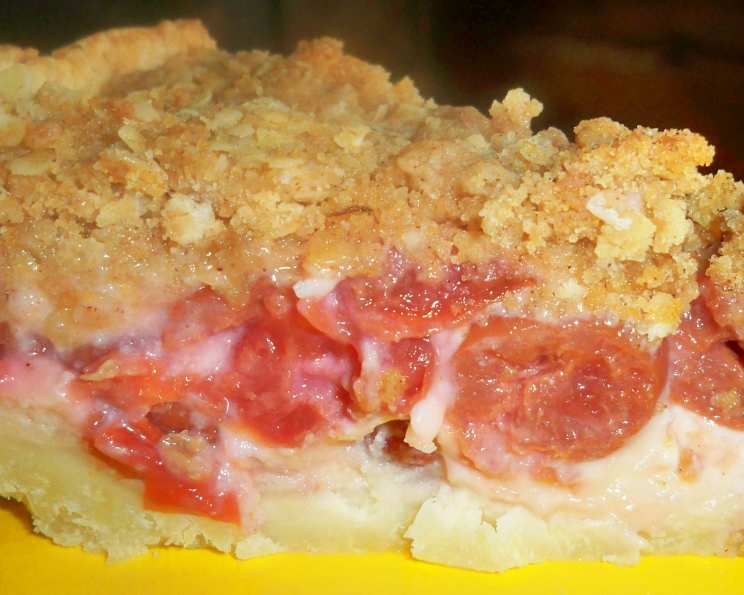
The Foolproof No-Roll Cream Cheese Pie Crust: A Baker’s Secret Weapon
My grandmother, bless her heart, was a pie-baking dynamo. Every Thanksgiving, her kitchen transformed into a fragrant symphony of cinnamon, nutmeg, and simmering fruit. I remember being tasked, at far too young an age, with helping roll out the dough. It was always a stressful endeavor; sticky dough, uneven thickness, and the constant fear of tearing it were all part of the experience. If only I had known about this no-roll cream cheese crust back then! It would have saved us both a lot of flour-dusted frustration. This recipe delivers the same tender, flaky texture as a traditional crust, but without the fuss.
Recipe Overview
- Prep Time: 15 minutes
- Cook Time: 10 minutes (pre-bake) + varies with filling
- Total Time: 25 minutes + filling bake time
- Servings: 8
- Yield: 1 pie crust (9-inch)
- Dietary Type: Not Gluten-Free
Ingredients
- ½ cup cream cheese, softened
- ½ cup butter, softened
- 1 ½ cups all-purpose flour
- ¼ cup sugar
- ½ teaspoon salt
Equipment Needed
- 9-inch pie plate
- Mixing bowl
- Fork
Instructions
-
Begin by ensuring your cream cheese and butter are properly softened. This is crucial for a smooth and even dough. You can let them sit at room temperature for about 30 minutes to an hour, or use a microwave on a low setting for very short bursts, being careful not to melt them.
-
In a mixing bowl, thoroughly mix together the softened cream cheese and butter. You can use an electric mixer for this, but a sturdy spoon and some elbow grease work just as well. The goal is to create a homogenous, creamy mixture.
-
In a separate bowl, combine the flour, sugar, and salt. Whisk these dry ingredients together to ensure they are evenly distributed.
-
Gradually incorporate the dry ingredients into the wet ingredients. Add the flour mixture a little at a time to the cream cheese and butter mixture, mixing until just combined. Be careful not to overmix the dough, as this can result in a tough crust. The dough will be slightly sticky, and that’s perfectly normal.
-
Press the dough evenly into a 9-inch pie plate. Start by pressing the dough onto the bottom of the plate, then work your way up the sides. You can use your fingers or the back of a spoon to create a smooth and even surface. If the dough is too sticky, lightly flour your fingers or the spoon.
-
Once the crust is evenly distributed, prick it all over with a fork. This prevents the crust from puffing up too much during baking.
-
Bake the crust for approximately 10 minutes at 350 degrees Fahrenheit (175 degrees Celsius). This is a pre-bake, which means the crust will only be partially baked. The goal is to set the crust and prevent it from becoming soggy once the filling is added.
-
Remove the crust from the oven and let it cool slightly.
-
Add your pie filling of choice. This crust works beautifully with both sweet and savory fillings. Apple, pumpkin, blueberry, or even a creamy quiche filling would all be delicious choices.
-
Bake the pie as directed in your filling recipe. Baking times will vary depending on the filling, so follow the specific instructions for your chosen pie.
Expert Tips & Tricks
- Soften, Don’t Melt: Make absolutely sure that the cream cheese and butter are softened, but not melted. Melting them will change the fat structure and affect the final texture of the crust, making it tough instead of tender.
- Chilling is Optional (But Recommended): While this is a “no-roll” crust, chilling the dough for 30 minutes before pressing it into the pie plate can make it even easier to work with, especially in warmer kitchens.
- Blind Baking for Extra Crispness: If you’re using a particularly wet filling, consider blind baking the crust completely before adding the filling. To do this, line the crust with parchment paper and fill it with pie weights or dried beans. Bake for the initial 10 minutes, then remove the weights and parchment and bake for another 5-10 minutes until golden brown.
- Preventing a Soggy Bottom: To further combat a soggy bottom crust, brush the pre-baked crust with a lightly beaten egg white before adding the filling. This creates a barrier that helps prevent the filling from seeping into the crust.
- Crust Shielding: If the edges of your crust are browning too quickly during the final bake, use a pie crust shield or strips of aluminum foil to protect them.
Serving & Storage Suggestions
This pie crust is best served as part of a complete pie, with your favorite filling. Allow the pie to cool completely before slicing and serving.
- Room Temperature: Pies containing dairy or eggs (like custard pies) should not be left at room temperature for more than two hours. Fruit pies are generally safe for a longer period, but it’s always best to err on the side of caution.
- Refrigeration: Leftover pie should be stored in the refrigerator, covered, for up to 3-4 days.
- Freezing: For longer storage, you can freeze the baked pie. Wrap it tightly in plastic wrap and then in foil, or place it in a freezer-safe container. Frozen pie can be stored for up to 2-3 months. Thaw it in the refrigerator overnight before serving.
- Reheating: To reheat leftover pie, warm it in a preheated oven at 350 degrees Fahrenheit (175 degrees Celsius) for about 10-15 minutes, or until heated through. You can also microwave individual slices for a quicker reheat, but the crust may not be as crisp.
Nutritional Information
Note: Nutritional information will vary depending on the specific ingredients used and the size of the slices.
| Nutrient | Amount per Serving | % Daily Value |
|---|---|---|
| Calories | 280 kcal | 14% |
| Total Fat | 18g | 28% |
| Saturated Fat | 12g | 60% |
| Cholesterol | 50mg | 17% |
| Sodium | 200mg | 9% |
| Total Carbohydrate | 25g | 8% |
| Dietary Fiber | 1g | 4% |
| Sugars | 8g | N/A |
| Protein | 3g | 6% |
Variations & Substitutions
- Gluten-Free Crust: Substitute the all-purpose flour with a gluten-free blend specifically designed for baking. You may need to add a binder like xanthan gum to help hold the crust together.
- Whole Wheat Crust: Replace half of the all-purpose flour with whole wheat flour for a nuttier flavor and increased fiber content.
- Vegan Crust: Use vegan cream cheese and butter substitutes to create a dairy-free version of this crust.
- Herbaceous Crust: Add a teaspoon of dried herbs like rosemary or thyme to the flour mixture for a savory crust that pairs well with quiches or vegetable pies.
- Citrus Zest: Incorporate the zest of a lemon or orange into the dough for a bright and refreshing flavor.
FAQs (Frequently Asked Questions)
Q: Why is my crust tough?
A: Overmixing the dough is the most common cause of a tough crust. Mix the ingredients until just combined, and avoid kneading.
Q: Can I use a food processor to make this crust?
A: Yes, you can use a food processor. Pulse the ingredients until the dough comes together, but be careful not to overprocess.
Q: Can I freeze the unbaked crust?
A: Yes, you can freeze the unbaked crust. Press the dough into the pie plate, wrap it tightly in plastic wrap, and freeze for up to 2 months. Thaw it in the refrigerator overnight before baking.
Q: What if my crust shrinks during baking?
A: This can happen if the dough is overworked or if the oven temperature is too high. Make sure to avoid overmixing and bake at the recommended temperature.
Q: Can I use this crust for a no-bake pie?
A: Yes, you can, but you’ll need to fully bake the crust first. Follow the blind baking instructions mentioned in the “Expert Tips & Tricks” section.
Final Thoughts
This no-roll cream cheese pie crust is a game-changer for any baker, regardless of skill level. It’s a fantastic way to achieve a delicious, flaky crust without the hassle of traditional methods. Whether you’re making a classic apple pie for the holidays or a simple quiche for a weeknight dinner, this crust will deliver perfect results every time. Give it a try, and let me know what you think! Don’t hesitate to experiment with different fillings and variations to create your own signature pie. Happy baking!