
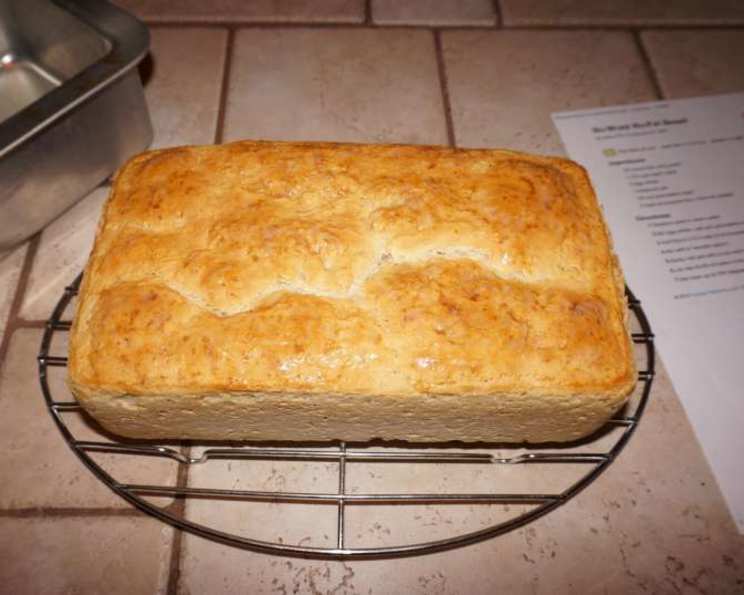
No-Work No-Fat Bread: A Simple Loaf for Every Kitchen
The aroma of freshly baked bread has always been my culinary comfort. I vividly remember my grandmother, her hands dusted with flour, effortlessly kneading dough on a wooden board. While I cherished those moments, my busy modern life doesn’t always allow for such elaborate bread-making. That’s why this no-work, no-fat bread has become a staple in my kitchen—it’s a delicious, simple way to enjoy homemade bread without the fuss.
Recipe Overview
- Prep Time: 15 minutes
- Rise Time: 40-60 minutes
- Cook Time: 35 minutes
- Total Time: 1 hour 30 minutes to 1 hour 50 minutes
- Yields: 1 loaf
- Servings: 14
- Dietary Type: Low-Fat
Ingredients
- 1/4 ounce fast rising yeast
- 1 1/3 cups warm water
- 2 egg whites
- 1 teaspoon salt
- 1/4 cup granulated sugar
- 3 cups all-purpose flour, plus more as needed
Equipment Needed
- Loaf pan
- Non-stick cooking spray
- Wooden spoon
- Oven
Instructions
-
Begin by dissolving the fast rising yeast in the warm water. It’s crucial that the water is warm, not hot, to properly activate the yeast without killing it. Let this mixture stand for a few minutes until it becomes frothy. This step ensures that the yeast is alive and ready to leaven the bread.
-
In a separate bowl, mix together the egg whites, salt, and granulated sugar. The egg whites add structure to the bread while keeping it fat-free, and the sugar provides a little sweetness and food for the yeast.
-
Add the wet ingredients (the yeast mixture and the egg white mixture) to 3 cups of the all-purpose flour.
-
Mix all the ingredients together with a wooden spoon. The dough will be sticky at this stage. Gradually add more flour, if needed, until the dough comes together into a manageable ball. Be careful not to add too much flour, as this can result in a dry, dense loaf. The goal is to achieve a dough that is slightly tacky but not overly sticky.
-
Spray a loaf pan generously with non-stick cooking spray. This will prevent the bread from sticking to the pan during baking and make it easier to remove after it’s done.
-
Fill the prepared loaf pan with the dough.
-
Let the dough rise for 40-60 minutes in the oven at its lowest setting until the dough is almost to the top of the pan. For optimal rising, make sure your oven is not too hot; simply having the oven light on might be enough to create a warm environment. The ideal temperature for proofing bread is around 80-90°F (27-32°C).
-
Once the dough has risen adequately, set the oven to 350 degrees Fahrenheit (175 degrees Celsius).
-
Bake the bread for 35 minutes, or until golden brown and the internal temperature reaches 200-210°F (93-99°C). If the top of the bread starts to brown too quickly, you can loosely cover it with aluminum foil during the last 10-15 minutes of baking.
-
Once baking is complete, remove the loaf from the oven and let it cool in the pan for a few minutes before transferring it to a wire rack to cool completely. This prevents the bottom from becoming soggy.
Expert Tips & Tricks
-
Yeast Activation: Ensure your yeast is active by checking the expiration date and testing it in warm water with a pinch of sugar before starting the recipe. If it doesn’t foam after a few minutes, the yeast is likely dead and you’ll need to use fresh yeast.
-
Dough Consistency: The dough should be slightly sticky but manageable. Avoid adding too much flour, as this can make the bread dry and dense.
-
Rising Time: The rising time can vary depending on the temperature and humidity of your kitchen. In a colder environment, it may take longer for the dough to rise.
-
Oven Temperature: Oven temperatures can vary, so it’s always a good idea to use an oven thermometer to ensure accurate baking.
-
Doneness Check: Tap the bottom of the loaf – it should sound hollow when done. If you have a thermometer, the internal temperature should reach 200-210°F.
Serving & Storage Suggestions
This no-work, no-fat bread is delicious served warm with a pat of butter (if you’re not strictly avoiding fat) or a drizzle of olive oil. It’s also great for making sandwiches or toast.
To store, wrap the bread tightly in plastic wrap or place it in an airtight container at room temperature. It will stay fresh for 2-3 days. Since there are no added preservatives, if there is any left after the first day, you should wrap and keep in the refrigerator. For longer storage, you can freeze the bread for up to 2 months. Thaw it at room temperature before serving. To refresh a slightly stale loaf, lightly sprinkle it with water and bake it in a preheated oven at 350°F for a few minutes.
Nutritional Information
Here’s an approximate nutritional breakdown per serving (based on 14 servings):
| Nutrient | Amount per Serving | % Daily Value |
|---|---|---|
| Calories | 115.3 kcal | N/A |
| Calories from Fat | N/A | 2% |
| Total Fat | 0.3 g | 0% |
| Saturated Fat | 0 g | 0% |
| Cholesterol | 0 mg | 0% |
| Sodium | 175.2 mg | 7% |
| Total Carbohydrate | 24.2 g | 8% |
| Dietary Fiber | 0.8 g | 3% |
| Sugars | 3.7 g | 14% |
| Protein | 3.5 g | 6% |
Note: Nutritional information is an estimate and may vary based on specific ingredients and serving sizes.
Variations & Substitutions
-
Whole Wheat Bread: Substitute up to half of the all-purpose flour with whole wheat flour for a nuttier flavor and added fiber.
-
Herbed Bread: Add 1-2 tablespoons of dried herbs such as rosemary, thyme, or oregano to the dough for a savory twist.
-
Sweet Bread: Add a handful of raisins, dried cranberries, or chocolate chips to the dough for a sweeter treat. You may also want to increase the sugar slightly.
-
Gluten-Free Bread: While this recipe is not naturally gluten-free, you can experiment with gluten-free flour blends. Be aware that the texture and rise may be different, and you may need to adjust the liquid content.
-
Dairy-Free: This recipe is naturally dairy-free.
FAQs (Frequently Asked Questions)
Q: Can I use active dry yeast instead of fast-rising yeast?
A: Yes, you can. However, you will need to proof the active dry yeast in warm water for a longer period (about 10-15 minutes) before adding it to the other ingredients.
Q: My bread is not rising properly. What could be the reason?
A: Several factors can affect the rise of the bread, including the freshness of the yeast, the temperature of the water, and the temperature of the room. Ensure that your yeast is active, the water is warm (not hot), and the dough is placed in a warm environment to rise.
Q: Can I make this bread in a bread machine?
A: Yes, you can adapt this recipe for a bread machine. Simply follow the manufacturer’s instructions for adding the ingredients and selecting the appropriate settings.
Q: My bread is browning too quickly on top. What should I do?
A: If the top of the bread starts to brown too quickly, you can loosely cover it with aluminum foil during the last 10-15 minutes of baking.
Q: How can I make the crust of the bread softer?
A: Brushing the top of the bread with melted butter or olive oil immediately after baking can help soften the crust. You can also tent the loaf with foil during the last part of baking.
Final Thoughts
This No-Work No-Fat Bread is a testament to the fact that delicious, homemade bread doesn’t have to be complicated or laden with fat. It’s a simple, satisfying recipe that’s perfect for busy weeknights or lazy weekends. I encourage you to try this recipe and experience the joy of fresh-baked bread in your own kitchen. Don’t be afraid to experiment with different variations and flavors to create your own signature loaf. And most importantly, enjoy the process! Happy baking!