
Mastering the Noble Roman’s Pizza Crust: A Culinary Journey Back in Time
The scent of baking pizza crust always transports me back to Mrs. Evans’ Home Economics class. It was more than just a class; it was a haven. The aroma of yeast proofing and flour dusting the air, the collaborative buzz of students learning together, the sheer joy of creating something delicious from scratch – it was a recipe for happiness. Little did I know that the pizza dough recipe Mrs. Evans shared would become a cherished staple in my kitchen for decades to come. This Noble Roman’s-inspired crust recipe is my homage to those formative years, a simple yet satisfying foundation for countless family meals and culinary experiments.
Recipe Overview
- Prep Time: 20 minutes
- Cook Time: 25 minutes
- Total Time: 45 minutes
- Servings: 6
- Yield: 1 pizza
- Dietary Type: Vegetarian
Ingredients
- 1 teaspoon dry yeast
- 1/8 teaspoon dry yeast
- 1/2 cup warm water (about 105-115°F)
- 1 tablespoon oil (vegetable or olive)
- 1 1/2 teaspoons oil (for greasing)
- 1 1/2 – 1 3/4 cups all-purpose flour, plus more for dusting
- 1/2 teaspoon salt
- 1/2 teaspoon sugar
Equipment Needed
- Mixing bowl
- Measuring cups and spoons
- Clean dishtowel
- Cookie sheet or pizza stone
- Rolling pin (optional)
Instructions
-
Activate the Yeast: In a mixing bowl, combine the 1 teaspoon of dry yeast and the additional 1/8 teaspoon of dry yeast with the 1/2 cup of warm water. Let this mixture stand for about 5-10 minutes, or until it becomes foamy. This indicates that the yeast is active and ready to leaven the dough.
-
Combine Wet and Dry Ingredients: To the yeast mixture, add the 1 tablespoon of oil, sugar, and salt. Stir well to combine.
-
Gradually Incorporate Flour: Begin adding the flour to the wet ingredients, starting with 1 1/2 cups. Stir until a shaggy dough forms. If the dough is too sticky, gradually add the remaining flour (up to 1 3/4 cups total) until it comes together into a ball. The amount of flour needed may vary depending on humidity and the type of flour used.
-
Knead the Dough: Turn the dough out onto a lightly floured surface. Knead the dough for about 5 minutes, until it becomes smooth and elastic. To knead, push the dough away from you with the heel of your hand, then fold it back over itself and turn it a quarter turn. Repeat this process rhythmically.
-
First Rise (Pizza Dough): Grease a clean mixing bowl with 1/2 teaspoon of oil. Place the dough in the bowl, turning it to coat all sides with the oil. This prevents the dough from drying out. Cover the bowl with a clean dishtowel and let it rise in a warm place for only 5 minutes if you want to make pizza dough.
-
First Rise (Breadsticks): For breadsticks, cover the bowl with a clean dishtowel and let it rise in a warm place for around 35 minutes.
-
Check for Readiness: After the rising time (either 5 or 35 minutes), test the dough by gently pressing your thumb into it. If the indentation remains, the dough is ready to be punched down. If the indentation slowly fills in, let the dough rise for a few more minutes.
-
Punch Down and Roll Out: Punch down the dough to release any excess air. Turn it out onto a lightly greased cookie sheet or baking stone. Use your hands or a rolling pin to roll the dough out to your desired thickness and shape.
-
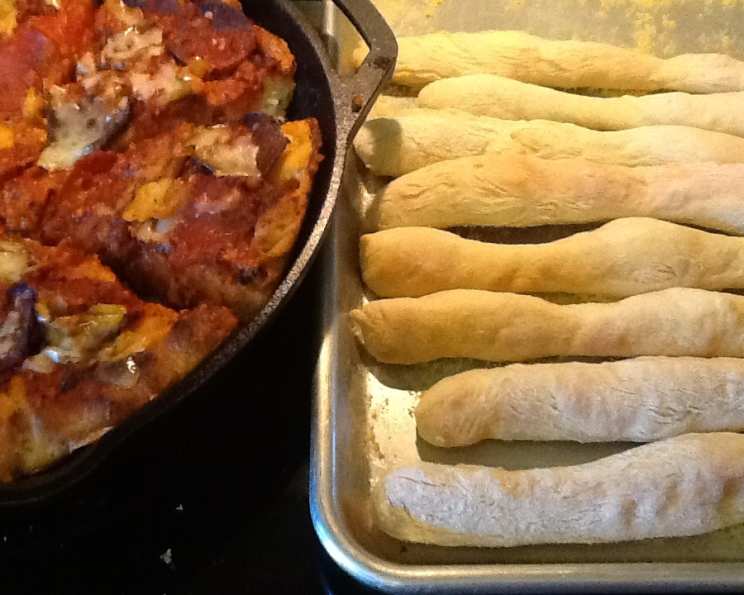
Prepare Breadsticks (Optional): If making breadsticks, cut pieces of dough and roll them out like snakes to form the breadsticks. Place them on a greased baking sheet.
-
Add Toppings: Spread your desired pizza sauce and toppings over the rolled-out dough.
-
Bake: Preheat your oven to 400°F (200°C). Bake the pizza for 25 minutes, or until the crust is golden brown and the cheese is melted and bubbly.
-
Cool and Serve: Remove the pizza from the oven and let it cool for a few minutes before slicing and serving.
Expert Tips & Tricks
- Yeast Activation: Ensuring the water is the correct temperature (105-115°F) is crucial for activating the yeast. Too hot, and you’ll kill the yeast; too cold, and it won’t activate properly. Use a thermometer for accurate results.
- Dough Consistency: The amount of flour needed can vary depending on the humidity and the type of flour used. Start with less flour and gradually add more until the dough is smooth and elastic, but not sticky.
- Kneading Technique: Proper kneading develops the gluten in the flour, resulting in a chewier, more flavorful crust. Don’t be afraid to put some elbow grease into it!
- Rise Time: The rise time is short in this recipe, if a longer rise time is desired, reduce the yeast by half to prevent over-proofing.
- Pre-Baking the Crust: For a crispier crust, pre-bake the dough for 5-7 minutes before adding toppings. This helps prevent the crust from becoming soggy.
- Baking Stone vs. Cookie Sheet: A baking stone will produce a crispier crust than a cookie sheet. If using a baking stone, preheat it in the oven before placing the pizza on it.
Serving & Storage Suggestions
Serve your freshly baked pizza immediately for the best flavor and texture. Leftover pizza can be stored in an airtight container in the refrigerator for up to 3-4 days. To reheat, preheat your oven to 350°F (175°C) and bake for 5-10 minutes, or until heated through. You can also reheat individual slices in a microwave, but the crust will be softer.
For longer storage, you can freeze leftover pizza slices. Wrap them individually in plastic wrap and then place them in a freezer bag. Frozen pizza can be stored for up to 2-3 months. To reheat, bake directly from frozen at 375°F (190°C) for 10-15 minutes, or until heated through.
Nutritional Information
| Nutrient | Amount per Serving | % Daily Value |
|---|---|---|
| Calories | 148 kcal | 7% |
| Total Fat | 3.8g | 5% |
| Saturated Fat | 0.5g | 3% |
| Cholesterol | 0mg | 0% |
| Sodium | 195mg | 9% |
| Total Carbohydrate | 25g | 8% |
| Dietary Fiber | 1.1g | 4% |
| Sugars | 0.4g | 1% |
| Protein | 3.5g | 7% |
Note: Nutritional information is an estimate and may vary depending on specific ingredients and portion sizes.
Variations & Substitutions
- Gluten-Free Crust: Substitute all-purpose flour with a gluten-free flour blend. You may need to adjust the amount of liquid depending on the blend.
- Whole Wheat Crust: Replace half of the all-purpose flour with whole wheat flour for a nuttier flavor and added fiber.
- Herb-Infused Crust: Add 1-2 teaspoons of dried herbs, such as oregano, basil, or rosemary, to the flour for a more flavorful crust.
- Garlic Crust: Mix 1-2 cloves of minced garlic into the dough for a savory garlic flavor.
- Spicy Crust: Add a pinch of red pepper flakes to the dough for a hint of spice.
FAQs (Frequently Asked Questions)
Q: Can I use active dry yeast instead of instant dry yeast?
A: Yes, you can use active dry yeast. However, you’ll need to proof it in warm water for a longer period (about 10-15 minutes) before adding it to the other ingredients.
Q: Can I make the dough ahead of time?
A: Yes, you can make the dough ahead of time and store it in the refrigerator for up to 24 hours. Wrap the dough tightly in plastic wrap to prevent it from drying out. Let the dough come to room temperature before rolling it out.
Q: My dough is too sticky. What should I do?
A: Add a little more flour, a tablespoon at a time, until the dough is easier to handle. Be careful not to add too much flour, as this can make the crust tough.
Q: My crust is not crispy. What can I do?
A: Pre-baking the crust for 5-7 minutes before adding toppings can help create a crispier crust. You can also use a baking stone, which will distribute heat more evenly.
Q: Can I freeze the pizza dough?
A: Yes, you can freeze the pizza dough. Wrap it tightly in plastic wrap and then place it in a freezer bag. Frozen dough can be stored for up to 2-3 months. Thaw the dough in the refrigerator overnight before using.
Final Thoughts
This Noble Roman’s-inspired pizza crust recipe is a testament to the power of simple ingredients and cherished culinary memories. I encourage you to try this recipe and experience the joy of creating your own delicious pizza at home. Don’t be afraid to experiment with different toppings and variations to create your own signature pizza. And most importantly, share your creations with loved ones and enjoy the deliciousness together! I’m sure Mrs. Evans would be proud.