
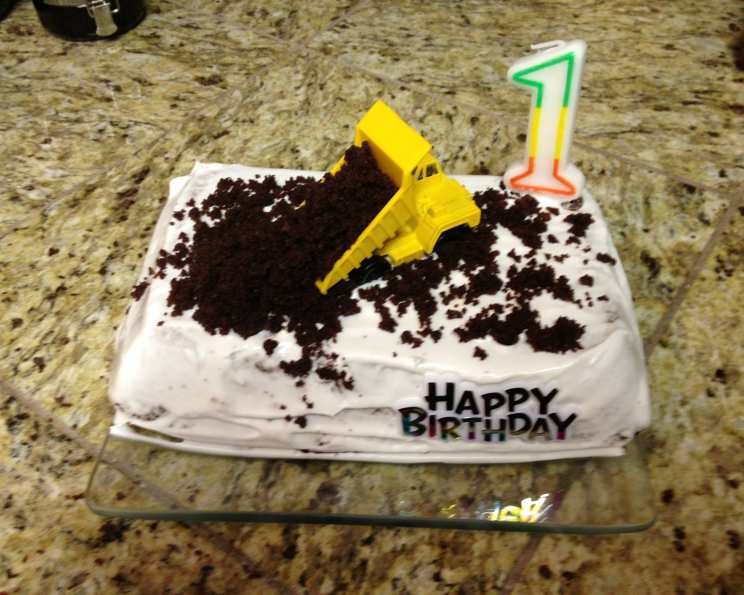
The Unbelievably Easy Non-Dairy Chocolate Cake
I remember the first time I tasted this cake. It was at a potluck, and nestled amongst the elaborate pies and fussy layer cakes sat this unassuming, dark brown square. Someone simply called it “Wacky Cake.” One bite, and I was hooked! The moist, intensely chocolatey flavor defied its humble appearance. It was so good, I had to get the recipe, and I was shocked to discover that it was dairy-free! I’ve been making it ever since. It’s the perfect recipe for beginner bakers or anyone looking for a quick and satisfying chocolate fix.
Recipe Overview
- Prep Time: 15 minutes
- Cook Time: 30-35 minutes
- Total Time: 45-50 minutes
- Servings: 16-20
- Dietary Type: Dairy-Free
Ingredients
- 3 cups flour
- 2 cups sugar
- 6 tablespoons cocoa
- 2 teaspoons baking soda
- 1 teaspoon salt
- 2 tablespoons vinegar
- ¾ cup canola oil (almost any kind of cooking oil will do)
- 2 teaspoons vanilla
- 2 cups water
Equipment Needed
- 9×13-inch baking pan
- Measuring cups and spoons
- Fork or wire whisk
Instructions
-
Preheat your oven to 350°F (175°C).
-
In an ungreased 9×13-inch pan, sift together the first five ingredients: flour, sugar, cocoa, baking soda, and salt. Sifting ensures that there are no lumps, giving the cake a smoother texture.
-
Now, create three distinct “wells” in the dry mixture. These wells will hold the liquid ingredients before we mix everything together.
-
Into each well, carefully pour one of the next three ingredients: vinegar, canola oil, and vanilla. This method helps distribute the liquids evenly throughout the dry ingredients.
-
Pour the 2 cups of water over the entire mixture.
-
Using a fork or wire whisk, thoroughly mix all the ingredients together directly in the baking pan. Ensure that there are no dry pockets and that the batter is smooth. Don’t overmix. Just combine until the dry ingredients are incorporated.
-
Bake at 350°F (175°C) for 30-35 minutes.
-
To check for doneness, insert a toothpick into the center of the cake. If it comes out clean or with just a few moist crumbs attached, the cake is done. If it comes out with wet batter, bake for a few more minutes and check again.
-
Remove the cake from the oven and let it cool completely in the pan before frosting or serving.
Expert Tips & Tricks
-
Cocoa Powder Quality: The quality of your cocoa powder will significantly impact the flavor of the cake. Use a high-quality Dutch-processed cocoa for a richer, less acidic chocolate flavor.
-
Don’t Overbake: Overbaking is the enemy of a moist cake. Start checking for doneness around 30 minutes and keep a close eye on it.
-
Even Baking: If your oven has hot spots, rotate the cake halfway through baking to ensure even cooking.
-
Oil Type: While canola oil is recommended, you can use almost any neutral-flavored cooking oil, such as vegetable oil, sunflower oil, or even melted coconut oil (although this may impart a slight coconut flavor).
-
Vinegar’s Role: Don’t skip the vinegar! It reacts with the baking soda to create a light and fluffy texture. You won’t taste it in the final product.
-
Pan Prep: Although the recipe says ungreased pan, I sometimes lightly grease and flour the pan for an easier release of the cake after baking.
Serving & Storage Suggestions
This Non-Dairy Chocolate Cake is delicious served warm or at room temperature. You can dust it with powdered sugar for a simple presentation, frost it with your favorite non-dairy frosting (chocolate, vanilla, or even peanut butter frosting work well), or serve it with a scoop of non-dairy ice cream.
- Storage: Store leftover cake in an airtight container at room temperature for up to 3 days, in the refrigerator for up to a week, or in the freezer for up to 2 months.
- Reheating: If frozen, thaw the cake completely before serving. You can gently warm individual slices in the microwave for a few seconds if desired.
Nutritional Information
Here’s an estimate of the nutritional information per serving (based on 16 servings):
| Nutrient | Amount per Serving | % Daily Value |
|---|---|---|
| Calories | 282 kcal | 14% |
| Total Fat | 10.6 g | 16% |
| Saturated Fat | 0.8 g | 3% |
| Cholesterol | 0 mg | 0% |
| Sodium | 304 mg | 12% |
| Total Carbohydrate | 44 g | 15% |
| Dietary Fiber | 1 g | 4% |
| Sugars | 25 g | 50% |
| Protein | 2.8 g | 5% |
Variations & Substitutions
-
Gluten-Free: Substitute the all-purpose flour with a gluten-free all-purpose blend. You may need to add a binder like xanthan gum to improve the texture.
-
Different Extracts: Experiment with different extracts like almond, peppermint, or orange to change the flavor profile.
-
Coffee Boost: Add 1-2 teaspoons of instant espresso powder to the dry ingredients to enhance the chocolate flavor.
-
Chocolate Chips: Fold in non-dairy chocolate chips into the batter for an extra chocolatey treat.
-
Frosting Flavors: The possibilities are endless! Consider a coconut whipped cream, a cashew-based frosting, or even a simple glaze made with powdered sugar and non-dairy milk.
FAQs (Frequently Asked Questions)
Q: Why is it called “Wacky Cake” or “Crazy Cake”?
A: This cake earned those names because it doesn’t require eggs, butter, or milk, which was unusual in traditional baking. Also, the method of mixing everything directly in the pan was considered “wacky.”
Q: Can I use whole wheat flour instead of all-purpose flour?
A: While you can substitute some of the all-purpose flour with whole wheat flour, it will result in a denser cake. Start by replacing no more than half of the all-purpose flour with whole wheat flour.
Q: Can I use a different type of oil?
A: Yes, you can use any neutral-flavored cooking oil such as vegetable oil, sunflower oil, or even melted coconut oil. Avoid using oils with strong flavors like olive oil.
Q: What if I don’t have vinegar?
A: If you don’t have vinegar, you can substitute it with lemon juice. The acidity is important for activating the baking soda and creating a light texture.
Q: How do I prevent the cake from sticking to the pan?
A: While the recipe calls for an ungreased pan, you can lightly grease and flour the pan or line it with parchment paper for easy removal.
Final Thoughts
This Non-Dairy Chocolate Cake is a testament to the fact that you don’t need a long list of ingredients or fancy equipment to create a delicious and satisfying dessert. It’s a simple, foolproof recipe that’s perfect for any occasion. So, gather your ingredients, preheat your oven, and get ready to bake a cake that will surprise and delight everyone who tries it. Enjoy, and don’t hesitate to share your feedback and variations! I’d recommend serving it with a scoop of non-dairy vanilla ice cream for the ultimate treat!