
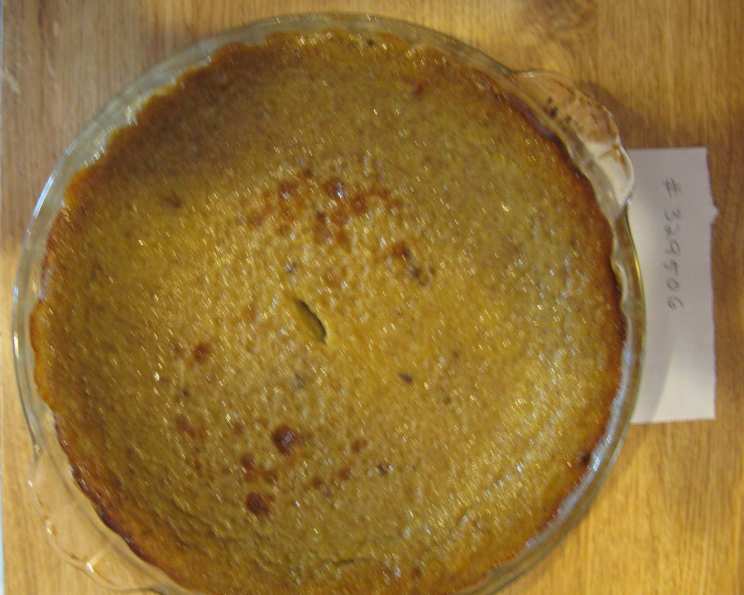
The Dairy-Free Pumpkin Pie That Won Thanksgiving
I’ll never forget the first time I served this pie. It was Thanksgiving at my sister’s house, a gathering known for its traditional, butter-laden fare. My son had recently been diagnosed with a dairy allergy, and the thought of him missing out on his favorite dessert filled me with dread. So, I tinkered away in the kitchen, determined to create a pumpkin pie that was both dairy-free and delicious enough to fool even the most discerning palate. The moment of truth came after dinner, when slices were passed around. Silence. Then, my notoriously picky uncle exclaimed, “This is the best pumpkin pie I’ve ever had!” My heart soared.
Recipe Overview
- Prep Time: 20 minutes
- Cook Time: 55 minutes
- Total Time: 1 hour 15 minutes
- Servings: 8
- Yield: 1 pie
- Dietary Type: Dairy-Free
Ingredients
- 1 (15 ounce) can pumpkin puree (not pumpkin pie filling)
- 11 ounces soy milk
- 2 large eggs
- 1 large egg white
- 1 teaspoon cornstarch
- ¾ cup white sugar
- ½ teaspoon salt
- 1 teaspoon cinnamon
- ¼ – ½ teaspoon ginger
- ¼ teaspoon clove (I like to go light on the cloves)
- 1 9-inch unbaked pie shell
Equipment Needed
- Blender
- Large Mixing Bowl
- Measuring cups and spoons
- 9-inch pie dish
- Whisk
- Oven
Instructions
- Begin by preheating your oven to 425 degrees Fahrenheit (220 degrees Celsius).
- In a blender, combine the pumpkin puree, soy milk, eggs, and egg white. Blend these ingredients together until they are thoroughly mixed and smooth. This initial blending ensures a creamy base for your pie filling.
- In a separate, large mixing bowl, whisk together the dry ingredients: white sugar, salt, cinnamon, ginger, and clove. Make sure these are well combined; this ensures even distribution of flavor throughout the pie.
- Carefully pour the dry ingredients from the bowl into the blender with the wet ingredients. Blend again until the mixture is completely smooth and homogenous. The consistency should be velvety.
- Pour the blended pumpkin pie filling into the unbaked 9-inch pie shell. Ensure the filling is evenly distributed.
- Place the pie in the preheated oven and bake at 425 degrees Fahrenheit for 15 minutes. This initial high heat helps to set the crust and prevent it from becoming soggy.
- After 15 minutes, reduce the oven temperature to 350 degrees Fahrenheit (175 degrees Celsius). Continue baking for 40-50 minutes, or until a knife inserted into the center of the pie comes out clean. The baking time can vary depending on your oven, so keep a close eye on it.
- Remove the pie from the oven and let it cool for a couple of hours on a wire rack. This allows the filling to set completely.
- Once cooled, serve and refrigerate any leftovers promptly to maintain freshness and prevent spoilage.
Expert Tips & Tricks
- Spice it up: Don’t be afraid to adjust the spices to your liking. A pinch of nutmeg or allspice can add extra warmth. You can also use pumpkin pie spice blend for convenience.
- Prevent a soggy crust: To prevent a soggy crust, you can blind-bake the pie shell for 10 minutes before pouring in the filling. Simply line the crust with parchment paper and fill it with pie weights or dried beans, then bake at 350°F (175°C).
- Check for doneness: The pie is done when the edges are set but the center still has a slight jiggle. It will continue to set as it cools. If the crust starts to brown too quickly, cover the edges with foil.
- Making ahead: This pie can be made a day or two in advance. Store it in the refrigerator, tightly covered.
- Troubleshooting cracks: If the pie cracks during baking, don’t worry! It won’t affect the taste. You can also cover the cracks with whipped cream or coconut whipped cream.
Serving & Storage Suggestions
Serve this dairy-free pumpkin pie chilled or at room temperature. A dollop of dairy-free whipped cream or a scoop of vanilla ice cream (also dairy-free, of course!) makes a wonderful accompaniment. You could also sprinkle a dusting of cinnamon or cocoa powder on top for an extra touch of elegance.
Leftover pie should be stored in the refrigerator, covered tightly with plastic wrap or in an airtight container. It will last for up to 3-4 days. While freezing is possible, the texture of the filling may change slightly upon thawing. If freezing, wrap the pie tightly in plastic wrap and then in foil. Thaw it in the refrigerator overnight before serving.
Nutritional Information
| Nutrient | Amount per Serving | % Daily Value |
|---|---|---|
| Calories | 131 kcal | N/A |
| Calories from Fat | 17 g | 14% |
| Total Fat | 2 g | 3% |
| Saturated Fat | 0.5 g | 2% |
| Cholesterol | 46.5 mg | 15% |
| Sodium | 191.9 mg | 7% |
| Total Carbohydrate | 25.6 g | 8% |
| Dietary Fiber | 0.7 g | 2% |
| Sugars | 21.2 g | 84% |
| Protein | 3.9 g | 7% |
Note: Nutritional information is an estimate and may vary based on specific ingredients and serving sizes.
Variations & Substitutions
- Gluten-Free Crust: Use a gluten-free pie crust recipe or a store-bought gluten-free crust.
- Coconut Milk: Substitute the soy milk with full-fat coconut milk for an even richer and creamier texture. Keep in mind this will impart a coconut flavor.
- Sweetener Alternatives: Replace the white sugar with coconut sugar or maple syrup for a more natural sweetener.
- Spice Variations: Experiment with different spice combinations, such as adding cardamom or star anise for a unique flavor profile.
- Nutmeg: Add a pinch of freshly grated nutmeg to enhance the warm, spicy notes of the pie.
- Ginger Snaps: For a unique crust, crush ginger snap cookies and press them into the pie plate.
FAQs (Frequently Asked Questions)
Q: Can I use a pre-made pie crust?
A: Absolutely! Using a pre-made crust saves time. Just make sure it’s a 9-inch crust and that you adjust the baking time if needed.
Q: How do I know when the pie is done?
A: The pie is done when the edges are set and the center has a slight jiggle. A knife inserted near the center should come out clean.
Q: Can I freeze this pie?
A: Yes, you can freeze the pie, but the texture may change slightly after thawing. Wrap it tightly in plastic wrap and then in foil before freezing.
Q: What if my pie crust browns too quickly?
A: If your pie crust starts to brown too quickly, you can cover the edges with foil or a pie shield to prevent burning.
Q: Can I make this recipe vegan?
A: To make this recipe fully vegan, replace the eggs with an egg substitute designed for baking, such as aquafaba (the liquid from canned chickpeas) or a commercial egg replacer.
Final Thoughts
This dairy-free pumpkin pie is more than just a recipe; it’s a testament to the fact that dietary restrictions don’t have to mean sacrificing flavor or tradition. I encourage you to try this recipe and share it with your loved ones. Whether you’re catering to a specific dietary need or simply looking for a delicious twist on a classic, this pie is sure to be a crowd-pleaser. Pair it with a warm cup of spiced apple cider or a dairy-free latte for the ultimate fall treat. Don’t be afraid to experiment with variations and make it your own. Happy baking!