
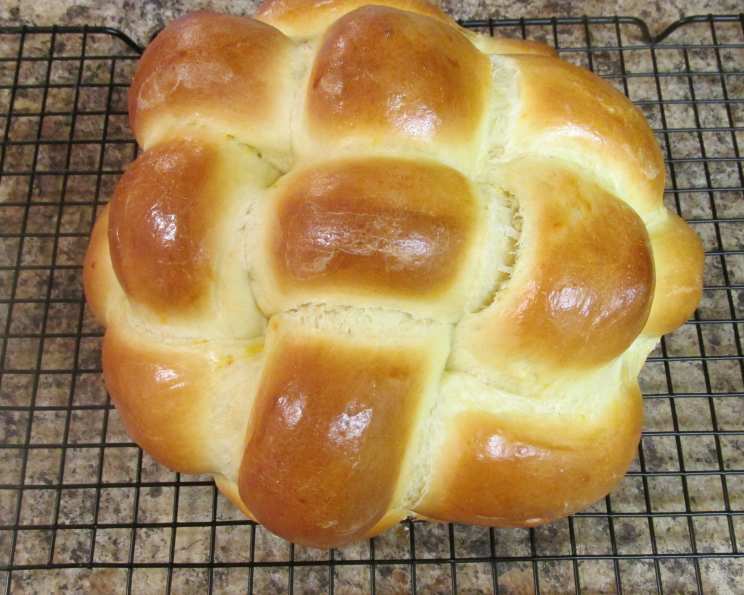
Nora’s Challah: A Taste of Tradition and Time
My grandmother, Nora, wasn’t much for elaborate meals, but when it came to her challah, it was pure artistry. The scent alone – that warm, yeasty fragrance mingled with a hint of honey – could fill the entire house with a comforting embrace. I remember standing on a stool beside her, mesmerized as she deftly braided the golden dough, her hands moving with a practiced grace honed over decades. More than just bread, Nora’s challah was a symbol of family, love, and the enduring spirit of tradition. It was a weekly ritual, a tangible expression of her heart, and a taste I’ve been chasing ever since.
Recipe Overview
- Prep Time: 48 minutes (including resting time)
- Cook Time: 30 minutes
- Total Time: 1 hour 18 minutes + overnight refrigeration
- Yields: 1 loaf
- Serves: 6-8
- Dietary Type: Dairy
Ingredients
- 2/3 cup warm water
- 2 1/2 teaspoons yeast
- 3 eggs
- 2 tablespoons olive oil
- 2 tablespoons honey
- 1 teaspoon kosher salt
- 3 cups bread flour, plus some extra for dusting
- Cooking spray for the bowl and baking sheet
- Optional: Kosher salt or sesame seeds for topping
Equipment Needed
- Stand mixer with dough hook attachment
- Mixing bowl
- Zip-top bag
- Baking sheet
- Whisk
Instructions
- Begin by attaching the dough hook to your Kitchenaid mixer.
- In the mixing bowl, dissolve the yeast in the warm water. Allow it to sit for a few minutes until foamy, which indicates the yeast is active.
- Stir in 2 of the eggs, olive oil, and honey, then add the salt.
- Place the bowl on the mixer, turn it on at a low speed, and slowly begin adding the flour, a few tablespoons at a time. It’s crucial to add the flour gradually to allow the dough to properly hydrate and develop gluten.
- Depending on the time of year, the temperature, and humidity in your kitchen, you may need to add more flour or a few more drops of water to get the right consistency. Only add a few tablespoons at a time, and be patient. Remember, the goal is a dough that is firm, smooth, and not sticky.
- Knead for a while (or mix) before you decide if you need to adjust the flour or water. For all you mamas and daddies out there, the best test I was ever told when feeling the dough to see if it was ready was that when patted, it would feel like patting a baby’s bottom.
- Once the dough is kneaded and feels smooth and elastic, place the ball of dough in a zip-top bag that you have coated the inside with cooking spray. This will prevent the dough from sticking and allows it to rise easily.
- Place the zip-top bag in the refrigerator overnight. This cold fermentation process allows the flavors to develop fully, resulting in a richer, more complex challah.
- The next day, when ready to bake, remove the dough from the fridge and let it rest on the countertop for about 45 minutes. This allows the dough to warm up slightly, making it easier to work with.
- Remove the dough from the bag, punch it down to release any excess gas, and divide it into 3 ropes.
- Coat a baking sheet with cooking spray to prevent sticking, then braid the challah directly on the baking sheet.
- In a small bowl, whisk together the remaining egg with a tablespoon of cold water. This egg wash will give the challah a beautiful golden-brown sheen during baking.
- Brush the finished challah with the egg wash.
- Sprinkle with kosher salt or sesame seeds, if desired.
- Bake at 350 degrees for 30 minutes, or until golden brown and the internal temperature reaches approximately 200-210°F.
Expert Tips & Tricks
- Cold Rise is Key: Don’t skip the overnight refrigeration. The slow, cold rise is what gives this challah its distinctive flavor and texture.
- Flour Variation: Be mindful of the flour. Humidity plays a significant role. Start with less flour and add more as needed, aiming for a slightly tacky, but not sticky, dough.
- Kneading is Crucial: Thorough kneading develops the gluten, which gives the challah its structure and chewiness. Use the stand mixer for at least 8-10 minutes, or knead by hand for 12-15 minutes.
- Egg Wash Perfection: For an extra glossy crust, apply a second coat of egg wash halfway through baking.
- Oven Temperature: Oven temperatures can vary. Keep an eye on the challah during baking and adjust the time accordingly. If it’s browning too quickly, tent it with foil.
- Shaping: Don’t be afraid to experiment with different braiding techniques! A classic 3-strand braid is always beautiful, but you can also try a 4-strand, 6-strand, or even a round challah for the High Holidays.
Serving & Storage Suggestions
Nora’s Challah is best enjoyed fresh, still warm from the oven. Serve it alongside your favorite spreads, such as butter, jam, or honey. It’s also delicious with savory dishes like roasted chicken or soup.
To store leftovers, wrap the challah tightly in plastic wrap or place it in an airtight container. It will keep at room temperature for 2-3 days, in the refrigerator for up to a week, or in the freezer for up to 2 months.
To reheat, wrap the challah in foil and warm it in a 350°F oven for 10-15 minutes, or until heated through. You can also slice and toast individual portions.
Nutritional Information
| Nutrient | Amount per Serving | % Daily Value |
|---|---|---|
| Calories | 330.2 kcal | N/A |
| Calories from Fat | 69 g | 21% |
| Total Fat | 7.7 g | 11% |
| Saturated Fat | 1.5 g | 7% |
| Cholesterol | 105.8 mg | 35% |
| Sodium | 328.7 mg | 13% |
| Total Carbohydrate | 54.3 g | 18% |
| Dietary Fiber | 2 g | 8% |
| Sugars | 6.1 g | N/A |
| Protein | 10.3 g | 20% |
Note: Nutritional information is an estimate and may vary based on specific ingredients and preparation methods.
Variations & Substitutions
- Sweet Challah: Add a tablespoon or two of sugar to the dough for a sweeter challah.
- Savory Challah: Incorporate herbs, spices, or cheese into the dough for a savory twist. Try adding rosemary, thyme, garlic powder, or grated Parmesan cheese.
- Chocolate Chip Challah: Fold in chocolate chips or chunks into the dough before braiding for a decadent treat.
- Gluten-Free Challah: Substitute the bread flour with a gluten-free bread flour blend. Be sure to add a binding agent like xanthan gum to help with the structure.
- Vegan Challah: Replace the eggs with a flax egg (1 tablespoon ground flaxseed mixed with 3 tablespoons water per egg) and ensure the honey is replaced with agave or maple syrup.
FAQs (Frequently Asked Questions)
Q: Can I use all-purpose flour instead of bread flour?
A: While bread flour is recommended for its higher protein content, which results in a chewier texture, you can use all-purpose flour. The challah might be slightly less chewy, but still delicious.
Q: Can I freeze the challah dough?
A: Yes, you can freeze the dough after the first rise. Wrap it tightly in plastic wrap and place it in a freezer bag. Thaw it overnight in the refrigerator before proceeding with the recipe.
Q: Why is my challah dry?
A: Overbaking is the most common cause of dry challah. Check the internal temperature with a thermometer to ensure it doesn’t exceed 210°F. You can also brush the challah with melted butter after baking to add moisture.
Q: My challah didn’t rise properly. What happened?
A: Several factors can affect the rise. Make sure your yeast is fresh and active. Also, ensure the water is warm, but not too hot, as it can kill the yeast. Finally, give the dough enough time to rise in a warm, draft-free place.
Q: Can I make this challah by hand without a stand mixer?
A: Absolutely! Kneading by hand will require a bit more effort, but it’s definitely possible. Knead the dough on a lightly floured surface for 12-15 minutes, or until it becomes smooth and elastic.
Final Thoughts
Nora’s Challah is more than just a recipe; it’s an invitation to connect with tradition, family, and the simple joy of baking. While it may seem daunting at first, the process is surprisingly rewarding, and the aroma that fills your kitchen as it bakes is simply divine. Don’t be afraid to experiment with different braiding techniques or flavors to make it your own. I encourage you to try this recipe, share it with loved ones, and create your own cherished memories around this timeless bread. Pair it with a hearty stew or a simple cup of coffee for a truly comforting experience. Enjoy!