
Nordic Cardamom Ice Cream: A Taste of Scandinavia
The memory of my grandmother’s kitchen is forever intertwined with the scent of cardamom. She wasn’t Scandinavian, but she had a well-worn copy of a Nordic baking book that she treasured. The pages were stained with butter and dotted with handwritten notes, and from it emerged the most wonderful cardamom-infused creations. The aroma would fill the house, a warm and inviting hug that promised sweet comfort. It’s a scent that takes me back in time with every whiff, and a flavor that brings immense joy. Now, I bring to you that warm hug of cardamom in the form of this unforgettable Nordic Cardamom Ice Cream!
Recipe Overview
- Prep Time: 30 minutes
- Cook Time: 8 minutes
- Total Time: 2 hours 38 minutes (includes chilling and freezing time)
- Servings: Varies depending on scoop size
- Yield: Approximately 1 pint
- Dietary Type: Not specified
Ingredients
- 8 egg yolks, at room temperature
- 1 cup sugar
- 2 cups milk
- 2 cups whipping cream
- 1 vanilla bean
- 1 tablespoon cardamom, freshly ground
Equipment Needed
- Large saucepan
- Whisk
- Fine sieve or colander
- Ice cream maker (optional)
Instructions
- Begin by allowing your egg yolks to sit at room temperature for about 30 minutes. This helps them emulsify better, creating a smoother ice cream base.
- In a mixing bowl, whisk together the room temperature egg yolks and sugar until the mixture is pale, lemon-yellow, and creamy. This usually takes a few minutes of vigorous whisking. You’re aiming to incorporate air and dissolve the sugar completely.
- In a large saucepan, whisk together the milk and whipping cream.
- Take your vanilla bean and carefully cut it in half lengthwise. Using the back of your knife, scrape the vanilla seeds out of both halves and directly into the milk and cream mixture. Don’t discard the vanilla bean halves just yet! Toss them into the liquid as well. They’ll infuse even more vanilla flavor during the simmering process.
- Stir in the 1 tablespoon of freshly ground cardamom into the milk and cream mixture. Make sure the cardamom is freshly ground for the best and most potent flavor. Pre-ground cardamom loses its aroma quickly.
- Place the saucepan over medium-high heat, stirring constantly. Bring the milk mixture to a low simmer. Keep a close eye on it to prevent scorching.
- When the mixture reaches the scalding point (you’ll see small bubbles forming around the edges, and steam rising), remove the saucepan from the burner. It’s crucial not to let it boil.
- Now comes the tempering process, which is essential to prevent scrambled eggs in your ice cream! Slowly and gradually pour the warm milk mixture into the bowl with the egg yolks in a very light, thin stream, whisking strongly and constantly to prevent the yolks from curdling. It’s important to go slowly, incorporating just a little bit of the warm liquid at a time.
- After all of the milk mixture has been incorporated into the egg yolks, strain the mixture through a fine sieve or colander back into the saucepan. This step will remove any accidentally cooked egg bits and the vanilla bean, ensuring an exceptionally smooth final product.
- Place the saucepan back on the burner over medium heat. Cook the custard until it reaches a simmer and starts to thicken, about 8 minutes, stirring vigorously the entire time. You need to stir constantly to prevent sticking and scorching.
- You’ll know the custard is thick enough when it coats the back of a spoon. To test this, dip a spoon into the custard, then run your finger across the back of the spoon. If the line you make with your finger remains distinct and doesn’t immediately flow back together, it’s ready.
- Once the custard has reached the desired consistency, remove it from the heat.
- Cover the saucepan and refrigerate the custard for at least 1 hour, or ideally overnight. This allows the flavors to meld together beautifully and the custard to chill completely, which is important for proper freezing.
- Now it’s time to finish the ice cream! If you have an ice cream maker, pour the chilled cardamom custard mixture into it and freeze according to the manufacturer’s instructions. This usually takes about 20-30 minutes.
- If you don’t have an ice cream maker, you can still achieve delicious results using your freezer. Pour the chilled cardamom custard mixture into a freezer-safe container. Place it in the freezer for 20 minutes.
- After 20 minutes, remove the container from the freezer and whisk the mixture vigorously. This helps break up ice crystals and creates a smoother texture.
- Return the container to the freezer for another 20 minutes, and repeat the whisking process.
- Continue this freeze-and-whisk process every 20 minutes until the mixture has frozen into the proper ice cream consistency. This may take several hours, but the effort is worth it!
Expert Tips & Tricks
- Room Temperature Yolks: Using room temperature egg yolks is crucial for smooth emulsification. If you forget to take them out ahead of time, you can speed up the process by placing them in a bowl of warm (not hot) water for a few minutes.
- Fresh Cardamom is King: The flavor of freshly ground cardamom is far superior to pre-ground. Invest in a spice grinder or mortar and pestle for the best results.
- Don’t Boil the Custard: Overheating the custard can cause the eggs to curdle. Keep the heat at medium and stir constantly.
- Patience is Key: Whether you’re using an ice cream maker or the freezer method, allow ample time for the ice cream to fully freeze and develop its flavor.
- Infusion Boost: For a more intense vanilla flavor, steep the vanilla bean in the milk and cream mixture for a longer period of time (several hours or overnight) before simmering.
Serving & Storage Suggestions
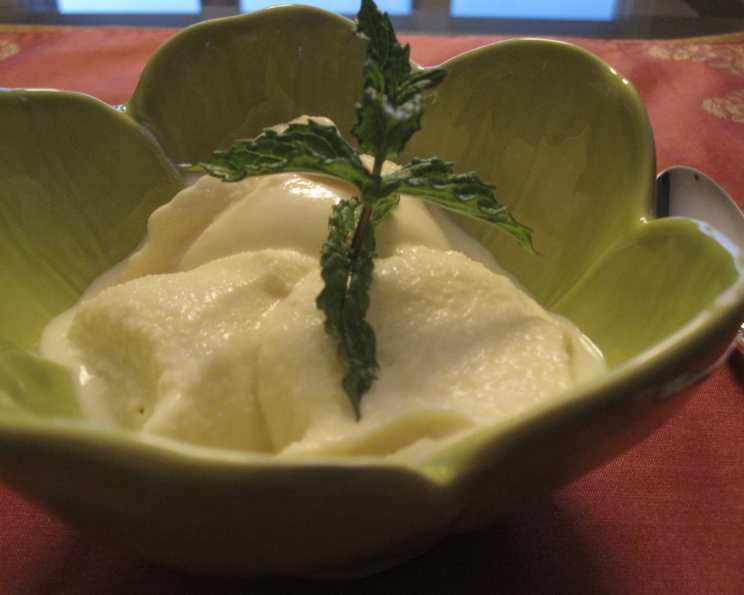
Serve your Nordic Cardamom Ice Cream slightly softened for the best texture. It’s delicious on its own, but it also pairs wonderfully with fruit crisps, crumbles, or warm compotes. Consider a scoop alongside a slice of warm apple pie or a bowl of poached pears.
Store leftover ice cream in an airtight container in the freezer. Homemade ice cream tends to be less stable than commercially produced ice cream due to the lack of stabilizers, so it’s best consumed within a week or two for optimal texture. If the ice cream becomes too hard after freezing, let it sit at room temperature for a few minutes to soften slightly before serving.
Nutritional Information
Please note that this is an estimate and can vary based on ingredient brands and specific measurements.
| Nutrient | Amount per Serving | % Daily Value (approx.) |
|---|---|---|
| Calories | 350 kcal (approx.) | 18% |
| Total Fat | 25g (approx.) | 38% |
| Saturated Fat | 15g (approx.) | 75% |
| Cholesterol | 200mg (approx.) | 67% |
| Sodium | 50mg (approx.) | 2% |
| Total Carbohydrate | 25g (approx.) | 8% |
| Dietary Fiber | 0g | 0% |
| Sugars | 20g (approx.) | N/A |
| Protein | 5g (approx.) | 10% |
Variations & Substitutions
- Dairy-Free Version: Substitute the milk and whipping cream with coconut milk for a vegan-friendly version. Keep in mind that the texture and flavor will be slightly different.
- Spice it Up: Experiment with other complementary spices like ginger, cinnamon, or a pinch of nutmeg.
- Citrus Zest: Add a teaspoon of lemon or orange zest to the custard for a brighter flavor profile.
- Cardamom Extract: In a pinch, you can use cardamom extract, but be very careful with the amount as it can be quite potent. Start with 1/2 teaspoon and adjust to taste.
FAQs (Frequently Asked Questions)
Q: Why do I need to let the egg yolks sit at room temperature?
A: Allowing the egg yolks to warm up helps them emulsify more easily with the sugar and milk, resulting in a smoother ice cream base and better texture.
Q: Can I use pre-ground cardamom instead of freshly ground?
A: While you can, freshly ground cardamom offers a much more intense and aromatic flavor that is worth the extra effort. Pre-ground cardamom loses its potency quickly.
Q: What if my custard curdles while cooking?
A: If your custard curdles, immediately remove it from the heat and whisk vigorously. You can also try straining it through a fine-mesh sieve to remove the curdled bits. The ice cream may still be salvageable.
Q: How long does homemade ice cream last in the freezer?
A: Homemade ice cream is best consumed within 1-2 weeks for optimal texture, as it lacks the stabilizers found in commercial ice cream.
Q: Can I make this ice cream without an ice cream maker?
A: Yes! The recipe includes instructions for making the ice cream using the freezer method, which involves freezing the mixture and whisking it every 20 minutes to break up ice crystals.
Final Thoughts
This Nordic Cardamom Ice Cream is more than just a dessert; it’s a taste of comforting memories and warm spices. Don’t be intimidated by the process – it’s surprisingly simple, and the result is well worth the effort. I encourage you to try this recipe and share your creations with loved ones. It pairs wonderfully with a cup of strong coffee or a dessert wine, making it the perfect ending to any meal. Enjoy the journey and the delightful flavors!