
Nordic Stone Age Bread: A Culinary Journey Back in Time
The first time I tasted this bread, I was backpacking through Denmark. I stumbled upon a tiny bakery in Copenhagen, the air thick with the aroma of rye and something…else. This dense, seedy loaf, sliced thin and offered with a dollop of skyr and wild berries, wasn’t like anything I’d had before. It was hearty, almost primal, and deeply satisfying. It sparked a fascination that has led me to experiment endlessly with grain-free baking, always chasing that initial taste of Danish stenalderbrød.
Recipe Overview
- Prep Time: 15 minutes
- Cook Time: 1 hour
- Total Time: 1 hour 15 minutes
- Servings: 12
- Yields: 1 loaf
- Dietary Type: Paleo, Gluten-Free, Grain-Free, Dairy-Free
Ingredients
- 1 cup raw almonds
- 1 cup raw walnuts
- 1 cup whole flax seeds
- 1 cup raw sunflower seeds
- 1 cup raw pumpkin seeds (also known as pepitas)
- 1 cup sesame seeds
- 5 eggs
- 1 1/2 teaspoons sea salt
Equipment Needed
- Large mixing bowl
- Spatula or spoon
- Loaf pan (approximately 9×5 inches)
- Parchment paper
- Oven
Instructions
-
Preheat your oven to 350 degrees Fahrenheit (175 degrees Celsius). This ensures even baking and proper setting of the ingredients.
-
In a large mixing bowl, combine all the dry ingredients: raw almonds, raw walnuts, whole flax seeds, raw sunflower seeds, raw pumpkin seeds, and sesame seeds.
-
Add the sea salt to the bowl of dry ingredients. The salt enhances the natural flavors of the nuts and seeds.
-
In the same bowl, crack in the 5 eggs. The eggs act as a binding agent, holding the seeds and nuts together to form the loaf.
-
Mix all the ingredients thoroughly with a spatula or spoon. Ensure that the eggs are evenly distributed throughout the mixture. This is crucial for the bread to hold its shape and have a consistent texture. The mixture will be quite dense and sticky.
-
Line a loaf pan with parchment paper. This prevents the bread from sticking to the pan and allows for easy removal after baking. Extend the parchment paper over the sides of the pan to create “handles” for lifting the baked loaf.
-
Pour the mixture into the parchment-lined loaf pan.
-
Level out the top of the mixture with your spatula or spoon. This ensures that the bread bakes evenly and has a pleasing appearance.
-
Bake at 350 degrees Fahrenheit (175 degrees Celsius) for 1 hour. Keep in mind that this is a very dense bread and will not leaven like traditional breads.
-
To check for doneness, tap the top of the loaf. It should sound hollow when tapped. If the loaf is still soft or seems wet, bake for an additional 5-10 minutes, checking periodically until done.
-
Once baked, remove the loaf from the oven and let it cool in the pan for about 10 minutes. This allows the bread to firm up slightly, making it easier to slice.
-
Use the parchment paper “handles” to lift the loaf out of the pan and transfer it to a cooling rack. Allow it to cool completely before slicing.
-
Thinly slice the bread. It is best enjoyed thinly sliced due to its density.
-
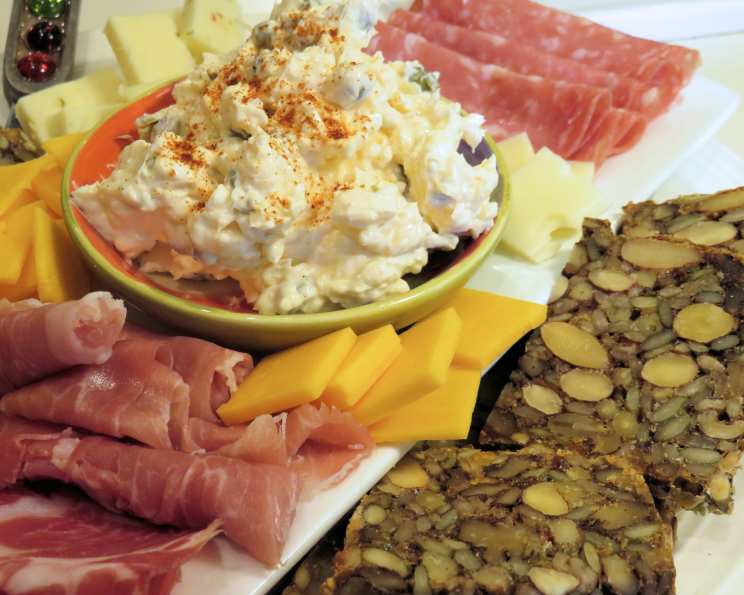
Enjoy any time of the day! It’s especially delicious toasted and topped with cheese, pâté, jam, or luncheon meats. It goes well with practically any type of spread or topping.
Expert Tips & Tricks
-
Soaking the Nuts (Optional): For easier digestion and improved nutrient absorption, consider soaking the almonds and walnuts in water for 4-8 hours before using. Drain and dry them thoroughly before adding to the recipe.
-
Toasting the Seeds: Lightly toasting the sunflower, pumpkin, and sesame seeds in a dry skillet before adding them to the mixture will enhance their flavor and aroma. Be careful not to burn them.
-
Egg Substitute: While eggs are crucial for binding, flax eggs (1 tablespoon of ground flaxseed mixed with 3 tablespoons of water, let sit for 5 minutes) can substitute 1-2 eggs, but the texture will be slightly different.
-
Adjusting Sweetness: A tablespoon of honey or maple syrup can be added for a touch of sweetness if desired.
-
Even Baking: If you notice the top of the bread browning too quickly, loosely tent a piece of aluminum foil over the loaf for the last 15-20 minutes of baking.
-
Slicing Technique: A serrated bread knife works best for slicing this dense bread. Ensure the bread is completely cool before slicing to prevent crumbling.
Serving & Storage Suggestions
This bread is incredibly versatile. Enjoy it toasted with your favorite toppings for breakfast, as a side to soups and salads, or as a base for open-faced sandwiches (smørrebrød). It pairs beautifully with creamy cheeses like brie or goat cheese, savory spreads like hummus or avocado, and sweet toppings like fruit preserves or honey.
The bread will keep in the refrigerator for around a week. For longer storage, it freezes very well. Slice the bread before freezing so you can easily thaw individual slices as needed. Wrap the loaf or individual slices tightly in plastic wrap and then place them in a freezer bag. It can be stored in the freezer for up to 2-3 months. To thaw, simply leave the slices at room temperature for about 30 minutes or toast them directly from frozen.
Nutritional Information
| Nutrient | Amount per Serving | % Daily Value |
|---|---|---|
| Calories | 434 kcal | N/A |
| Total Fat | 37.5 g | 57% |
| Saturated Fat | 4.5 g | 22% |
| Cholesterol | 77.5 mg | 25% |
| Sodium | 366.8 mg | 15% |
| Total Carbohydrate | 14.3 g | 4% |
| Dietary Fiber | 8.8 g | 35% |
| Sugars | 1.6 g | 6% |
| Protein | 16.9 g | 33% |
Note: Nutritional information is an estimate and may vary based on specific ingredients and portion sizes.
Variations & Substitutions
- Nut Variations: Feel free to substitute other nuts like hazelnuts, pecans, or macadamia nuts for the almonds or walnuts.
- Seed Variations: Chia seeds, hemp seeds, or poppy seeds can be used in place of some of the other seeds.
- Spice it Up: Add a pinch of cinnamon, cardamom, or nutmeg to the batter for a warm, spiced flavor.
- Savory Herbs: Incorporate chopped fresh herbs like rosemary, thyme, or sage for a savory twist.
- Dried Fruit: Add dried cranberries, raisins, or chopped dates for a touch of sweetness and chewiness.
FAQs (Frequently Asked Questions)
Q: Why is this bread called “Stone Age” bread?
A: The name refers to the Paleolithic or “Stone Age” diet, which emphasizes whole, unprocessed foods like nuts, seeds, and eggs, while excluding grains.
Q: Is this bread suitable for people with nut allergies?
A: No, this recipe contains a significant amount of nuts and is not suitable for individuals with nut allergies.
Q: Can I use pre-ground flaxseed instead of whole flaxseed?
A: While you can, whole flaxseed provides better texture and retains more nutrients. If using ground flaxseed, store it in the refrigerator to prevent it from going rancid.
Q: Why is my bread so dense?
A: This bread is naturally dense due to the lack of gluten and leavening agents. Ensuring proper ingredient measurements and thorough mixing can help improve the texture.
Q: How can I make this bread vegan?
A: Substituting the eggs with a flax egg mixture or a commercial egg replacer can make this bread vegan, but the texture may be slightly different.
Final Thoughts
This Nordic Stone Age bread is more than just a recipe; it’s an invitation to reconnect with simple, nourishing ingredients and a celebration of wholesome flavors. Don’t be intimidated by its rustic appearance – it’s surprisingly easy to make and incredibly rewarding to eat. Experiment with different combinations of nuts, seeds, and spices to create your own signature loaf. Share it with friends and family, and let them experience the joy of this truly special bread. Pair it with a strong cup of coffee or a glass of red wine for the ultimate indulgence. Happy baking!