
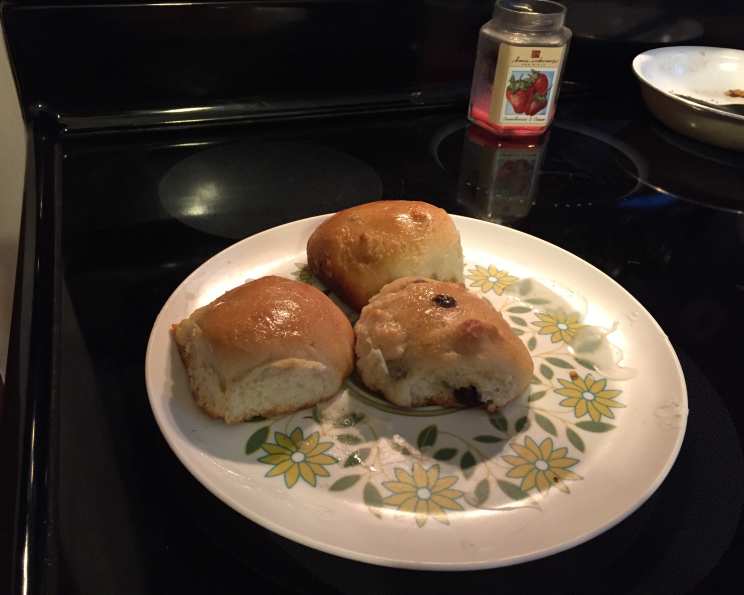
Norwegian Boller: A Taste of Home
The aroma of cardamom, sweet dough, and warm butter is an instant portal back to my childhood summers spent with my Norwegian grandmother. Every visit started the same way: a steaming plate of freshly baked boller, her weathered hands carefully arranging them on a lace-covered doily. Each bite was a comforting hug, a taste of tradition, and a reminder of her unwavering love. These aren’t just rolls; they are edible memories, woven with the warmth of family and the heart of Norway.
Recipe Overview
- Prep Time: 30 minutes
- Cook Time: 20 minutes
- Rise Time: 1 hour 30 minutes
- Total Time: 2 hours 20 minutes
- Yields: 20-24 Rolls
- Serves: 12-16
Ingredients
- 2 ½ cups milk, warmed (about 100F)
- ½ cup butter, melted
- 1 cup granulated sugar
- 2 tablespoons active dry yeast
- 1 teaspoon salt
- 2 teaspoons cardamom, ground
- 5 ½ cups all-purpose flour
- ½ cup raisins (optional)
- 1 egg white, for glazing
Equipment Needed
- Large bowl
- Measuring cups and spoons
- Mixing spoon or stand mixer
- Clean kitchen towel
- Floured surface
- Greased cookie sheet
- Pastry brush
Instructions
-
In a large bowl, combine the warm milk, melted butter, sugar, and yeast. Gently stir to combine. Let the mixture stand for about 10 minutes, or until the yeast is foamy. This step ensures the yeast is active and will properly leaven the dough.
-
Add the salt and cardamom to the yeast mixture. The cardamom is crucial for that signature boller flavor, so don’t skimp!
-
Begin adding the flour, one cup at a time, stirring well after each addition. This gradual incorporation of flour prevents clumps and ensures a smooth dough. If using a stand mixer, use the dough hook attachment.
-
If desired, stir in the raisins. Some prefer their boller plain, while others love the added sweetness and texture of raisins. This is completely up to your preference.
-
At this point, the dough will be quite sticky. Don’t be tempted to add too much flour, as this can result in dry boller.
-
Cover the bowl with a clean kitchen towel and let the dough rise in a warm place for about an hour, or until it has doubled in size. A warm oven (turned off) or a sunny spot works well.
-
Once the dough has doubled, punch it down to release the air. Turn the dough out onto a lightly floured surface.
-
Sprinkle the top of the dough with a bit more flour and knead it briefly for just a couple of minutes. Be generous with the flour on your hands to prevent the dough from sticking.
-
Break off pieces of dough, each about the size of a large golf ball. Roll each piece in your hands to create smooth, round balls.
-
Place the dough balls onto a greased cookie sheet, leaving a little space between each one to allow for expansion during the second rise.
-
Cover the cookie sheet with a clean towel and let the boller rise for another 30-40 minutes. They should puff up noticeably.
-
Preheat your oven to 350°F (175°C).
-
Gently brush the tops of the risen boller with the beaten egg white. This will give them a beautiful golden-brown color and a slightly glossy finish.
-
Bake in the preheated oven for about 20 minutes, or until the boller are golden brown. Keep a close eye on them, as ovens can vary.
-
Cool the boller on a wire rack for about 15 minutes before eating.
Expert Tips & Tricks
- Warm Milk: The temperature of the milk is important for activating the yeast. It should be warm to the touch, about 100°F (38°C). Too hot, and it will kill the yeast; too cold, and it won’t activate it properly.
- Cardamom Power: Freshly ground cardamom has the most potent flavor. If possible, grind your own from cardamom pods for the best results.
- Sticky Dough: Embrace the stickiness! Resist the urge to add too much flour. A slightly sticky dough results in softer, lighter boller.
- Even Baking: For even baking, rotate the cookie sheet halfway through the baking time.
- Make-Ahead Tip: You can prepare the dough ahead of time and let it rise in the refrigerator overnight. This slow rise develops even more flavor. Just be sure to bring the dough back to room temperature before shaping and baking.
Serving & Storage Suggestions
Norwegian boller are incredibly versatile and can be enjoyed in many ways. Serve them warm with butter, cheese and meat, or simply plain. They are also delicious with jam or a dusting of powdered sugar.
- Room Temperature: Boller are best enjoyed fresh, but they can be stored at room temperature in an airtight container for up to 2 days.
- Refrigerator: For longer storage, keep them in an airtight container in the refrigerator for up to 5 days.
- Freezer: Boller freeze well. Wrap them individually in plastic wrap and then place them in a freezer bag. They can be frozen for up to 2 months. To reheat, thaw at room temperature or warm in a low oven.
Nutritional Information
Note: Nutritional information is an estimate and may vary based on specific ingredients and portion sizes.
| Nutrient | Amount per Serving | % Daily Value |
|---|---|---|
| Calories | 382 kcal | 19% |
| Total Fat | 10 g | 13% |
| Saturated Fat | 6 g | 30% |
| Cholesterol | 27 mg | 9% |
| Sodium | 293 mg | 12% |
| Total Carbohydrate | 64 g | 23% |
| Dietary Fiber | 2 g | 7% |
| Sugars | 17 g | N/A |
| Protein | 9 g | 18% |
Variations & Substitutions
- Gluten-Free Boller: Substitute all-purpose flour with a gluten-free blend. You may need to adjust the amount of liquid.
- Dairy-Free Boller: Replace the milk with almond, soy, or oat milk and use a dairy-free butter substitute.
- Lemon or Orange Zest: Add a teaspoon of lemon or orange zest to the dough for a bright, citrusy flavor.
- Other Spices: Experiment with other spices like nutmeg or cinnamon.
- Filled Boller: Before baking, flatten each dough ball slightly and fill with a dollop of jam, Nutella, or almond paste.
FAQs (Frequently Asked Questions)
Q: Can I use instant yeast instead of active dry yeast?
A: Yes, you can. If using instant yeast, you can skip the initial proofing step and add it directly to the dry ingredients.
Q: My dough isn’t rising. What am I doing wrong?
A: Make sure your yeast is fresh and your milk is warm but not too hot. Also, the room where you’re letting the dough rise should be warm and draft-free.
Q: Can I make the boller dough in a bread machine?
A: Yes, you can. Use the dough setting on your bread machine and then follow the instructions for shaping and baking.
Q: What if I don’t have egg white for glazing?
A: You can use milk or melted butter instead. These will still give the boller a nice color, though not as glossy as egg white.
Q: Can I add a glaze after baking?
A: Absolutely! A simple powdered sugar glaze (mix powdered sugar with a little milk or lemon juice) is a delicious addition. Drizzle it over the cooled boller.
Final Thoughts
I hope this recipe brings a touch of Norwegian warmth to your kitchen. Boller are more than just rolls; they’re a symbol of comfort, tradition, and the simple pleasures of life. Don’t be afraid to experiment with different variations and make them your own. Share them with your loved ones and savor the joy of homemade goodness. Enjoy your baking and kos deg (enjoy yourself)!