
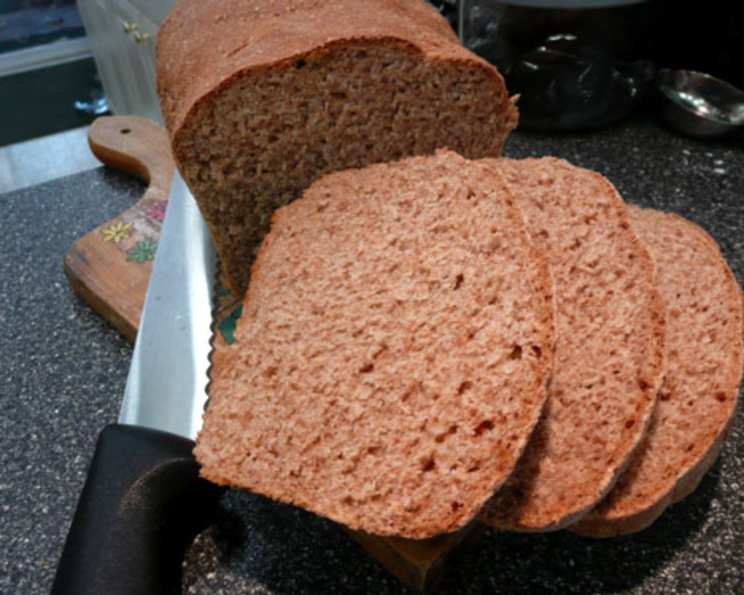
Baking Memories: Mastering the Art of Norwegian Kneip Bread
The scent of baking bread has always been, for me, the very essence of home. As a child, I remember my grandmother’s kitchen filled with the warm, yeasty aroma of something wonderful in the oven. Among the many delights she baked, it was the hearty, slightly rustic, and uniquely satisfying flavor of Kneip bread that truly captured my heart. Every slice was an edible hug, a taste of simpler times filled with family, laughter, and contentment. I’ve spent years trying to recreate that perfect loaf, and I’m thrilled to share this recipe so you can bring a little bit of that Norwegian warmth into your own kitchen.
Recipe Overview
- Prep Time: 30 minutes
- Cook Time: 45 minutes
- Total Time: 1 hour 15 minutes (plus rising time)
- Yields: 3 loaves
- Serves: 10-12
- Dietary Type: Vegetarian
Ingredients
- 8 cups all-purpose flour
- 3 cups coarse wheat flour (cracked wheat berries)
- 4 ½ teaspoons salt
- 30 g fresh yeast (or equivalent active dry yeast)
- 30 g margarine (or butter)
- 2 cups milk
- 2 cups water
Equipment Needed
- Large mixing bowl
- Measuring cups and spoons
- Small saucepan
- Clean kitchen towel
- Large greased bowl
- Floured surface
- 3 greased loaf pans
- Oven
Instructions
- In a large mixing bowl, thoroughly mix together the all-purpose flour, coarse wheat flour, and salt. This ensures even distribution of the salt throughout the dough, which is crucial for proper gluten development and flavor.
- In a separate small saucepan, combine 1 ½ cups of milk and 1 ½ cups of water. Add the margarine and heat gently over low heat until the margarine is completely melted. Be careful not to overheat the liquid; it should be warm, not scalding.
- In a separate bowl, warm the remaining ½ cup of milk and ½ cup of water until just slightly warm to the touch. Add the yeast to this warm liquid and stir gently to dissolve. Let the mixture stand for 5-10 minutes until it becomes foamy, indicating that the yeast is active. If the yeast doesn’t foam, it may be expired or the liquid was too hot, and you’ll need to start again with fresh yeast.
- Gradually add the melted milk/water/margarine mixture and the yeast mixture to the dry ingredients, mixing after each addition. Use a sturdy spoon or your hands to incorporate the wet ingredients into the dry until a shaggy dough forms.
- Flour a clean, flat surface generously. Turn the dough out onto the floured surface and knead for at least 10 minutes. Kneading is essential for developing the gluten in the flour, which gives the bread its structure and chewy texture. The dough should become smooth and elastic. If the dough is too sticky, add a little more flour, one tablespoon at a time, until it becomes manageable.
- Grease a large bowl with oil or cooking spray. Place the kneaded dough into the greased bowl, turning to coat the entire surface. This will prevent the dough from drying out as it rises. Cover the bowl with a clean kitchen towel and place it in a warm place to rise. A warm place could be near a preheating oven, in a sunny spot, or even inside a slightly warmed (then turned off) oven.
- Let the dough rise until it has doubled in bulk, which typically takes about 1-1.5 hours, depending on the temperature of your environment.
- Once the dough has doubled, turn it out onto a lightly floured surface and knead for another 5 minutes. This step helps to redistribute the yeast and even out the texture of the dough.
- Divide the dough into 3 equal portions.
- Grease three loaf pans thoroughly. Shape each portion of dough into a loaf and place it into a greased loaf pan.
- Cover the loaf pans with a clean kitchen towel and let them stand in a warm place until the dough has doubled in size again. This second rise is crucial for achieving a light and airy texture.
- Preheat your oven to 400°F (200°C).
- Bake the loaves for 45 minutes, or until they are golden brown and sound hollow when tapped on the bottom. The internal temperature should reach around 200-210°F (93-99°C).
- Remove the loaves from the oven and let them cool in the pans for about 10 minutes before transferring them to a wire rack to cool completely. This prevents the bread from becoming soggy.
Expert Tips & Tricks
- For a richer flavor, try using a combination of whole milk and cream.
- If you don’t have coarse wheat flour, you can substitute it with an equal amount of whole wheat flour or even more all-purpose flour, but the texture will be slightly different.
- To ensure even baking, rotate the loaf pans halfway through the baking time.
- For a softer crust, brush the tops of the loaves with melted butter or milk immediately after removing them from the oven.
- To check for doneness, insert a wooden skewer into the center of a loaf. If it comes out clean, the bread is done.
Serving & Storage Suggestions
Kneip bread is fantastic served warm with butter, cheese, or your favorite spread. It also makes excellent sandwiches and toast. Leftover bread can be stored at room temperature in a sealed plastic bag for up to 3 days. For longer storage, wrap the loaves tightly in plastic wrap and freeze them for up to 2 months. To reheat, thaw the bread completely and then bake it in a preheated oven at 350°F (175°C) for about 10-15 minutes, or until warmed through. You can also slice the bread and toast it.
Nutritional Information
| Nutrient | Amount per Serving | % Daily Value |
|---|---|---|
| Calories | 425.6 kcal | N/A |
| Calories from Fat | N/A | 11% |
| Total Fat | 5.3 g | 8% |
| Saturated Fat | 1.7 g | 8% |
| Cholesterol | 6.8 mg | 2% |
| Sodium | 1103.1 mg | 45% |
| Total Carbohydrate | 79.8 g | 26% |
| Dietary Fiber | 3.3 g | 13% |
| Sugars | 0.3 g | 1% |
| Protein | 13.1 g | 26% |
Note: Nutritional information is an estimate and may vary based on specific ingredients and portion sizes.
Variations & Substitutions
- Gluten-Free Kneip Bread: Substitute the all-purpose and wheat flours with a gluten-free bread flour blend. You may need to adjust the liquid content to achieve the right dough consistency.
- Vegan Kneip Bread: Ensure your margarine is plant-based or substitute with a neutral oil. Use a plant-based milk alternative like oat or almond milk.
- Seeded Kneip Bread: Add 1/2 cup of mixed seeds (sunflower, pumpkin, flax) to the dough during the kneading process for added texture and flavor.
- Spiced Kneip Bread: Add 1 teaspoon of ground cardamom or cinnamon to the dry ingredients for a warm, aromatic twist.
FAQs (Frequently Asked Questions)
Q: Can I use active dry yeast instead of fresh yeast?
A: Yes, you can. Use approximately 10g of active dry yeast instead of 30g of fresh yeast. Activate it in the warm milk/water mixture as described in the recipe.
Q: Why is my dough not rising?
A: Several factors can affect rising. Ensure your yeast is fresh, the liquid is warm (not hot), and the environment is warm enough. Also, too much salt can inhibit yeast activity.
Q: Can I make the dough ahead of time?
A: Yes, you can prepare the dough, let it rise once, and then refrigerate it for up to 24 hours. Allow it to come to room temperature before shaping and baking.
Q: How do I prevent the crust from getting too dark?
A: If the crust is browning too quickly, tent the loaves with aluminum foil during the last 15-20 minutes of baking.
Q: Can I freeze the baked bread?
A: Absolutely! Let the bread cool completely, then wrap it tightly in plastic wrap and freeze it for up to 2 months. Thaw completely before reheating.
Final Thoughts
I hope this recipe inspires you to create your own memories with a loaf of homemade Kneip bread. It’s more than just a recipe; it’s a connection to heritage, a symbol of warmth, and a delicious reminder of the simple pleasures in life. Don’t be afraid to experiment with variations and make it your own. And most importantly, enjoy the process! I’d love to hear your experiences and any creative twists you add to this classic recipe. Happy baking!