
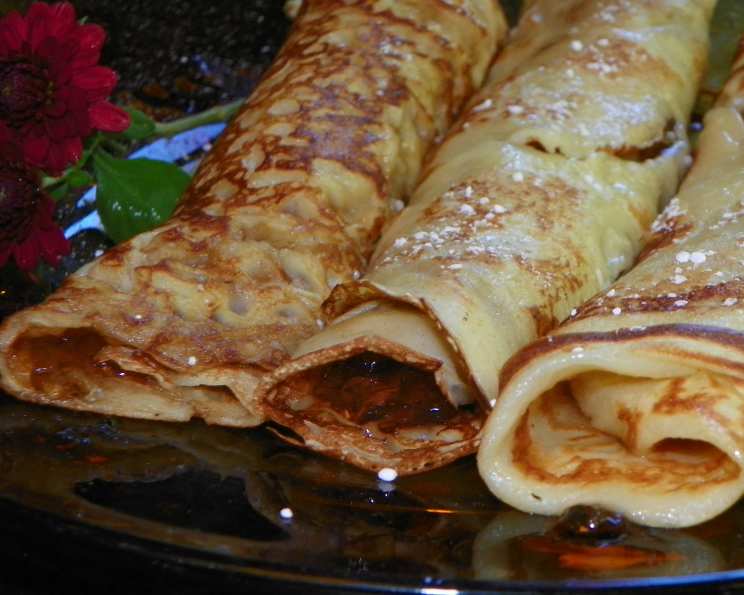
Norwegian Thin Pancakes: A Taste of Home
The scent of these pancakes always takes me back to my grandmother’s kitchen. Sunlight streamed through the lace curtains, illuminating the cloud of flour dust that perpetually hung in the air as she worked. She’d hum a quiet tune, flipping the delicate rounds with practiced ease. Each bite was a warm, comforting hug, a taste of simple joys and unwavering love. These pancakes, called pannekaker in Norwegian, are more than just a breakfast staple; they are a tangible piece of my heritage.
Recipe Overview
- Prep Time: 5 minutes
- Cook Time: 20 minutes
- Total Time: 25 minutes
- Servings: 4
- Yield: Approximately 12 pancakes
- Dietary Type: Can be made Dairy-Free
Ingredients
- 2 eggs
- ½ tablespoon granulated sugar
- 3 cups milk (dairy or non-dairy alternative)
- ¼ teaspoon salt
- 1 ¼ cups white flour
- Butter, for greasing the pan
Equipment Needed
- Mixing Bowl
- Whisk
- Measuring Cups and Spoons
- 7-inch Skillet or Crepe Pan
- Ladle or Measuring Cup (for pouring batter)
- Spatula
Instructions
- Begin by combining the eggs and granulated sugar in a mixing bowl. Beat them together thoroughly until the mixture is light and slightly frothy. This step helps incorporate air into the batter, resulting in a slightly more tender pancake.
- Gradually add the milk and salt to the egg mixture. Whisk continuously to ensure a smooth, homogenous blend. The milk provides the necessary liquid for the batter, while the salt enhances the other flavors.
- Now, add the flour to the wet ingredients. It is crucial to add the flour gradually while continuously mixing to prevent lumps from forming. Whisk until the batter is smooth and free of any clumps. Don’t overmix, as this can develop the gluten in the flour and result in tough pancakes. A few small lumps are okay, they will dissolve during the resting period.
- Allow the batter to rest for approximately 20 minutes at room temperature. This resting period allows the gluten in the flour to relax, resulting in more tender pancakes. It also gives the flour time to fully absorb the liquid, creating a smoother, more cohesive batter.
- While the batter rests, prepare your skillet or crepe pan. Place it over medium-high heat and allow it to heat up completely. The pan should be hot enough that a drop of water flicked onto the surface evaporates almost instantly.
- Once the skillet is hot, lightly grease it with butter. You don’t need a lot of butter – just enough to prevent the pancakes from sticking. Too much butter can make the pancakes greasy. For subsequent pancakes, you may need to re-grease the pan as needed.
- Using a ladle or measuring cup, pour 2 to 3 tablespoons of batter into the hot, buttered skillet. Immediately tilt the skillet around so that the batter spreads out evenly, forming a thin, 7-inch diameter pancake. The key to these pancakes is their thinness, so be sure to spread the batter quickly and evenly.
- The batter will begin to firm up relatively quickly as it cooks. Watch closely, as the cooking time can vary depending on the heat of your skillet.
- When the first side is golden brown and the edges begin to lift slightly, carefully flip the pancake with a spatula.
- Brown the other side for a similar amount of time, until it is also golden brown.
- Remove the cooked pancake from the skillet and place it on a plate.
- Repeat steps 6-11 with the remaining batter, stacking the cooked pancakes on a plate as you go.
- Serve immediately with your favorite toppings.
Expert Tips & Tricks
- Batter Consistency: If the batter seems too thick after resting, add a tablespoon or two of milk to thin it out. The batter should be thin enough to spread easily in the pan but not so thin that it becomes watery.
- Skillet Temperature: Maintaining the correct skillet temperature is essential for achieving perfectly browned pancakes. If the skillet is too hot, the pancakes will burn before they cook through. If it’s not hot enough, the pancakes will be pale and greasy. Adjust the heat as needed throughout the cooking process.
- Butter Application: Instead of pouring butter directly into the pan each time, try melting the butter in a small bowl and brushing it onto the pan with a pastry brush. This allows for more precise and even butter application.
- Keeping Pancakes Warm: To keep the pancakes warm while you cook the rest of the batter, preheat your oven to a low temperature (around 200°F or 95°C) and place the cooked pancakes on a baking sheet in the oven.
- Flavor Infusion: Experiment with adding a dash of vanilla extract, almond extract, or lemon zest to the batter for a subtle flavor boost.
- Lacy Edges: For extra crispy and lacy edges, use a slightly higher heat and don’t be afraid to let the edges of the pancake get a little brown.
Serving & Storage Suggestions
Norwegian thin pancakes are traditionally served hot with a simple combination of butter and sugar, or with a dollop of your favorite jelly or jam. They are also delicious with fresh fruit, whipped cream, or a sprinkle of cinnamon.
Leftover pancakes can be stored in an airtight container in the refrigerator for up to 3 days. To reheat, simply warm them in a skillet over medium heat or microwave them for a few seconds. You can also freeze the pancakes for longer storage. To freeze, place the pancakes in a single layer on a baking sheet and freeze until solid. Then, transfer them to a freezer-safe bag or container. Frozen pancakes can be reheated directly from the freezer in a skillet, microwave, or toaster.
Nutritional Information
| Nutrient | Amount per Serving | % Daily Value |
|---|---|---|
| Calories | 210 kcal | 11% |
| Total Fat | 7g | 9% |
| Saturated Fat | 4g | 20% |
| Cholesterol | 80mg | 27% |
| Sodium | 150mg | 7% |
| Total Carbohydrate | 30g | 11% |
| Dietary Fiber | 1g | 4% |
| Sugars | 5g | – |
| Protein | 7g | 14% |
Nutritional information is an estimate and can vary based on specific ingredients and cooking methods.
Variations & Substitutions
- Dairy-Free: Substitute the milk with your favorite non-dairy alternative, such as almond milk, soy milk, or oat milk. Ensure the non-dairy milk is unsweetened for best results.
- Gluten-Free: Use a gluten-free flour blend in place of the all-purpose flour. Be sure to choose a blend that is designed for baking and contains xanthan gum or another binding agent.
- Whole Wheat: Substitute up to half of the white flour with whole wheat flour for a nuttier flavor and increased fiber content.
- Lemon Ricotta: After cooking, spread each pancake with a mixture of ricotta cheese, lemon zest, and a drizzle of honey for a delicious and refreshing treat.
- Savory Pancakes: Omit the sugar from the batter and add a pinch of herbs like thyme or rosemary. Serve with savory toppings like smoked salmon, cream cheese, or sautéed vegetables.
- Berry Pancakes: Add fresh or frozen berries to the batter for a burst of fruity flavor.
FAQs (Frequently Asked Questions)
Q: Why is my pancake batter lumpy?
A: Lumps often occur when flour isn’t fully incorporated into the wet ingredients. Resting the batter helps, but whisk thoroughly while gradually adding the flour to minimize lumps.
Q: How do I prevent the pancakes from sticking to the pan?
A: Ensure your skillet is properly heated before adding the batter, and lightly grease the pan with butter or oil. Non-stick pans work best for this recipe.
Q: Can I make the batter ahead of time?
A: Yes, you can prepare the batter up to 24 hours in advance and store it in the refrigerator. Whisk well before using.
Q: My pancakes are burning before they cook through. What am I doing wrong?
A: Your skillet is likely too hot. Reduce the heat to medium or medium-low and continue cooking the pancakes until they are golden brown on both sides.
Q: How do I make the pancakes thinner?
A: Add a little more milk to the batter until it reaches a thinner consistency. Also, make sure you are spreading the batter thinly and evenly in the skillet.
Final Thoughts
These Norwegian thin pancakes are a testament to the beauty of simple ingredients and time-honored traditions. They are incredibly easy to make, yet they deliver a taste that is both comforting and satisfying. I encourage you to try this recipe and experience the warmth and joy that these pancakes bring. Feel free to experiment with different toppings and variations to create your own family favorites. And, of course, I’d love to hear your feedback and see your creations! Vel bekomme! (Enjoy your meal!)