
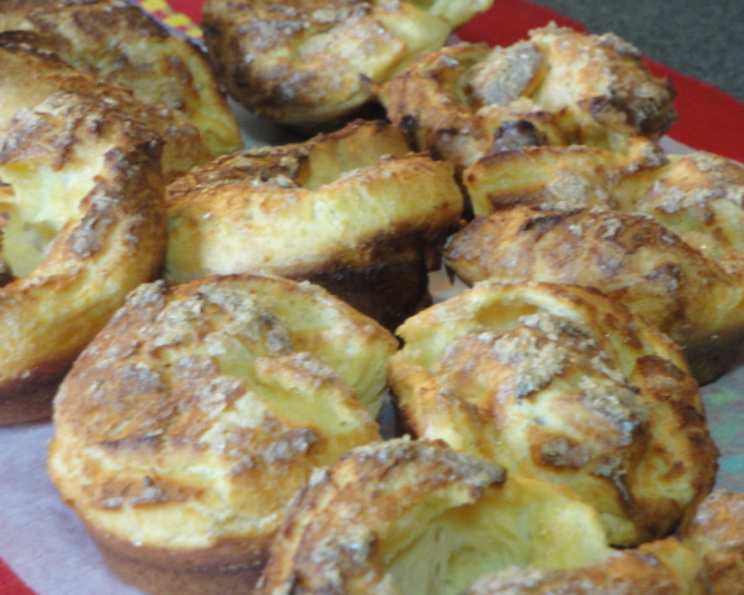
Nun’s Puffs: A Culinary Secret Revealed
The first time I tasted a Nun’s Puff, I was visiting a small monastery nestled in the rolling hills of Tuscany. The air was thick with the scent of lavender and freshly baked bread. Sister Agnes, her face etched with a lifetime of prayer and flour dust, presented me with a basket of these golden, airy delights. The first bite was pure magic—a delicate crispness giving way to a soft, eggy interior. It was a flavor I’ve chased ever since, and now, I’m thrilled to share my perfected version of this heavenly treat with you.
Recipe Overview
- Prep Time: 15 minutes
- Cook Time: 30 minutes
- Total Time: 45 minutes
- Servings: 12
- Yield: 12 puffs
- Dietary Type: Not Vegetarian
Ingredients
- 8 tablespoons unsalted butter
- 1 cup milk
- 1/4 teaspoon salt
- 1/2 teaspoon vanilla
- 3/4 cup flour
- 4 large eggs
- 12 pinches sugar, for dusting (turbinado or granulated)
Equipment Needed
- Large saucepan
- Fork or whisk
- Mixing bowl
- 12-cup muffin tin
- #9 disher (optional, for uniform scoops)
Instructions
-
Begin by melting the butter in a large saucepan over medium-high heat. Watch carefully to ensure the butter melts evenly without browning.
-
Pour the milk into the saucepan with the melted butter, and add the salt. Stir continuously to combine the ingredients thoroughly. Allow the mixture to come to a boil; you’ll notice a frothy head forming on the surface. This indicates that the mixture is ready for the next step.
-
Remove the saucepan from the heat momentarily, and add all of the flour at once. Using a fork or a sturdy whisk, vigorously stir the flour into the butter-milk mixture until a loose ball of dough begins to form. Continue stirring the dough over low heat for an additional 1 to 2 minutes. This step is crucial for cooking out some of the flour’s raw taste and helping the dough come together. The dough should be smooth and pull away from the sides of the pan.
-
Scrape the dough ball out of the saucepan and into a mixing bowl. Allow the dough to sit at room temperature for approximately 5 minutes. This cooling period is essential, as it prevents the eggs from cooking when you incorporate them later.
-
Now, add the eggs one at a time to the slightly cooled dough. After each addition, thoroughly stir the egg into the mixture until it is completely smooth and homogenous. Ensure each egg is fully incorporated before adding the next; this will result in a light and airy puff. The dough will appear slightly loose at first, but it will come together with each added egg. The vanilla extract should be added along with the last egg.
-
Preheat your oven to 375 degrees Fahrenheit (190 degrees Celsius). It’s important to have the oven fully preheated before baking to ensure the puffs rise properly.
-
Generously coat a 12-cup muffin tin with butter, paying particular attention to the area around the mouth of each cup. This will prevent the puffs from sticking and help them rise evenly. If you have a #9 disher (an ice cream scoop with a lever), grease it thoroughly as well.
-
Using the disher or a spoon, scoop approximately half a scoop of the batter into each prepared muffin cup. Be careful not to overfill the cups, as the puffs will expand significantly during baking.
-
Dust the top of each puff with a small pinch of sugar. Turbinado sugar works exceptionally well for this, as its larger crystals provide a delightful crunch. However, granulated sugar is also suitable.
-
Carefully slide the muffin tin into the preheated oven and bake for 30 minutes. Monitor the puffs closely; they are ready when they have more than doubled in size and are a rich, golden brown color. Avoid opening the oven door during the first 20 minutes of baking to prevent the puffs from deflating.
-
Once the puffs are baked and golden brown, remove the muffin tin from the oven. Immediately poke each puff with a fork to release the steam. This prevents the insides from becoming soggy as they cool.
-
Carefully remove each puff from the muffin tin and allow them to cool slightly on a wire rack before serving. They are best enjoyed warm.
Expert Tips & Tricks
- Dough Consistency is Key: The dough should be smooth and elastic after incorporating the eggs. If it appears curdled, continue stirring until it comes together.
- Oven Temperature: Accurate oven temperature is crucial for achieving the perfect rise. Use an oven thermometer to verify your oven’s accuracy.
- Don’t Open the Oven Door: Resist the temptation to peek! Opening the oven door during baking can cause the puffs to collapse.
- Make Ahead: The batter can be made ahead of time and stored in the refrigerator for up to 24 hours. Bring to room temperature before baking.
- Flavor Infusion: Add a zest of lemon or orange to the batter for a subtle citrus flavor.
Serving & Storage Suggestions
Serve Nun’s Puffs warm, ideally within a few hours of baking. They pair perfectly with a dusting of powdered sugar, a drizzle of honey, or a side of fresh berries and whipped cream.
Leftover puffs can be stored in an airtight container at room temperature for up to 2 days, although they are best consumed fresh. To reheat, place them in a preheated 350°F (175°C) oven for a few minutes until warmed through. Avoid microwaving, as this can make them soggy. They can also be frozen for up to 1 month. Thaw completely at room temperature before reheating.
Nutritional Information
| Nutrient | Amount per Serving | % Daily Value |
|---|---|---|
| Calories | 133.7 kcal | N/A |
| Calories from Fat | N/A | 68% |
| Total Fat | 10.1 g | 15% |
| Saturated Fat | 5.9 g | 29% |
| Cholesterol | 85.2 mg | 28% |
| Sodium | 83.3 mg | 3% |
| Total Carbohydrate | 7.1 g | 2% |
| Dietary Fiber | 0.2 g | 0% |
| Sugars | 0.1 g | 0% |
| Protein | 3.6 g | 7% |
Variations & Substitutions
- Gluten-Free Nun’s Puffs: Substitute the all-purpose flour with a gluten-free all-purpose blend. Ensure the blend contains xanthan gum for proper binding.
- Dairy-Free Nun’s Puffs: Use your favorite dairy-free milk alternative (almond, soy, or oat milk) and a dairy-free butter substitute.
- Savory Nun’s Puffs: Omit the sugar dusting and add herbs like rosemary, thyme, or chives to the batter for a savory twist.
- Chocolate Nun’s Puffs: Add a tablespoon of cocoa powder to the flour mixture for a chocolatey flavor.
FAQs (Frequently Asked Questions)
Q: Why did my puffs not rise properly?
A: Several factors can contribute to this, including using cold eggs, not having the oven hot enough, or opening the oven door too early. Ensure your ingredients are at room temperature and your oven is properly preheated.
Q: Can I use a different type of sugar for dusting?
A: Yes, you can use granulated sugar, powdered sugar, or even a sprinkle of cinnamon sugar.
Q: The inside of my puffs is still a bit doughy. What did I do wrong?
A: This can happen if the puffs aren’t baked long enough or if the oven temperature is too low. Ensure the puffs are golden brown and firm to the touch before removing them from the oven.
Q: Can I add fillings to these puffs?
A: Absolutely! Once cooled, you can slice them open and fill them with pastry cream, whipped cream, or even a savory filling like cream cheese and smoked salmon.
Q: How do I prevent the puffs from sticking to the muffin tin?
A: Generously buttering the muffin tin is key. You can also use muffin liners for added insurance.
Final Thoughts
Nun’s Puffs are more than just a breakfast treat; they’re a delightful culinary experience. I hope this recipe inspires you to recreate a little piece of Tuscan magic in your own kitchen. Don’t be afraid to experiment with variations and flavors to make them your own. Share your creations with friends and family, and let me know how they turn out! Buon appetito!