
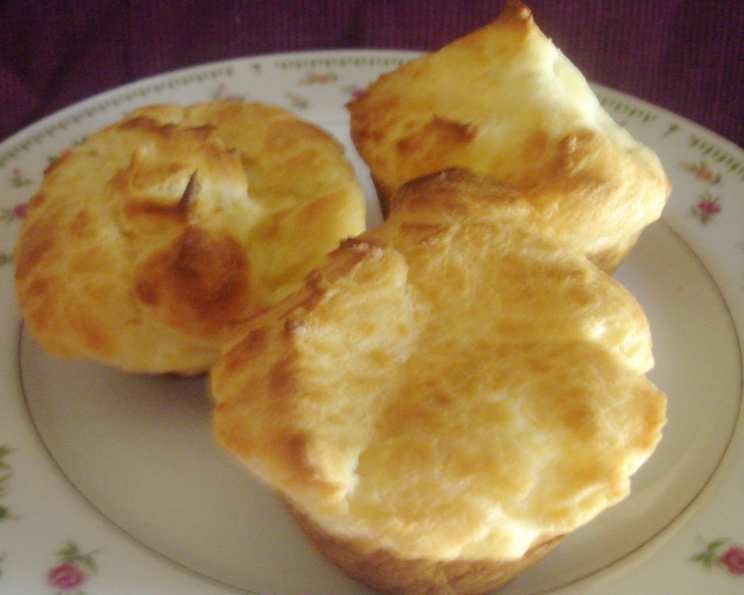
Nun’s Puffs With Cream: A Taste of Heavenly Delight
The first time I tasted Nun’s Puffs, I was a young culinary student, and a dear old woman, Mrs. Rossi, had brought them to our class potluck. The airy, eggy clouds, topped with a swirl of homemade whipped cream and a drizzle of golden honey, were unlike anything I had ever tasted. I remember closing my eyes, savoring the delicate sweetness, and feeling like I had just taken a bite of pure sunshine. They’ve been a comfort food staple in my repertoire ever since, a reminder of the simple joys in life and the power of a truly delicious treat.
Recipe Overview
- Prep Time: 15 minutes
- Cook Time: 30 minutes
- Total Time: 45 minutes
- Servings: 12
- Yield: 12 puffs
- Dietary Type: Not Gluten-Free
Ingredients
- ½ cup butter or margarine
- 1 cup milk
- ¾ cup all-purpose flour
- 4 eggs
- 1 tablespoon white sugar
- Whipped cream, for serving (or honey, for serving)
Equipment Needed
- 12-cup muffin tin
- Medium saucepan
- Whisk
- Mixing bowl
- Electric mixer (optional, but helpful)
Instructions
- Preheat your oven to 375°F (190°C).
- Thoroughly grease a 12-cup muffin tin. Make sure to grease not only the bottoms and sides of the cups, but also the area around the top of each cup to prevent sticking as the puffs rise. Do NOT use paper muffin cups for this recipe, as they will not work.
- In a medium saucepan, melt ½ cup of butter or margarine over medium heat.
- Add 1 cup of milk to the melted butter and bring the mixture to a boil.
- Remove the saucepan from the heat and add ¾ cup of all-purpose flour all at once.
- Stir the mixture vigorously with a whisk or wooden spoon until it forms a smooth ball that pulls away from the sides of the saucepan. The dough should not separate and should be cohesive.
- Cool the dough for 5 minutes. This is crucial to prevent the eggs from cooking when you add them.
- One at a time, add the 4 eggs to the cooled dough, beating for 1 minute after each egg is added until the mixture is smooth and well combined. An electric mixer can be helpful for this step, but it’s perfectly doable by hand. The batter will look a little curdled at first, but keep beating, and it will come together.
- Divide the dough evenly among the prepared muffin cups. Don’t worry if the cups aren’t completely full; the puffs will rise significantly during baking.
- Sprinkle the tops of the puffs with 1 tablespoon of white sugar. This will give them a nice, golden-brown crust.
- Bake for approximately 30 minutes, or until the puffs are golden brown and well-puffed. Keep an eye on them; ovens vary, so the baking time may need to be adjusted slightly.
- Remove the muffin tin from the oven and carefully remove the puffs from the pan.
- Plop a generous dollop of whipped cream on top of each puff and serve immediately. Alternatively, you can drizzle honey over the tops for a different flavor profile.
Expert Tips & Tricks
- Don’t skip the cooling step: Allowing the dough to cool slightly before adding the eggs is crucial. If the dough is too hot, the eggs will scramble, and the puffs won’t rise properly.
- Be patient with the egg incorporation: As mentioned above, the batter might look a little curdled when you first add the eggs. Don’t panic! Just keep beating, and it will eventually become smooth.
- Don’t open the oven door too early: Opening the oven door during baking can cause the puffs to deflate. Resist the urge to peek until they are almost done.
- For a richer flavor, use brown butter: Brown the butter before adding the milk for a nuttier, more complex flavor. Be careful not to burn the butter.
- Add a touch of vanilla extract: A teaspoon of vanilla extract added to the dough can enhance the flavor of the puffs.
Serving & Storage Suggestions
These puffs are best served warm and fresh, right out of the oven. The texture is at its peak when they are newly baked, with a crisp exterior and a light, airy interior.
If you have any leftovers, store them in an airtight container at room temperature for up to a day. However, they are best enjoyed on the same day they are baked, as they tend to lose their crispness over time.
Reheating is not recommended, as it can make them tough and rubbery. If you must reheat them, do so in a low oven (around 300°F) for a few minutes.
Nutritional Information
| Nutrient | Amount per Serving | % Daily Value |
|---|---|---|
| Calories | 137.8 kcal | N/A |
| Calories from Fat | 91g | 66% |
| Total Fat | 10.2 g | 15% |
| Saturated Fat | 5.8 g | 29% |
| Cholesterol | 93.7 mg | 31% |
| Sodium | 87.9 mg | 3% |
| Total Carbohydrate | 8.1 g | 2% |
| Dietary Fiber | 0.2 g | 0% |
| Sugars | 1.2 g | 4% |
| Protein | 3.6 g | 7% |
Note: Nutritional information is an estimate and may vary based on specific ingredients and preparation methods.
Variations & Substitutions
- Savory Nun’s Puffs: Omit the sugar and add a pinch of salt and some grated Parmesan cheese to the dough for a savory twist. Fill with a creamy cheese sauce or serve alongside soup.
- Gluten-Free Nun’s Puffs: Substitute the all-purpose flour with a gluten-free all-purpose flour blend. Be sure to choose a blend that contains xanthan gum for best results.
- Lemon Nun’s Puffs: Add the zest of one lemon to the dough for a bright, citrusy flavor.
- Chocolate Nun’s Puffs: Add 2 tablespoons of cocoa powder to the dough for a chocolatey treat. Drizzle with melted chocolate instead of honey or whipped cream.
- Spice it up: Add a pinch of cinnamon or nutmeg to the dough for a warm, comforting flavor.
FAQs (Frequently Asked Questions)
Q: Why are these called Nun’s Puffs?
A: The origin of the name “Nun’s Puffs” is somewhat obscure. It’s believed that the name may be linked to monasteries or convents where similar pastries were originally made, or simply reflects their light, airy, and almost ethereal texture.
Q: Can I make these ahead of time?
A: While Nun’s Puffs are best enjoyed fresh, you can prepare the batter ahead of time and store it in the refrigerator for up to 24 hours. Let the batter come to room temperature before baking.
Q: Can I freeze these puffs?
A: Freezing is not recommended as it affects the texture. They will become soggy upon thawing.
Q: My puffs didn’t rise properly. What went wrong?
A: Several factors can cause puffs not to rise. Make sure you didn’t open the oven door too early, that the dough wasn’t too hot when you added the eggs, or that you didn’t overmix the batter. Also, ensure your baking powder (if added for a variation) is fresh.
Q: Can I use a different type of milk?
A: Yes, you can use other types of milk, such as almond milk or oat milk, although the flavor and texture might be slightly different. Dairy milk will provide the richest flavor and texture.
Final Thoughts
Nun’s Puffs are a delightful treat that are surprisingly easy to make. Their light, airy texture and delicate flavor make them a perfect dessert for any occasion. Don’t be afraid to experiment with different flavor combinations and toppings to create your own signature version. Whether you enjoy them with a dollop of whipped cream, a drizzle of honey, or a dusting of powdered sugar, these puffs are sure to bring a smile to your face. I encourage you to give this recipe a try and share your creations with friends and family. And don’t forget to let me know what you think! Bon appétit!