
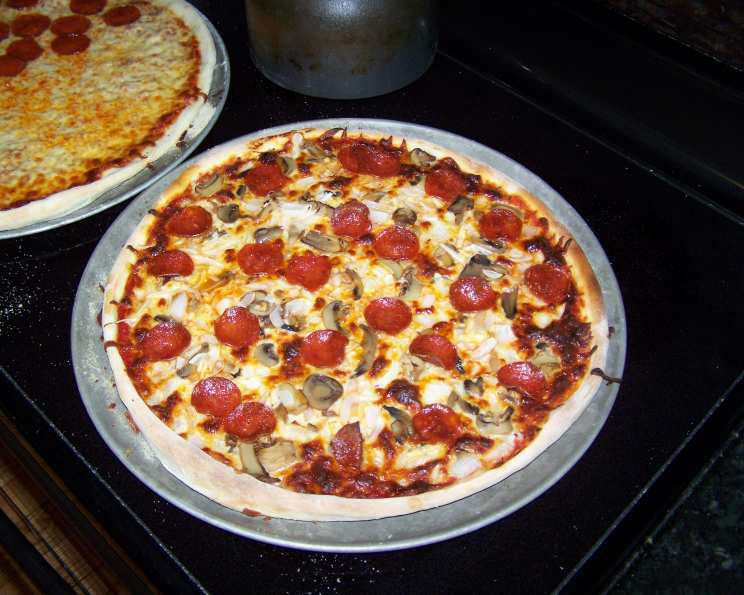
Mastering the New York Slice: A Chef’s Guide to Homemade Pizza Dough
The scent of baking pizza is more than just a smell; it’s a time machine. One whiff, and I’m instantly transported back to my college days, crammed into a tiny, bustling pizzeria in the East Village. The air was thick with steam, the ovens roared like dragons, and the pizzaiolos, with flour-dusted aprons and tireless hands, spun dough with a grace that bordered on magic. I was always trying to replicate that perfect, chewy yet crisp crust at home, a quest that led to countless experiments—some triumphant, others destined for the compost bin. But finally, I found the recipe that captures the soul of a true New York slice.
Recipe Overview
- Prep Time: 30 minutes
- Cook Time: 20-25 minutes
- Total Time: 1 hour 50 minutes (including proofing)
- Servings: 4
- Yield: 2 15-inch pizzas
- Dietary Type: Vegetarian
Ingredients
- 1 1⁄2 cups warm water (105F)
- 4 1⁄2 cups all-purpose flour
- 1 tablespoon olive oil
- 2 1⁄2 teaspoons granulated sugar
- 2 1⁄2 teaspoons salt
- 1⁄2 teaspoon yeast
- 1⁄2 cup cornmeal
Equipment Needed
- Large mixing bowl
- Heavy spoon or stand mixer
- Clean work surface
- Plastic wrap
- Pizza peel or cutting board
- Pizza stone or pizza pan
Instructions
-
In a large bowl, dissolve the sugar and salt in the warm water. Ensure the water isn’t too hot, as this can kill the yeast. The ideal temperature is around 105°F (40°C).
-
Add the olive oil and flour to the bowl. Use a heavy spoon to stir the ingredients together for about 1 minute, until a shaggy dough begins to form. Alternatively, you can use a stand mixer with a dough hook attachment.
-
Turn the dough out onto a lightly floured surface and press it into a circle.
-
Sprinkle the yeast evenly over the surface of the dough circle.
-
Knead the dough for 12 minutes. This is crucial for developing the gluten, which gives the pizza its characteristic chew. If using a stand mixer, knead on medium speed for the same amount of time. The dough should become smooth and elastic. If the dough sticks while kneading, add a bit more flour a tablespoon at a time.
-
Divide the dough into portions. For calzones, use 6 oz portions. For a 12-inch pizza, use 18 oz portions, and for a 15-inch pizza, use 25 oz portions.
-
Roll each portion into a ball. Aim for a smooth, round dough ball with no visible seams except on the bottom.
-
Place the dough balls in a bowl, cover with plastic wrap, and allow them to proof for 1 to 2 hours at room temperature if you plan to use them the same day. Alternatively, store them in the refrigerator to use the next day. This slow fermentation in the refrigerator develops more complex flavors in the dough.
-
When ready to make your pizza, place a dough ball on a lightly floured surface, and lightly flour the top of the dough as well.
-
Use your fingertips to evenly flatten out the dough ball. Work from the edges to the center, pressing the dough into a 12-inch circle (or desired size). Place both hands within the shell edge and stretch with fingertips and palms, maintaining even pressure. Alternatively, you can use a lightly floured rolling pin to stretch the dough to your desired shape.
-
Sprinkle cornmeal or semolina on a pizza peel (a wooden paddle with a handle to slide the pizza in the oven) or a cutting board. The cornmeal acts as tiny ball bearings, allowing the pizza to slide onto the hot stone easily.
-
After topping the pizza with your favorite ingredients, and when you are ready to cook it, gently shake the peel or cutting board to ensure that none of the dough is sticking. If it sticks, carefully lift the dough and sprinkle more cornmeal underneath.
-
Carefully slide the pizza onto the preheated pizza stone in the oven.
-
Bake in a 500°F (260°C) oven for 20-25 minutes, or until the crust is golden brown and the cheese is melted and bubbly. Watch the pizza closely during the last few minutes of baking to prevent burning.
Expert Tips & Tricks
- The water temperature is critical: If the water is too hot, it will kill the yeast. If it’s too cold, the yeast won’t activate properly. Use a thermometer to ensure the water is around 105°F (40°C).
- Don’t skip the kneading: Kneading develops the gluten, which gives the pizza its signature chew. A well-kneaded dough will be smooth, elastic, and easy to stretch.
- Proofing is key: Allowing the dough to proof gives the yeast time to work its magic, creating a light and airy crust. You can proof the dough at room temperature for a faster rise or in the refrigerator for a longer, slower rise. The refrigerator method develops a more complex flavor.
- Use a pizza stone: A pizza stone helps to create a crispy crust by distributing heat evenly. Preheat the stone in the oven for at least 30 minutes before baking the pizza. If you don’t have a pizza stone, you can use a pizza pan, but the crust may not be as crispy.
- Don’t overload the pizza: Too many toppings can weigh down the crust and make it soggy. Less is often more when it comes to pizza toppings.
Serving & Storage Suggestions
Serve your freshly baked New York-style pizza immediately for the best flavor and texture. Garnish with fresh basil or a sprinkle of red pepper flakes, if desired.
Leftover pizza can be stored in the refrigerator for up to 3 days. To reheat, preheat the oven to 350°F (175°C) and bake the pizza for 10-15 minutes, or until heated through. You can also reheat pizza in a skillet on the stovetop for a crispy crust. For longer storage, you can freeze leftover pizza slices. Wrap them individually in plastic wrap and then place them in a freezer bag. Frozen pizza can be reheated in the oven or microwave.
Nutritional Information
| Nutrient | Amount per Serving | % Daily Value |
|---|---|---|
| Calories | 608.5 kcal | N/A |
| Calories from Fat | 47 g | N/A |
| Total Fat | 5.3 g | 8% |
| Saturated Fat | 0.8 g | 3% |
| Cholesterol | 0 mg | 0% |
| Sodium | 1463.7 mg | 60% |
| Total Carbohydrate | 121.8 g | 40% |
| Dietary Fiber | 5 g | 20% |
| Sugars | 3.1 g | N/A |
| Protein | 16 g | 31% |
Variations & Substitutions
- Whole Wheat Pizza Dough: Substitute up to half of the all-purpose flour with whole wheat flour for a nuttier flavor and added fiber.
- Gluten-Free Pizza Dough: Use a gluten-free all-purpose flour blend to make a gluten-free version of this recipe. You may need to adjust the amount of water depending on the blend you use.
- Herb-Infused Dough: Add 1-2 tablespoons of dried herbs such as oregano, basil, or rosemary to the dough for extra flavor.
- Spicy Pizza Dough: Add a pinch of red pepper flakes to the dough for a touch of heat.
FAQs (Frequently Asked Questions)
Q: Why is my pizza dough tough?
A: Over-kneading or using too much flour can result in a tough dough. Be sure to knead the dough for the recommended amount of time (12 minutes) and add flour sparingly.
Q: Can I make the dough ahead of time?
A: Yes! In fact, making the dough ahead of time and allowing it to proof in the refrigerator for 24-48 hours will develop a more complex flavor.
Q: My pizza is sticking to the peel. What should I do?
A: Make sure you use plenty of cornmeal or semolina on the pizza peel to prevent sticking. You can also gently lift the edges of the dough and sprinkle more cornmeal underneath.
Q: How do I get a crispy crust?
A: Preheat your pizza stone in the oven for at least 30 minutes before baking the pizza. Also, make sure your oven is hot enough (500°F/260°C).
Q: Can I freeze the pizza dough?
A: Yes, you can freeze the dough after it has been proofed. Wrap each dough ball tightly in plastic wrap and then place them in a freezer bag. Thaw the dough in the refrigerator overnight before using.
Final Thoughts
This New York-style pizza dough recipe is a labor of love, but the reward is a truly exceptional pizza that rivals anything you can find in a restaurant. Don’t be afraid to experiment with different toppings and flavors to create your own signature pizza. And most importantly, have fun! Making pizza should be a joyful experience, so gather your friends and family, crank up the music, and get ready to enjoy the taste of homemade goodness. I encourage you to try this recipe and share your creations – and any helpful tweaks you’ve made – with fellow pizza enthusiasts!