
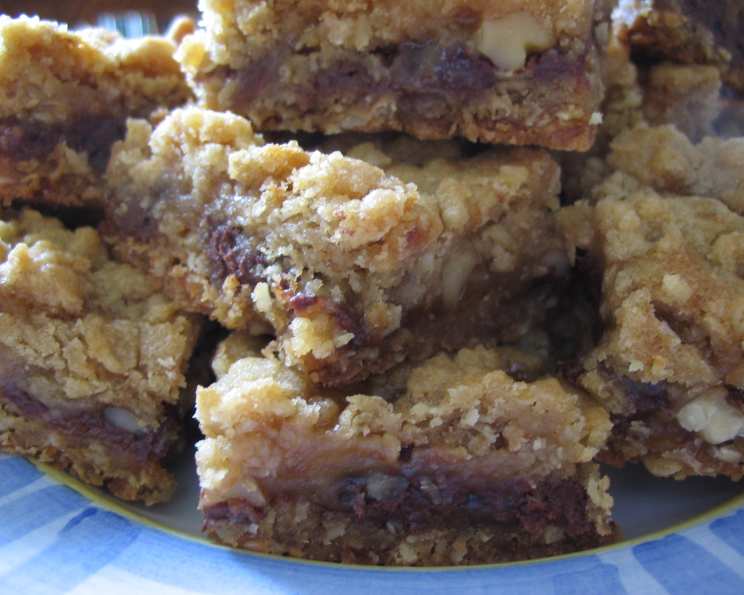
Oatmeal Carmelitas: A Symphony of Oats, Caramel, and Chocolate
Carmelitas. The name itself evokes feelings of warmth, comfort, and a hint of indulgence. I remember my grandmother making these every holiday season. The aroma of oats, brown sugar, and melting caramel would fill her kitchen, a fragrant promise of the deliciousness to come. We kids would hover around, eager to sneak a taste of the still-warm bars, each bite a little piece of holiday magic. This recipe, passed down through generations, remains a cherished family favorite, a simple yet satisfying treat that brings back those precious memories with every mouthful.
Recipe Overview
- Prep Time: 20 minutes
- Cook Time: 32 minutes
- Total Time: 2 hours 32 minutes (includes cooling time)
- Servings: ~36 bars
- Yield: One 13×9 inch pan
- Dietary Type: Vegetarian
Ingredients
For the Crust:
- 2 cups all-purpose flour
- 2 cups quick-cooking rolled oats
- 1 1/2 cups firmly packed brown sugar
- 1 teaspoon baking soda
- 1/2 teaspoon salt
- 1 1/4 cups margarine or butter, softened
For the Filling:
- 1 (12 1/2 ounce) jar caramel ice cream topping (about 1 cup)
- 3 tablespoons all-purpose flour
- 1 (6 ounce) package semi-sweet chocolate chips (about 1 cup)
- 1/2 cup chopped nuts (such as pecans or walnuts)
Equipment Needed
- 13×9 inch baking pan
- Large mixing bowl
- Small mixing bowl
- Measuring cups and spoons
- Electric mixer (optional, but recommended)
- Rubber spatula or wooden spoon
Instructions
- Preheat your oven to 350°F (175°C).
- Grease a 13×9 inch baking pan thoroughly. This will prevent the Carmelitas from sticking and ensure easy removal.
- In a large bowl, combine the all-purpose flour, quick-cooking rolled oats, firmly packed brown sugar, baking soda, and salt.
- Add the softened margarine or butter to the dry ingredients.
- Using an electric mixer on low speed or a pastry blender, blend the ingredients together until the mixture is crumbly. It should resemble coarse sand.
- Press half of the crumb mixture (approximately 3 cups) evenly into the bottom of the greased baking pan. Use your fingers or the back of a spoon to create a firm, compact crust.
- Reserve the remaining crumb mixture for the topping.
- Bake the crust in the preheated oven for 10 minutes. This par-baking ensures a sturdy base for the filling.
- While the crust is baking, prepare the caramel filling. In a small bowl, combine the caramel ice cream topping and the 3 tablespoons of all-purpose flour. Mix well until smooth and well-combined. The flour helps to thicken the caramel as it bakes.
- Once the crust is removed from the oven, sprinkle the warm crust evenly with the semi-sweet chocolate chips and the chopped nuts.
- Drizzle the caramel mixture evenly over the chocolate chips and nuts. Try to cover as much of the surface as possible for a rich caramel flavor in every bite.
- Sprinkle the reserved crumb mixture evenly over the caramel layer. Gently press the crumbs down so they adhere slightly to the caramel.
- Return the pan to the oven and bake for an additional 18 to 22 minutes, or until the topping is golden brown. Keep a close eye on it to prevent burning. The caramel should be bubbly and the topping nicely browned.
- Cool the Carmelitas completely in the pan on a wire rack. This is crucial for the filling to set properly.
- Refrigerate the Carmelitas for 1 to 2 hours, or until the filling is completely set. This will make them easier to cut into bars.
- Once chilled, cut the Carmelitas into bars.
- Enjoy!
Expert Tips & Tricks
- Softened Butter is Key: Make sure your butter or margarine is properly softened. This will ensure the crust comes together easily and evenly. Don’t melt it, just leave it at room temperature for about 30 minutes to an hour before starting.
- Don’t Overbake: Overbaking will result in a dry, brittle crust and a hardened caramel filling. Watch carefully during the final baking stage and remove the pan from the oven as soon as the topping is golden brown.
- Even Caramel Distribution: For even caramel distribution, use a spoon to spread it carefully over the chocolate and nuts. If you have a piping bag, even a ziplock bag with a corner snipped off, you can pipe the caramel in lines across the bars.
- Customize Your Nuts: Feel free to experiment with different types of nuts. Pecans and walnuts are classic choices, but almonds, hazelnuts, or even macadamia nuts would be delicious. You can also use a mixture of different nuts.
- Salted Caramel Variation: Sprinkle a pinch of sea salt over the caramel filling before adding the crumb topping for a delicious salted caramel twist.
- Make-Ahead Option: The unbaked Carmelitas can be assembled ahead of time and stored in the refrigerator for up to 24 hours. Simply bake them as directed when ready to serve.
Serving & Storage Suggestions
Carmelitas are best served chilled or at room temperature. They make a delightful dessert or snack and are perfect for potlucks, bake sales, or holiday gatherings.
- Serving: Arrange the Carmelita bars on a platter or serving dish for an appealing presentation. Dust lightly with powdered sugar for an elegant touch.
- Storage: Store leftover Carmelitas in an airtight container at room temperature for up to 3 days, or in the refrigerator for up to a week. For longer storage, freeze them in an airtight container for up to 2 months.
- Reheating: If you prefer warm Carmelitas, you can gently reheat them in the microwave for a few seconds.
Nutritional Information
Note: Nutritional information is an estimate and may vary based on specific ingredients and portion sizes.
| Nutrient | Amount per Serving | % Daily Value |
|---|---|---|
| Calories | 220 kcal | 11% |
| Total Fat | 12g | 15% |
| Saturated Fat | 7g | 35% |
| Cholesterol | 20mg | 7% |
| Sodium | 120mg | 5% |
| Total Carbohydrate | 28g | 10% |
| Dietary Fiber | 1g | 4% |
| Sugars | 16g | |
| Protein | 2g | 4% |
Variations & Substitutions
- Gluten-Free Carmelitas: Substitute the all-purpose flour with a gluten-free all-purpose flour blend. Make sure the blend contains xanthan gum or add 1/2 teaspoon of xanthan gum to the dry ingredients.
- Dairy-Free Carmelitas: Use a dairy-free margarine or butter substitute and a dairy-free caramel sauce.
- Different Chocolate: Experiment with different types of chocolate chips. Milk chocolate, dark chocolate, or even white chocolate chips would all be delicious.
- Spice it Up: Add a pinch of cinnamon or nutmeg to the crust mixture for a warm, spiced flavor.
- Caramel Swirl: Use a knife to swirl some extra caramel topping into the crumb topping before baking.
- Nut-Free Version: Omit the nuts altogether, or substitute with toasted sunflower seeds or pumpkin seeds.
FAQs (Frequently Asked Questions)
Q: Can I use regular rolled oats instead of quick-cooking oats?
A: While you can use regular rolled oats, the texture will be slightly different. Quick-cooking oats are finer and will create a more cohesive crust and topping. If using regular rolled oats, you may want to pulse them in a food processor a few times to break them down slightly.
Q: My caramel filling is too runny. What did I do wrong?
A: Make sure you are using caramel ice cream topping, not caramel sauce. Also, ensure you’ve mixed the caramel with the flour, as the flour helps to thicken it during baking.
Q: Can I freeze Carmelitas?
A: Yes, Carmelitas freeze well. Wrap them tightly in plastic wrap and then place them in an airtight container. They can be frozen for up to 2 months. Thaw them in the refrigerator before serving.
Q: The crust is getting too brown during baking. What should I do?
A: If the crust is browning too quickly, tent the pan with aluminum foil to prevent it from burning.
Q: My topping is dry and crumbly. How can I fix it?
A: Ensure that the butter or margarine is softened and evenly distributed throughout the mixture. You can also add a tablespoon or two of melted butter to the topping to help bind it together.
Final Thoughts
Oatmeal Carmelitas are more than just a dessert; they’re a celebration of simple pleasures and cherished memories. This recipe is a testament to the fact that some of the most satisfying treats are also the easiest to make. So, gather your ingredients, preheat your oven, and embark on a culinary journey that will fill your kitchen with the irresistible aroma of oats, caramel, and chocolate. Don’t hesitate to experiment with variations and substitutions to create your own unique version of this beloved classic. And most importantly, share your creation with loved ones and spread the joy of homemade goodness. Let me know in the comments how yours turned out!