
Havrekniplekaker: The Delicate Art of Norwegian Oatmeal Lace Cookies
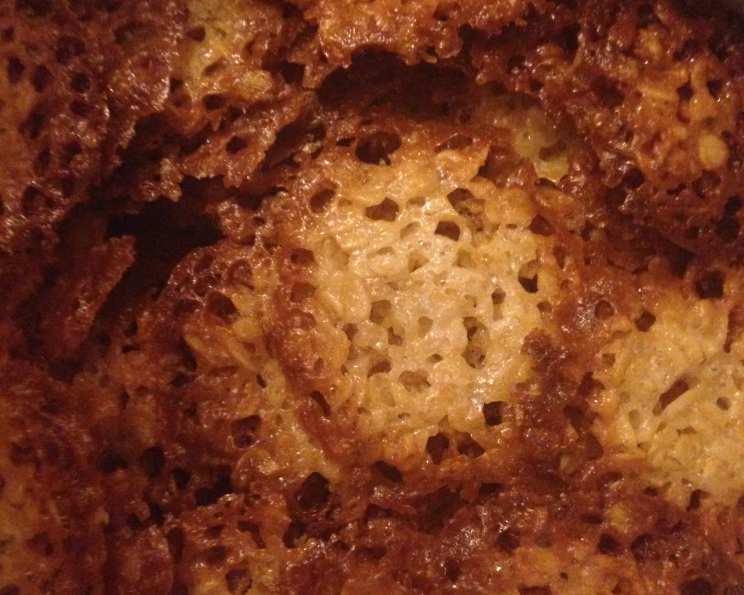
The first time I tasted Havrekniplekaker, or Norwegian Oatmeal Lace Cookies, was at my grandmother’s house. She always had a tin filled with them during the holidays. I remember being mesmerized by their delicate, almost transparent appearance. They seemed to shatter into a sweet, buttery crisp with each bite, leaving behind a hint of toasted oats and a lingering warmth that perfectly complemented a cup of strong, black coffee. These aren’t just cookies; they’re edible snowflakes, a taste of Norwegian heritage, and a fond memory all rolled into one delightfully fragile treat.
Recipe Overview
- Prep Time: 10 minutes
- Cook Time: 5-7 minutes
- Total Time: 15-17 minutes
- Servings: Varies
- Yield: Approximately 3 dozen cookies
- Dietary Type: Not specified, contains butter, milk, flour.
Ingredients
- 1 cup (2 sticks) butter, unsalted, do not substitute margarine
- 1 cup granulated sugar
- ⅔ cup all-purpose flour, sifted
- ½ teaspoon salt
- 2 cups quick-cooking oats, not instant
- ¼ cup milk
Equipment Needed
- Medium saucepan
- Measuring cups and spoons
- Greased and floured cookie sheets (baking parchment can also be used)
- Sifter
- Spatula
Instructions
-
Preheat your oven to 375°F (190°C). Make sure your oven rack is positioned in the center.
-
In a medium saucepan, melt the butter over medium-low heat. Stir it occasionally to ensure it melts evenly and doesn’t burn.
-
Remove the saucepan from the heat. Add the sugar, sifted flour, and salt to the melted butter.
-
Stir the mixture thoroughly until all ingredients are well combined and the mixture is smooth.
-
Add the quick-cooking oats and milk to the saucepan.
-
Mix all the ingredients together until they are evenly distributed and fully incorporated into the batter. The mixture will be quite loose.
-
Prepare your cookie sheets by greasing them generously with butter or shortening, then lightly flouring them. Alternatively, you can line the sheets with parchment paper for easier cleanup and to prevent sticking.
-
Drop the batter by ½ teaspoonful onto the prepared cookie sheets. Be sure to leave plenty of space – about 3 inches – between each cookie, as they will spread significantly during baking.
-
Use the back of a spoon or your fingertip to spread each dollop of batter very thinly. This is crucial for achieving the characteristic lacy texture. Aim for a near-transparent layer.
-
Bake in the preheated oven for 5-7 minutes. It is absolutely essential to WATCH CAREFULLY during baking. These cookies can burn quickly. You’re looking for a golden-brown color around the edges and a slightly darker color in the center.
-
Remove the cookie sheets from the oven and let the cookies stand for a few minutes on the sheet before attempting to remove them. This allows them to firm up slightly, making them less likely to break.
-
Using a thin spatula, carefully remove the cookies from the baking sheet and place them on a wire rack to cool completely. If the cookies stick to the sheet, gently slide the spatula underneath to loosen them.
Expert Tips & Tricks
- Butter is Best: Do not substitute margarine for butter. The butter’s fat content and flavor are crucial for the cookies’ texture and taste.
- Sifting Matters: Sifting the flour ensures a lighter batter and prevents lumps, which contribute to the delicate texture of the cookies.
- Watch the Oven Like a Hawk: These cookies can go from perfectly golden to burnt in a matter of seconds. Stay vigilant!
- Thin is In: The thinner you spread the batter, the more lacy and delicate your cookies will be.
- Cooling is Key: Let the cookies cool completely on the wire rack before storing. This prevents them from sticking together and helps them retain their crispness.
- Troubleshooting Burnt Edges: If your oven tends to bake unevenly, rotate the cookie sheets halfway through baking to ensure even browning.
- Make-Ahead Tip: The batter can be made ahead of time and stored in the refrigerator for up to 24 hours. Bring it to room temperature before baking.
Serving & Storage Suggestions
These Oatmeal Lace Cookies are best served slightly cooled, when they have achieved their optimal crispness. They make an elegant addition to any dessert platter and pair beautifully with a cup of coffee or tea. Their delicate sweetness also complements fresh fruit or a scoop of vanilla ice cream.
For storage, keep the cooled cookies in an airtight container at room temperature. They will stay crisp for up to 3-4 days. Because of their delicate nature, they are best consumed fresh. These cookies do not freeze well due to their high butter content, which can become rancid in the freezer over time, and their fragile structure, which is prone to breaking.
Nutritional Information
(Please note that these are estimated values, and actual values may vary depending on specific ingredient brands and measurements.)
| Nutrient | Amount per Serving | % Daily Value |
|---|---|---|
| Calories | 75 kcal | 4% |
| Total Fat | 5g | 8% |
| Saturated Fat | 3g | 15% |
| Cholesterol | 15mg | 5% |
| Sodium | 20mg | 1% |
| Total Carbohydrate | 7g | 2% |
| Dietary Fiber | 0.5g | 2% |
| Sugars | 4g | |
| Protein | 0.5g | 1% |
Variations & Substitutions
- Gluten-Free Option: While the recipe calls for all-purpose flour, you could try using a gluten-free all-purpose flour blend. Be aware that the texture might be slightly different, and the cookies may be more fragile. Add 1/4 teaspoon of xanthan gum for binding.
- Nutty Twist: Add a tablespoon of finely chopped nuts (almonds, pecans, or walnuts) to the batter for a bit of crunch and flavor.
- Spice It Up: A pinch of cardamom or cinnamon can add a warm, comforting note to the cookies.
- Citrus Zest: Add the zest of one lemon or orange to the batter for a bright, citrusy flavor.
- Chocolate Drizzle: Once the cookies have cooled completely, drizzle them with melted dark chocolate for an extra touch of indulgence.
- Brown Butter: For a deeper, nuttier flavor, brown the butter before adding the other ingredients. Be careful not to burn it.
FAQs (Frequently Asked Questions)
Q: Why are my cookies spreading too much?
A: This can be due to a couple of factors. Make sure you are using the correct amount of butter and that your oven temperature is accurate. Also, ensure you’re measuring ingredients correctly – too much butter or sugar can cause excessive spreading.
Q: My cookies are burning before they turn golden brown. What should I do?
A: This might be due to your oven running hot. Try reducing the oven temperature by 25 degrees Fahrenheit and shortening the baking time. Keep a close eye on the cookies to prevent burning.
Q: Can I use instant oats instead of quick-cooking oats?
A: No, instant oats will not work in this recipe. They are too finely processed and will result in a completely different texture. Quick-cooking oats provide the necessary structure for the cookies.
Q: How do I prevent the cookies from sticking to the baking sheet?
A: Make sure to grease and flour your baking sheets thoroughly or use parchment paper. Letting the cookies cool slightly on the sheet before removing them also helps.
Q: Why are my cookies not lacy?
A: The key to lacy cookies is spreading the batter very thinly. Use the back of a spoon or your fingertip to create a near-transparent layer on the baking sheet.
Final Thoughts
These Havrekniplekaker are more than just cookies; they are a piece of Norwegian tradition that you can bring into your own home. Don’t be intimidated by their delicate appearance. With a little patience and attention to detail, you can easily create these beautiful and delicious treats. Whether you’re sharing them with loved ones during the holidays or simply enjoying them with a quiet cup of coffee, I hope these cookies bring you as much joy as they have brought me over the years. I encourage you to try this recipe and share your creations with friends and family. Let me know how they turn out!