
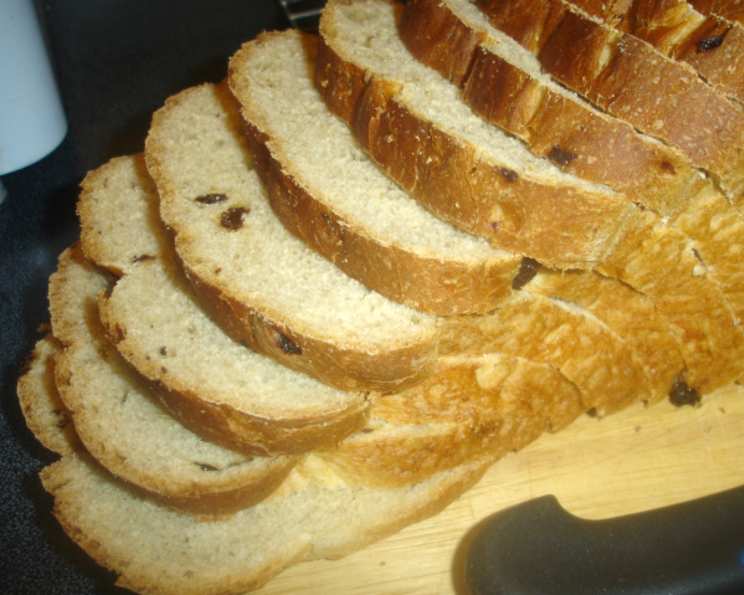
Oatmeal-Raisin Bread: A Bread Machine Delight
The aroma of freshly baked bread has always been a siren song to me, a comforting memory woven into the fabric of my childhood. I remember sneaking downstairs before sunrise, the house still dark and quiet, just to steal a warm crust from my grandmother’s cooling loaves. Though I wasn’t always a fan of raisins as a kid, Grandma’s oatmeal-raisin bread was different – a sweet, chewy treat that somehow made those little dried fruits irresistible. The scent alone would transport me back to her cozy kitchen, a place filled with warmth, love, and the promise of deliciousness.
Recipe Overview
- Prep Time: 10 minutes
- Cook Time: 55 minutes
- Total Time: 1 hour 5 minutes
- Yields: 1 1/2 lb. Loaf
- Dietary Type: Vegetarian
Ingredients
- 1 1/4 cups water
- 1/4 cup nonfat dry milk powder
- 2 tablespoons honey
- 1 tablespoon butter or margarine
- 1 1/2 teaspoons salt
- 3 cups bread flour
- 1 1/2 teaspoons fast rising yeast
- 1/2 cup old fashioned oats
- 1/2 cup raisins
Equipment Needed
- Bread Machine
- Measuring cups and spoons
- Wire rack
Instructions
-
Begin by carefully measuring all ingredients. Place the water, nonfat dry milk powder, honey, butter (or margarine), salt, bread flour, and fast rising yeast into the bread machine pan in the order recommended by your bread machine manufacturer (generally liquids first, then dry ingredients, with yeast last).
-
Secure the bread machine pan into the bread machine.
-
Set the bread machine program to the basic cycle with a medium crust setting.
-
Press the start button to begin the baking process.
-
Listen for the bread machine to signal the end of the first kneading cycle. This is usually indicated by a beep or series of beeps.
-
Once signaled, add the old fashioned oats and raisins to the bread machine pan.
-
Allow the bread machine to continue through its complete cycle, including kneading, rising, and baking. This typically takes around 55 minutes for the baking portion.
-
Once the bread machine cycle is complete, carefully remove the baked bread from the pan. Use oven mitts, as the pan will be hot. You may need to gently loosen the loaf from the pan using a spatula.
-
Place the freshly baked bread on a wire rack to cool completely before slicing and serving. This is crucial for preventing a gummy texture and allowing the flavors to fully develop.
Expert Tips & Tricks
- Ingredient Temperature Matters: For best results, ensure that your water is lukewarm (around 80-90°F). This helps activate the yeast properly.
- Yeast Freshness: Always check the expiration date of your yeast. Old yeast can result in a flat, dense loaf. If you’re unsure about your yeast’s potency, you can proof it by mixing it with a little warm water and sugar. If it foams up within 5-10 minutes, it’s good to go.
- Add-in Timing: Adding the oats and raisins at the end of the first kneading cycle ensures they are evenly distributed throughout the loaf without being completely pulverized.
- Crust Control: If you prefer a softer crust, you can brush the top of the loaf with melted butter immediately after removing it from the bread machine.
- High Altitude Adjustments: If you live at a high altitude, you may need to reduce the amount of yeast slightly (by about 1/4 teaspoon) and increase the liquid by 1-2 tablespoons. This will help prevent the bread from rising too quickly and collapsing.
- Sweetness Level: If you prefer a less sweet bread, you can reduce the amount of honey to 1 tablespoon.
Serving & Storage Suggestions
This Oatmeal-Raisin Bread is delicious served warm, toasted, or even as a base for sandwiches. It pairs wonderfully with a pat of butter, a drizzle of honey, or a dollop of cream cheese. It’s also fantastic alongside a bowl of hearty soup or a cup of hot tea.
To store, allow the bread to cool completely before wrapping it tightly in plastic wrap or placing it in an airtight container. At room temperature, it will stay fresh for about 2-3 days. For longer storage, you can refrigerate it for up to a week, but be aware that refrigeration can dry out the bread slightly.
For the best long-term storage, freeze the bread. Wrap it tightly in plastic wrap and then in foil, or place it in a freezer-safe bag. Frozen bread will keep for up to 2-3 months. To thaw, simply leave it at room temperature for a few hours, or toast it directly from frozen.
Nutritional Information
| Nutrient | Amount per Serving | % Daily Value |
|---|---|---|
| Calories | 1395.2 kcal | N/A |
| Calories from Fat | 113 g | N/A |
| Total Fat | 12.6 g | 19% |
| Saturated Fat | 5.7 g | 28% |
| Cholesterol | 24.4 mg | 8% |
| Sodium | 2521.1 mg | 105% |
| Total Carbohydrate | 282.4 g | 94% |
| Dietary Fiber | 12.4 g | 49% |
| Sugars | 63 g | 251% |
| Protein | 39.9 g | 79% |
Note: Nutritional information is an estimate and may vary based on specific ingredients and portion sizes.
Variations & Substitutions
- Spiced Oatmeal-Raisin Bread: Add 1 teaspoon of ground cinnamon and 1/2 teaspoon of ground nutmeg to the dry ingredients for a warm, spiced flavor.
- Nutty Oatmeal-Raisin Bread: Incorporate 1/2 cup of chopped walnuts or pecans along with the oats and raisins for added texture and flavor.
- Cranberry-Oatmeal Bread: Substitute dried cranberries for the raisins for a tart and festive twist.
- Gluten-Free Option: While this recipe calls for bread flour, it is possible to experiment with gluten-free bread flour blends. Be sure to follow the manufacturer’s instructions for substitutions and you may need to add a binder such as xanthan gum for improved texture.
- Vegan Variation: Replace the butter with a vegan butter substitute. Ensure the honey is ethically sourced or substitute with maple syrup or agave nectar.
FAQs (Frequently Asked Questions)
Q: Can I use quick-cooking oats instead of old-fashioned oats?
A: While you can, old-fashioned oats provide a better texture and slightly nuttier flavor. Quick-cooking oats may result in a slightly softer loaf.
Q: My bread is sinking in the middle. What am I doing wrong?
A: This could be due to too much yeast, too much liquid, or not enough gluten development. Try reducing the yeast slightly, measuring the liquid accurately, and ensuring you are using bread flour (which has a higher gluten content than all-purpose flour).
Q: Can I add other dried fruits to this bread?
A: Absolutely! Dried apricots, dates, or even chopped dried figs would be delicious additions. Just keep the total amount of dried fruit consistent (1/2 cup).
Q: My bread is too dense. How can I make it lighter?
A: Ensure your yeast is fresh and active. Also, avoid adding too much flour, as this can weigh down the dough. Using a bread machine with a proper kneading cycle is crucial for developing gluten.
Q: Can I make this bread without a bread machine?
A: Yes, but it will require more hands-on work. You would need to knead the dough by hand or with a stand mixer, allow it to rise, shape it into a loaf, and bake it in a conventional oven. There are many online resources for converting bread machine recipes to conventional baking methods.
Final Thoughts
This Oatmeal-Raisin Bread is more than just a recipe; it’s a taste of comfort, a slice of nostalgia, and a celebration of simple pleasures. Whether you’re a seasoned baker or a bread machine novice, I encourage you to give this recipe a try. It’s remarkably easy to make, and the results are truly rewarding. So go ahead, fill your kitchen with the irresistible aroma of freshly baked bread, and share a slice (or two!) with those you love. And don’t forget to let me know what you think – I’d love to hear about your baking adventures!