
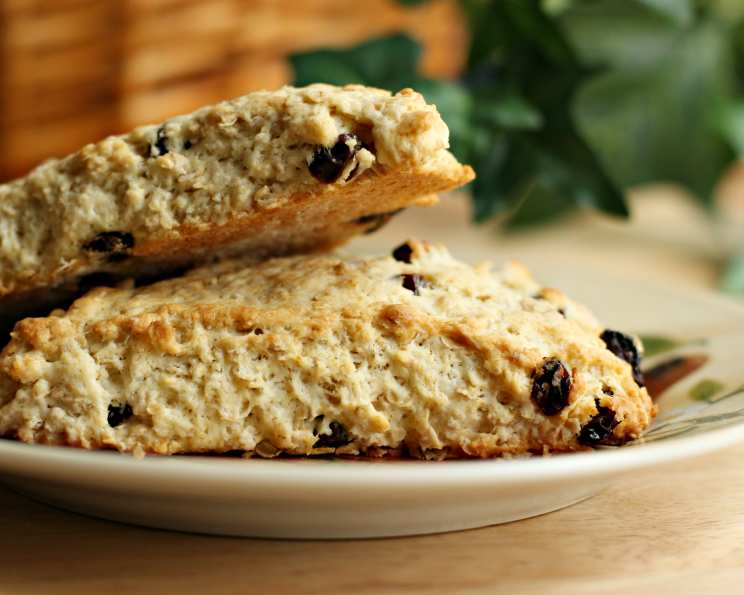
Rustic Oatmeal Scones: A Taste of Campfire Mornings
My earliest memories are painted with the smoky hues of campfire cooking. Growing up, every summer meant weeks spent in the mountains, and mornings were always heralded by the smell of woodsmoke mingling with the sweet aroma of Mom’s oatmeal scones. She’d whip them up right on the tailgate of the truck, the simplicity of the recipe perfectly mirroring the rugged beauty around us. Those scones, warm and crumbly, weren’t just breakfast; they were a symbol of adventure, family, and the comforting rhythm of the great outdoors. To this day, the first bite of a warm oatmeal scone instantly transports me back to those cherished mornings, reminding me of the simple joys in life.
Recipe Overview
- Prep Time: 15 minutes
- Cook Time: 12-15 minutes
- Total Time: 30 minutes
- Servings: 8-12
- Yield: 8-12 scones
- Dietary Type: Vegetarian
Ingredients
- 2⁄3 cup butter, melted
- 1⁄3 cup milk
- 1 egg
- 1 1⁄2 cups flour
- 1 1⁄4 cups quick oats, uncooked (or 1 1/2 cups old fashioned oats)
- 1⁄4 cup sugar
- 1 tablespoon baking powder
- 1 teaspoon cream of tartar
- 1⁄2 teaspoon salt
- 1⁄2 cup raisins or 1/2 cup currants
Equipment Needed
- Large mixing bowl
- Small mixing bowl
- Measuring cups and spoons
- Cookie sheet
- Parchment paper (optional)
- Pastry cutter or fork
Instructions
-
Preheat your oven to 425 degrees Fahrenheit (220 degrees Celsius). Prepare a cookie sheet by lightly greasing it or lining it with parchment paper to prevent sticking.
-
In a large mixing bowl, whisk together all the dry ingredients: flour, oats (either quick oats or old fashioned oats), sugar, baking powder, cream of tartar, and salt. Ensure the ingredients are evenly distributed for a consistent rise and flavor.
-
In a separate, small bowl, whisk together the wet ingredients: melted butter, milk, and egg. Whisk until the mixture is well combined.
-
Pour the wet ingredients into the bowl of dry ingredients. Gently mix until just moist. Be careful not to overmix the batter, as this can result in tough scones. A few streaks of flour are perfectly acceptable at this stage.
-
Fold in the raisins or currants. Distribute them evenly throughout the batter for a burst of sweetness in every bite.
-
Lightly flour a clean work surface. Turn the dough out onto the floured surface and gently shape it into a ball.
-
Pat the dough out into an 8-inch circle, approximately 1 inch thick. Use a sharp knife or a bench scraper to cut the circle into 8 to 12 wedges, depending on your desired scone size.
-
Carefully transfer the scone wedges to the prepared cookie sheet, spacing them slightly apart.
-
Bake in the preheated oven for 12-15 minutes, or until the scones are golden brown on top and cooked through. The exact baking time may vary slightly depending on your oven, so keep a close eye on them. A toothpick inserted into the center of a scone should come out clean.
-
Let the scones cool on the baking sheet for a few minutes before transferring them to a wire rack to cool completely. Serve warm or at room temperature.
Expert Tips & Tricks
- Don’t overmix the dough: Overmixing develops the gluten in the flour, leading to tough, dense scones. Mix just until the wet and dry ingredients are combined.
- Use cold butter (in melted form): While the recipe calls for melted butter, it’s best to use butter that has been melted and then slightly cooled. This helps create a tender crumb.
- Cold ingredients are key: Similar to pie crust, cold ingredients are your friend when making scones. They prevent the gluten from over-developing, resulting in a lighter texture. You can even chill the dry ingredients for 15 minutes before adding the wet ingredients.
- For extra browning: Brush the tops of the scones with a little milk or egg wash before baking for a more golden-brown finish.
- Make ahead: You can prepare the dough up to the point of baking, cut the scones into wedges, and then refrigerate them, covered, for up to 24 hours. Add a minute or two to the baking time if baking from cold.
- Flavor boost: Add a teaspoon of vanilla extract or a pinch of ground cinnamon to the wet ingredients for an extra layer of flavor.
Serving & Storage Suggestions
These oatmeal scones are delicious served warm with a pat of butter, a dollop of jam, or a drizzle of honey. They also pair perfectly with a cup of coffee or tea for a comforting breakfast or afternoon snack.
Store leftover scones in an airtight container at room temperature for up to 2 days. For longer storage, you can freeze them for up to 2 months. Wrap them individually in plastic wrap before placing them in a freezer bag to prevent freezer burn. To reheat frozen scones, thaw them at room temperature and then warm them in a 350°F (175°C) oven for 5-10 minutes, or until heated through. You can also reheat them in the microwave, but they may become slightly softer.
Nutritional Information
| Nutrient | Amount per Serving | % Daily Value |
|---|---|---|
| Calories | 338.4 kcal | N/A |
| Calories from Fat | 156 g | 46% |
| Total Fat | 17.4 g | 26% |
| Saturated Fat | 10.3 g | 51% |
| Cholesterol | 68.5 mg | 22% |
| Sodium | 406.4 mg | 16% |
| Total Carbohydrate | 41 g | 13% |
| Dietary Fiber | 2.2 g | 8% |
| Sugars | 11.9 g | N/A |
| Protein | 6 g | 12% |
Note: Nutritional information is an estimate and may vary based on specific ingredients and portion sizes.
Variations & Substitutions
- Gluten-Free: Substitute the all-purpose flour with a gluten-free all-purpose flour blend. You may need to add a little extra liquid to achieve the right consistency.
- Dairy-Free: Replace the milk with a plant-based milk alternative, such as almond milk, soy milk, or oat milk. Ensure the melted butter is also replaced with a dairy free alternative.
- Sweetener Alternatives: Substitute the granulated sugar with brown sugar, maple syrup, or honey. Adjust the amount to taste.
- Spice it up: Add a pinch of ground nutmeg, cloves, or allspice for a warm, autumnal flavor.
- Nutty: Incorporate chopped nuts, such as walnuts, pecans, or almonds, for added texture and flavor.
- Citrus Zest: Add the zest of an orange or lemon for a bright, refreshing twist.
- Seasonal Fruits: Experiment with different dried fruits, such as cranberries, cherries, or apricots.
FAQs (Frequently Asked Questions)
Q: Can I use old-fashioned oats instead of quick oats?
A: Yes, you can! The recipe specifies 1 1/4 cups of quick oats, but you can substitute with 1 1/2 cups of old-fashioned oats.
Q: Why are my scones dry?
A: Overbaking or using too much flour can result in dry scones. Be careful not to overmix the dough and ensure your oven temperature is accurate. Adding a little extra milk can also help.
Q: Can I freeze the unbaked scone dough?
A: Absolutely! Shape the dough into a disc, wrap it tightly in plastic wrap, and freeze for up to 2 months. Thaw completely in the refrigerator before baking.
Q: What’s the secret to a flaky scone?
A: Cold ingredients and minimal mixing are key. The cold butter creates pockets of steam during baking, resulting in a flaky texture. Avoid overworking the dough.
Q: How do I prevent the raisins from burning during baking?
A: You can soak the raisins in warm water for about 10 minutes before adding them to the dough. This will plump them up and prevent them from drying out and burning in the oven.
Final Thoughts
I hope this recipe for rustic oatmeal scones brings as much joy to your kitchen as it has to mine. Whether you’re recreating campfire memories or simply seeking a comforting treat, these scones are sure to satisfy. Don’t be afraid to experiment with different variations and substitutions to make them your own. And most importantly, enjoy the process of baking and sharing these delicious scones with loved ones. I encourage you to try this recipe and let me know how it turns out – I’d love to hear about your baking adventures! These pair exceptionally well with a hot cup of chai tea on a crisp morning!