
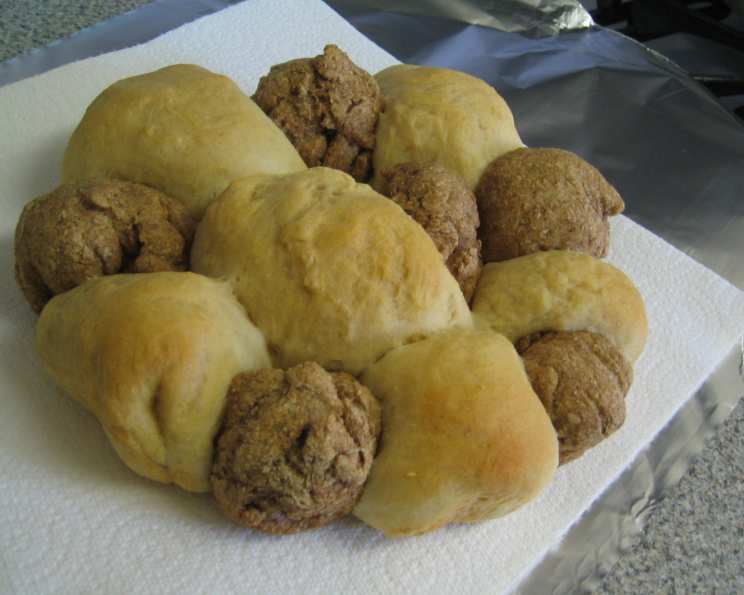
Oil-Free Challah: A Healthier Twist on a Classic
The aroma of freshly baked challah takes me straight back to my grandmother’s kitchen. Bubbe Rose always had a loaf ready for Shabbat, its golden crust glistening, the inside soft and yielding. While her recipe was a treasured family secret, I always suspected a generous glug of oil was involved. Today, I’m thrilled to share a version that captures that same comforting flavor and texture but skips the added oil, making it a slightly lighter indulgence. It’s a testament to the fact that you can still enjoy your favorite traditional recipes while making healthier choices.
Recipe Overview
- Prep Time: 3 hours 5 minutes (includes bread machine and rising time)
- Cook Time: 25 minutes
- Total Time: 3 hours 30 minutes
- Yields: 2 loaf
- Serves: 10
- Dietary Type: Dairy-Free
Ingredients
- ¾ cup water
- 1 egg
- ¾ tablespoon applesauce
- ¾ teaspoon salt
- 1 ½ tablespoons honey
- 1 ½ tablespoons sugar
- 2 ½ cups bread flour
- 1 ½ teaspoons yeast
- 1 egg, beaten with water (optional, for egg wash)
Equipment Needed
- Bread machine
- Round cake pan
- Measuring cups and spoons
- Floured surface
- Warm place for rising
Instructions
-
Begin by adding the ingredients to your bread machine in the order recommended by the manufacturer. Generally, this means starting with the water, followed by the egg, applesauce, salt, honey, and sugar. Finally, add the bread flour and yeast. It’s crucial to follow your bread machine’s instructions to ensure proper mixing and kneading.
-
Select the dough cycle on your bread machine. This cycle will mix and knead the dough, and then allow it to rise for the appropriate amount of time. Let the dough cycle run its course. This usually takes around 1.5 to 2 hours.
-
Once the dough cycle is complete, lightly grease and flour a round cake pan. This will prevent the challah from sticking and make it easier to remove after baking.
-
Turn the dough out onto a lightly floured surface. Be sure to have extra flour handy, as the dough can be a bit sticky. Flour your hands generously to prevent the dough from adhering to your skin.
-
Gently grab pieces of dough and shape them into balls. The size of the balls will depend on the size of your cake pan and the desired look of your challah. Aim for evenly sized balls for a uniform appearance.
-
Arrange the dough balls in the prepared cake pan. Place them close together but not so tightly packed that they won’t have room to rise. Continue flouring your hands as needed to prevent sticking.
-
Place the pan with the arranged dough balls in a warm place to rise. Cover loosely with a clean kitchen towel or plastic wrap. Allow the dough to rise until it has approximately doubled in size. This process can take about an hour, depending on the temperature of your environment. A slightly warm oven (turned off!) or a sunny spot can help speed up the rising process.
-
Optional Step: For a beautiful, glossy finish, gently brush the top of the risen challah with an egg wash. To make the egg wash, whisk together one egg with a tablespoon of water. Apply the egg wash evenly, being careful not to deflate the risen dough.
-
Preheat your oven to 375°F (190°C).
-
Bake the challah in the preheated oven for approximately 25 minutes, or until it is golden brown. The baking time may vary depending on your oven, so keep a close eye on it. To check for doneness, insert a wooden skewer or toothpick into the center of the challah. If it comes out clean, the challah is ready.
-
Once baked, remove the challah from the oven and let it cool in the pan for a few minutes before transferring it to a wire rack to cool completely.
Expert Tips & Tricks
- Don’t skip the applesauce! This ingredient adds moisture and helps to keep the challah soft without the need for oil.
- If you don’t have a bread machine, you can still make this recipe. Simply combine the ingredients in a large bowl, knead for 8-10 minutes until smooth and elastic, and then let it rise in a warm place for 1-1.5 hours before shaping and baking.
- For a sweeter challah, increase the amount of honey or sugar slightly. You can also add a pinch of cinnamon for extra flavor.
- To prevent the challah from browning too quickly, you can tent it with aluminum foil during the last 10 minutes of baking.
- The rising time can vary depending on the temperature of your kitchen. A warmer environment will result in a faster rise.
Serving & Storage Suggestions
This oil-free challah is delicious served warm or at room temperature. It’s perfect for sandwiches, toast, or simply enjoyed on its own. It pairs beautifully with soups, salads, and dips.
To store leftover challah, wrap it tightly in plastic wrap or place it in an airtight container. It will stay fresh at room temperature for up to 3 days. For longer storage, you can freeze the challah for up to 2 months. To reheat, thaw the challah completely and then warm it in a preheated oven at 350°F (175°C) for 5-10 minutes, or until heated through. You can also slice and toast it.
Nutritional Information
(Estimates – values may vary based on specific ingredients)
| Nutrient | Amount per Serving | % Daily Value |
|---|---|---|
| Calories | 141 kcal | N/A |
| Total Fat | 0.8g | 1% |
| Saturated Fat | 0.2g | 1% |
| Cholesterol | 21mg | 7% |
| Sodium | 183mg | 8% |
| Total Carbohydrate | 29g | 10% |
| Dietary Fiber | 1g | 4% |
| Sugars | 5g | N/A |
| Protein | 4g | 8% |
Variations & Substitutions
- Whole Wheat Challah: Substitute half of the bread flour with whole wheat flour for a nuttier flavor and added fiber.
- Vegan Challah: Replace the egg with flax eggs (1 tablespoon flaxseed meal mixed with 3 tablespoons water, let sit for 5 minutes to thicken). Use maple syrup instead of honey. Omit the egg wash or use a plant-based milk wash (like almond or soy milk).
- Gluten-Free Challah: Use a gluten-free bread flour blend. You may need to add a binding agent like xanthan gum to improve the texture.
- Seeded Challah: Before baking, sprinkle the top of the challah with sesame seeds, poppy seeds, or everything bagel seasoning for added flavor and visual appeal.
- Sweet Challah: Add a tablespoon of lemon or orange zest and ½ teaspoon of cardamom to the dough for a more aromatic and flavorful sweet challah.
FAQs (Frequently Asked Questions)
Q: Can I use all-purpose flour instead of bread flour?
A: While bread flour is recommended for its higher gluten content, which results in a chewier texture, you can use all-purpose flour in a pinch. The texture of the challah may be slightly different, but it will still be delicious.
Q: Why is my challah not rising properly?
A: Several factors can affect rising time, including the freshness of your yeast, the temperature of your environment, and the amount of gluten development. Ensure your yeast is fresh, the dough is in a warm place, and that you knead it adequately (or let the bread machine do its job!).
Q: How do I prevent the challah from drying out?
A: Store the challah properly in an airtight container or wrapped tightly in plastic wrap. You can also add a small amount of moisture to the oven while baking by placing a pan of hot water on the bottom rack.
Q: Can I freeze the challah?
A: Yes, challah freezes very well. Wrap it tightly in plastic wrap and then in aluminum foil before freezing. Thaw completely before reheating.
Q: What can I do if I don’t have a bread machine?
A: Simply combine the ingredients in a large bowl, knead for 8-10 minutes until smooth and elastic, and then let it rise in a warm place for 1-1.5 hours before shaping and baking.
Final Thoughts
This oil-free challah is a wonderful way to enjoy a traditional favorite with a slightly healthier twist. It’s perfect for special occasions, weekend brunches, or simply as a delicious and comforting treat. I encourage you to give this recipe a try and experience the joy of baking your own homemade challah. Feel free to experiment with different variations and substitutions to create your own unique version. And, of course, I’d love to hear your feedback and see your creations! Serve it with your favorite spread or alongside a hearty soup for a truly satisfying meal.