
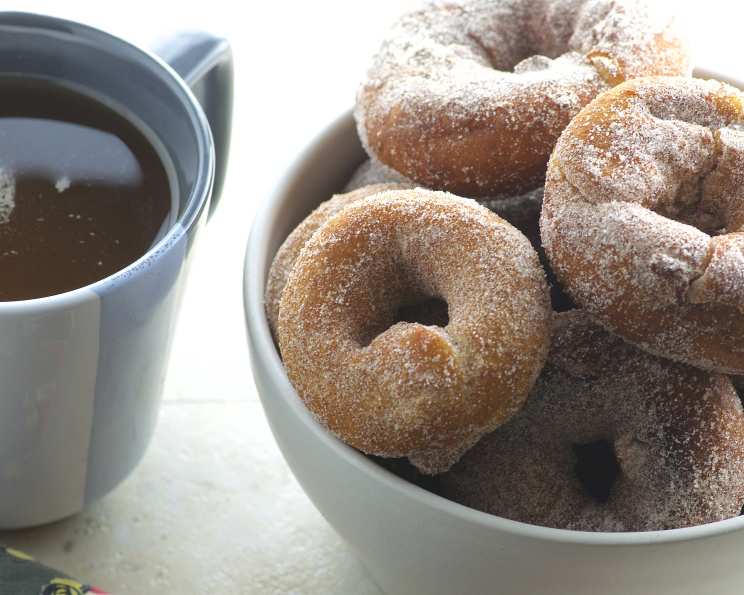
Old-Fashioned Cake Doughnuts: A Taste of Nostalgia
The scent of frying dough, laced with cinnamon and sugar, always takes me back to my grandmother’s kitchen. Every Saturday morning, she would transform her humble space into a doughnut factory. The air would be thick with warmth and anticipation as we, her eager grandchildren, watched her expertly roll, cut, and fry these little rings of joy. The first bite, still slightly warm, was pure bliss – a simple pleasure that defined weekend mornings and created memories that I cherish to this day. Now, I carry on that tradition, bringing that same sense of comfort and joy to my own family.
Recipe Overview
- Prep Time: 20 minutes
- Cook Time: 6-8 minutes per batch
- Total Time: 1 hour 20 minutes (includes chilling time)
- Servings: Varies (approximately 14 doughnuts)
- Yield: Approximately 14 doughnuts
- Dietary Type: Not specified (contains dairy and eggs)
Ingredients
- 1 cup sugar
- 4 teaspoons baking powder
- 1 1/2 teaspoons salt
- 1/2 teaspoon nutmeg
- 2 eggs
- 1/4 cup unsalted butter, melted
- 1 cup milk
- 4 cups flour, plus a little more if dough is sticky
- Oil for frying (vegetable, canola, or peanut oil work well)
- Cinnamon sugar for coating (or icing sugar, chocolate, sprinkles – your choice!)
Equipment Needed
- Large mixing bowl
- Stand mixer with dough hook (optional, but helpful)
- Plastic wrap
- Large metal skillet or deep fryer
- Doughnut cutter or biscuit/cookie cutter and small cap (or similar round object) for center hole
- Slotted spoon or spider
- Paper towels or brown paper bag
Instructions
-
In a large mixing bowl, combine the sugar, baking powder, salt, and nutmeg. Whisk together to ensure even distribution of the leavening agents. This is important for a consistent rise and texture.
-
Add the eggs, milk, and melted butter to the dry ingredients. Beat well with a mixer or by hand until everything is thoroughly combined and the mixture is smooth. The melted butter should be cooled slightly before adding to avoid cooking the eggs.
-
Add 3 cups of the flour to the wet ingredients. Begin beating until just blended. Avoid overmixing at this stage, as it can develop the gluten in the flour and result in a tougher doughnut.
-
Add the remaining 1 cup of flour and beat well. The dough should be soft and slightly sticky but firm enough to handle. If the dough is excessively sticky and difficult to manage, gradually add up to 1/2 cup more flour, one tablespoon at a time, until the desired consistency is achieved. Be careful not to add too much flour, as this can make the doughnuts dry.
-
Cover the bowl with plastic wrap and chill the dough in the refrigerator for at least one hour. Chilling allows the gluten to relax, making the dough easier to roll out and work with. It also helps to prevent the doughnuts from becoming too dense. You can also chill overnight for an even better result.
-
Remove the dough from the refrigerator. While the dough is resting, begin heating about 1 inch of oil in a large metal skillet or deep fryer to 360°F (182°C). Use a thermometer to ensure the oil is at the correct temperature. If the oil is too hot, the doughnuts will brown too quickly on the outside and remain raw on the inside. If the oil is too cold, the doughnuts will absorb too much oil and become greasy.
-
Working with half the dough at a time (keep the other half chilled), lightly flour a clean surface. Roll out the dough to about 1/2-inch thickness.
-
Use a doughnut cutter or a large biscuit/cookie cutter to cut out circles. For the center holes, use a small cap (like from a martini shaker or small bottle) or a smaller cookie cutter. Gather the scraps, gently knead them together, and roll them out again to cut more doughnuts. Remember, these won’t be as tender as the first batch.
-
Gently drop the doughnuts in batches into the hot oil. Do not overcrowd the skillet or deep fryer, as this will lower the oil temperature and cause the doughnuts to absorb more oil.
-
Flip the doughnuts over as they puff up and turn them a couple more times as they cook. They should take about 2-3 minutes in total to cook, becoming lovely and golden brown all over.
-
Remove the doughnuts from the oil using a slotted spoon or spider and place them on paper towels or a brown paper bag to drain excess oil.
-
While the doughnuts are still warm, generously douse them with cinnamon sugar, icing sugar, chocolate glaze, sprinkles, or your favorite topping.
Expert Tips & Tricks
- Temperature is Key: Maintaining the oil temperature at 360°F (182°C) is crucial for perfectly cooked doughnuts. Use a thermometer and adjust the heat as needed.
- Don’t Overmix: Overmixing the dough develops the gluten, leading to tough doughnuts. Mix until just combined.
- Chill Time Matters: The chilling period is essential for relaxing the gluten and preventing the doughnuts from becoming dense. Don’t skip this step!
- Flavor Infusion: Add a teaspoon of vanilla extract or lemon zest to the dough for a more complex flavor profile.
- Air Pockets: If you notice air pockets forming while frying, poke them gently with a toothpick to release the air.
- Preventing Soggy Doughnuts: To prevent your doughnuts from becoming soggy after frying, ensure that your oil is at the correct temperature and avoid overcrowding the pan.
Serving & Storage Suggestions
Serve these old-fashioned cake doughnuts warm, ideally within a few hours of frying, for the best flavor and texture. They are delicious on their own, or paired with a cup of coffee, tea, or a glass of cold milk.
To store leftover doughnuts, place them in an airtight container at room temperature. They will stay fresh for 1-2 days. For longer storage, you can freeze the doughnuts. Wrap them individually in plastic wrap and place them in a freezer-safe bag. Frozen doughnuts can be reheated in a microwave for a few seconds or in a low oven until warmed through. Be aware that the texture may change slightly after freezing.
Nutritional Information
Note: Nutritional information is an estimate and can vary based on specific ingredients and preparation methods.
| Nutrient | Amount per Serving | % Daily Value |
|---|---|---|
| Calories | 250 kcal | 13% |
| Total Fat | 12g | 15% |
| Saturated Fat | 7g | 35% |
| Cholesterol | 40mg | 13% |
| Sodium | 380mg | 16% |
| Total Carbohydrate | 35g | 13% |
| Dietary Fiber | 1g | 4% |
| Sugars | 15g | – |
| Protein | 4g | 8% |
Variations & Substitutions
- Spiced Doughnuts: Add a pinch of cinnamon, ginger, or cardamom to the dough for a warmer, more festive flavor.
- Chocolate Doughnuts: Incorporate 1/4 cup of unsweetened cocoa powder into the dry ingredients for chocolatey doughnuts.
- Gluten-Free Doughnuts: Substitute the all-purpose flour with a gluten-free all-purpose flour blend. Be sure to add a binder like xanthan gum to help with the structure.
- Dairy-Free Doughnuts: Use a non-dairy milk alternative (almond, soy, or oat milk) and a dairy-free butter substitute.
- Icing Variations: Experiment with different icing flavors, such as vanilla, chocolate, maple, or lemon. Add sprinkles, chopped nuts, or shredded coconut for extra flair.
FAQs (Frequently Asked Questions)
Q: Why are my doughnuts greasy?
A: Your oil temperature was likely too low. Make sure the oil is at 360°F (182°C) before frying. Also, avoid overcrowding the pan, as this will lower the oil temperature.
Q: My doughnuts are browning too quickly on the outside but are still raw inside. What should I do?
A: The oil temperature is too high. Lower the heat and allow the oil to cool slightly before continuing to fry the doughnuts.
Q: Can I make the dough ahead of time?
A: Yes, you can make the dough up to 24 hours in advance. Store it covered in the refrigerator and bring it to room temperature for about 30 minutes before rolling it out.
Q: Can I bake these doughnuts instead of frying them?
A: While this recipe is designed for frying, you can try baking them in a doughnut pan at 350°F (175°C) for about 10-12 minutes. However, the texture will be different from fried doughnuts.
Q: What can I do with the doughnut holes?
A: Fry the doughnut holes along with the doughnuts. They make a perfect bite-sized treat! Toss them in cinnamon sugar or dip them in chocolate.
Final Thoughts
These old-fashioned cake doughnuts are a delightful treat that are sure to bring a smile to your face. With their simple ingredients and comforting flavor, they are perfect for weekend mornings, special occasions, or any time you’re craving a little bit of nostalgia. Don’t be afraid to experiment with different toppings and flavors to create your own signature doughnut. So, gather your ingredients, preheat your oil, and get ready to embark on a delicious journey back in time. I hope this recipe becomes a cherished tradition in your family, just as it has been in mine. Enjoy!