
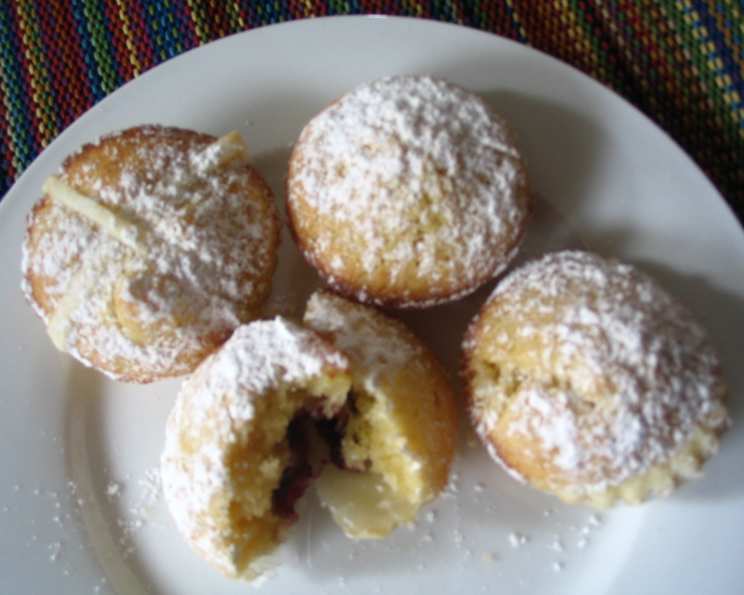
Old Fashioned Jam Cheesecakes: A Taste of Nostalgia
The scent of these little jam cheesecakes instantly transports me back to childhood birthday parties. I remember countless afternoons spent sneaking into the kitchen while my grandmother prepared them, eager to steal a taste of the sweet, buttery filling and the dollop of jam that crowned each tiny cake. They were, and still are, a perfect bite-sized treat, a reminder of simpler times filled with warmth and homemade goodness.
Recipe Overview
- Prep Time: 20 minutes
- Cook Time: 20 minutes
- Total Time: 40 minutes
- Yields: 20 cheesecakes
- Dietary Type: Vegetarian
Ingredients
- 2 sheets of pre-rolled flaky pie pastry
- Your favorite jam (strawberry, raspberry, or apricot work beautifully)
- 125g (4.4 oz) butter, softened
- 1 teaspoon grated fresh lemon rind
- 1/2 cup (100g) sugar
- 2 eggs
- 1 cup (125g) flour
- 1 teaspoon baking powder
- 2 tablespoons milk
- Icing sugar, for dusting
Equipment Needed
- 7cm (2.75 inch) biscuit cutter
- Patty tins (muffin tins also work)
- Mixing bowl
- Electric mixer (optional, but recommended)
- Sifter
- Cooling rack
Instructions
-
Begin by preparing your workspace. Unroll the pie pastry onto a clean, flat surface. Using the 7cm (2.75 inch) biscuit cutter, cut out as many rounds as possible from each sheet of pastry. Gently re-roll any leftover pastry scraps to cut out additional rounds until you have approximately 20 circles.
-
Carefully place each pastry round into the individual patty tins. Gently press the pastry into the bottom and up the sides of each tin, ensuring a snug fit.
-
Spoon about 1/2 teaspoon of your chosen jam onto the center of each pastry round. Be careful not to overfill, as the jam will spread during baking.
-
Now, prepare the cheesecake filling. In a mixing bowl, cream together the softened butter, grated fresh lemon rind, and sugar until the mixture is pale and fluffy. This step is crucial for creating a light and airy texture, so take your time and ensure the ingredients are well combined. An electric mixer makes this much easier, but it can be done by hand with some extra effort.
-
Beat in the eggs, one at a time, making sure to thoroughly incorporate each egg before adding the next. This prevents the mixture from curdling and ensures a smooth, emulsified batter.
-
In a separate bowl, sift together the flour and baking powder. This step is important for preventing lumps and ensuring an even rise.
-
Gradually add the sifted flour mixture to the creamed butter mixture, stirring gently to combine. Be careful not to overmix, as this can develop the gluten in the flour and result in a tough cheesecake.
-
Add the milk to the mixture, stirring until just combined. The batter should have a soft, dropping consistency – meaning it should easily fall off a spoon. If the batter is too thick, add a tiny splash more milk, a teaspoon at a time.
-
Spoon the cheesecake batter evenly among the pastry-lined patty tins, on top of the jam. Be careful not to overfill the tins, leaving a little space at the top for the cakes to rise.
-
Bake in a preheated oven at 190°C (375°F) for approximately 20 minutes, or until the cheesecakes are golden brown and the cakes spring back when lightly touched. The baking time may vary slightly depending on your oven, so keep a close eye on them.
-
Once baked, carefully transfer the cheesecakes to a cooling rack and allow them to cool completely. This prevents them from becoming soggy.
-
Before serving, dust generously with sifted icing sugar.
-
Optional: If you wish, before baking, you can create decorative patterns on top of the batter using thin strips of leftover pastry. Simply cut the scraps into thin strips and arrange them in a lattice or other design.
Expert Tips & Tricks
- For an extra burst of flavor, try using homemade jam.
- Make sure your butter is properly softened before creaming it with the sugar. Cold butter will not cream properly, resulting in a dense cheesecake.
- Don’t overmix the batter! Overmixing develops the gluten in the flour, which will make the cheesecakes tough.
- To prevent the pastry from puffing up too much during baking, you can dock the bottom with a fork before adding the jam and filling.
- If the tops of the cheesecakes are browning too quickly, you can loosely cover them with aluminum foil during the last few minutes of baking.
Serving & Storage Suggestions
These old fashioned jam cheesecakes are best served at room temperature, dusted generously with icing sugar. They are perfect for afternoon tea, picnics, or as a sweet treat any time of day.
To store leftovers, place them in an airtight container and keep them at room temperature for up to 2 days, or in the refrigerator for up to 5 days. They can also be frozen for up to 2 months. To freeze, wrap each cheesecake individually in plastic wrap, then place them in a freezer-safe container. Thaw overnight in the refrigerator before serving. Reheating is not recommended.
Nutritional Information
| Nutrient | Amount per Serving | % Daily Value |
|---|---|---|
| Calories | 186 kcal | 9% |
| Total Fat | 11.6g | 18% |
| Saturated Fat | 4.9g | 25% |
| Cholesterol | 34.7mg | 12% |
| Sodium | 155.3mg | 7% |
| Total Carbohydrate | 18.2g | 7% |
| Dietary Fiber | 0.8g | 3% |
| Sugars | 5.1g | 10% |
| Protein | 2.5g | 5% |
Note: Nutritional information is an estimate and may vary based on specific ingredients and preparation methods.
Variations & Substitutions
- Gluten-Free: Use a gluten-free pie crust and gluten-free flour blend.
- Different Jam: Experiment with different flavors of jam, such as fig, blueberry, or lemon curd.
- Citrus Zest: Try adding orange or lime zest instead of lemon zest for a different flavor profile.
- Spiced: Add a pinch of cinnamon, nutmeg, or cardamom to the batter for a warm, spiced flavor.
- Chocolate Chips: Stir in a handful of mini chocolate chips for a chocolatey twist.
FAQs (Frequently Asked Questions)
Q: Can I use a different size biscuit cutter?
A: Yes, you can use a different size biscuit cutter, but you’ll need to adjust the baking time accordingly. Smaller rounds will bake faster, while larger rounds will take longer.
Q: Can I make these ahead of time?
A: Yes, you can make these cheesecakes ahead of time and store them in an airtight container in the refrigerator for up to 2 days.
Q: What can I do if my pastry is cracking?
A: If your pastry is cracking, it may be too dry. Try adding a little bit of water to the pastry dough to hydrate it.
Q: My cheesecakes are sinking in the middle. What did I do wrong?
A: This can happen if the oven temperature is too low or if the cheesecakes are underbaked. Make sure your oven is properly preheated and bake the cheesecakes until they are golden brown and spring back when lightly touched.
Q: Can I freeze these cheesecakes?
A: Yes, you can freeze these cheesecakes. Wrap each cheesecake individually in plastic wrap, then place them in a freezer-safe container. Thaw overnight in the refrigerator before serving.
Final Thoughts
These old fashioned jam cheesecakes are a delightful treat that’s sure to bring a smile to your face. They’re easy to make, incredibly delicious, and perfect for any occasion. So, gather your ingredients, preheat your oven, and get ready to experience a taste of nostalgia. I encourage you to try this recipe and share your feedback. These cheesecakes pair wonderfully with a cup of tea or coffee, making them the perfect afternoon indulgence. Happy baking!