
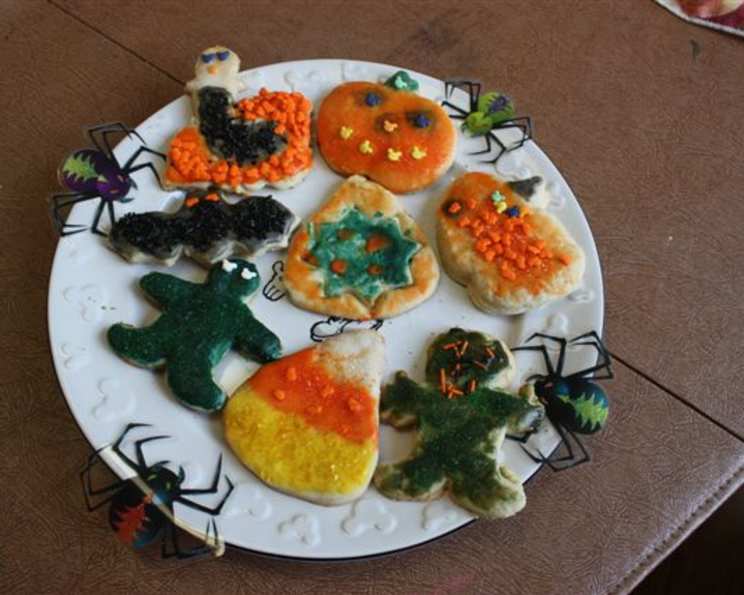
Old-Fashioned Cut-Out Frosted Butter Cookies
The scent of butter and vanilla, mingling with the cheerful chaos of holiday music, instantly transports me back to my grandmother’s kitchen. Flour dusted every surface, cookie cutters scattered like fallen leaves, and the happy chatter of family filled the air as we carefully decorated dozens of these very cookies. Each sprinkle, each swirl of frosting was a small act of love, creating edible masterpieces that tasted of pure joy and tradition. Those memories are more precious than any gold, and I find myself recreating them year after year, hoping to pass on that same sweet magic.
Recipe Overview
- Prep Time: 20 minutes
- Cook Time: 5-8 minutes
- Total Time: 35 minutes
- Yields: 80 cookies
- Dietary Type: Not specified
Ingredients
- 1 cup butter, softened
- ¾ cup sugar
- 1 egg
- 2 tablespoons cream or 2 tablespoons milk
- ½ teaspoon vanilla extract
- 3 cups flour, sifted
- 1 teaspoon baking powder
- ½ teaspoon salt
Equipment Needed
- Large bowl
- Electric mixer (optional)
- Measuring cups and spoons
- Sifter
- Rolling pin
- Cookie cutters
- Cookie sheets
- Cooling rack
Instructions
- Preheat your oven to 400 degrees Fahrenheit.
- In a large bowl, cream together the softened butter and sugar until light and fluffy. This is best achieved with an electric mixer, but can be done by hand if necessary. Ensure the butter is truly softened for a smooth consistency.
- Mix in the egg, cream (or milk), and vanilla extract. Combine until well incorporated. Don’t overmix at this stage.
- In a separate bowl, sift together the flour, baking powder, and salt. Sifting ensures a lighter, more tender cookie.
- Gradually blend the dry ingredients into the wet ingredients until a dough forms. Mix until just combined; avoid overmixing, which can lead to tough cookies.
- If desired, chill the dough for an hour for easier handling. While this step is optional, it can help the dough firm up and prevent it from spreading too much during baking. If you skip this step, make sure to flour your work surface well.
- Divide the dough into thirds. This makes it easier to roll out.
- On a lightly floured board, roll out one portion of the dough to about 1/8th inch thickness. Aim for an even thickness for consistent baking.
- Using your favorite cookie cutters, cut out shapes and place them on ungreased cookie sheets. Leave a little space between each cookie to allow for even baking.
- Bake in the preheated oven for about 5 to 8 minutes, or until lightly golden brown around the edges. Keep a close eye on them, as they can burn quickly.
- Cool the cookies on the cookie sheet for a minute or two before transferring them to a wire rack to cool completely.
- Once the cookies are completely cool, decorate with your favorite frosting and sprinkles.
SPECIAL NOTE: While vanilla extract is perfectly fine, consider using vanilla bean paste for an extra special flavor. The little flecks of vanilla bean add a beautiful visual element as well. Vintage cookie cutters can add a nostalgic charm, but be sure to use ones that are food-safe. Copper cookie cutters are a great alternative to aluminum.
Expert Tips & Tricks
- Softened Butter is Key: Make sure your butter is truly softened, but not melted. The ideal consistency is when you can easily make an indent with your finger.
- Don’t Overmix: Overmixing develops the gluten in the flour, resulting in tougher cookies. Mix until just combined.
- Chill for Success: Chilling the dough helps prevent the cookies from spreading too much in the oven. If you’re short on time, even 30 minutes in the refrigerator can make a difference.
- Even Baking: To ensure even baking, use a ruler to check the thickness of your rolled-out dough. Also, rotate the cookie sheets halfway through baking.
- Preventing Sticking: If your dough is sticking to the rolling pin or work surface, use more flour, but do so sparingly to avoid dry cookies. You can also try rolling the dough between two sheets of parchment paper.
- Re-rolling Dough: When re-rolling scraps of dough, knead them gently to avoid toughness.
- Frosting Tip: For a smoother frosting application, warm your frosting slightly.
Serving & Storage Suggestions
Serve these cookies on a festive platter at your next holiday gathering or package them in decorative boxes as gifts. They pair perfectly with a glass of cold milk, hot cocoa, or a cup of coffee.
To store, place the completely cooled and decorated cookies in an airtight container. They will keep at room temperature for up to a week. For longer storage, you can freeze the cookies for up to 2-3 months. To freeze, place the cookies in a single layer on a baking sheet and freeze until solid. Then, transfer them to an airtight container or freezer bag. Thaw at room temperature before serving.
Nutritional Information
| Nutrient | Amount per Serving | % Daily Value |
|---|---|---|
| Calories | 47 kcal | – |
| Calories from Fat | 22 g | 49% |
| Total Fat | 2.5 g | 3% |
| Saturated Fat | 1.6 g | 7% |
| Cholesterol | 8.8 mg | 2% |
| Sodium | 40.5 mg | 1% |
| Total Carbohydrate | 5.5 g | 1% |
| Dietary Fiber | 0.1 g | 0% |
| Sugars | 1.9 g | 7% |
| Protein | 0.6 g | 1% |
Note: Nutritional information is an estimate and may vary based on specific ingredients and portion sizes.
Variations & Substitutions
- Gluten-Free: Substitute the all-purpose flour with a gluten-free blend. Be sure to add a binder like xanthan gum to help hold the cookies together.
- Dairy-Free: Replace the butter with a vegan butter substitute and use a plant-based milk instead of cream or milk.
- Citrus Zest: Add the zest of an orange or lemon to the dough for a bright, citrusy flavor.
- Spices: Incorporate spices like cinnamon, nutmeg, or ginger for a warmer, more festive flavor profile.
- Chocolate Chip: Add mini chocolate chips to the dough for a chocolatey twist.
FAQs (Frequently Asked Questions)
Q: Can I make the dough ahead of time?
A: Yes, you can make the dough up to 2 days in advance. Wrap it tightly in plastic wrap and store it in the refrigerator. Let it soften slightly at room temperature before rolling it out.
Q: Why are my cookies spreading too much during baking?
A: This could be due to several factors, including using butter that is too soft, not chilling the dough, or overmixing the dough.
Q: How do I prevent the cookies from burning?
A: Ensure your oven temperature is accurate and keep a close eye on the cookies while they are baking. You can also try placing a sheet of parchment paper on the cookie sheet to help prevent burning.
Q: Can I freeze the decorated cookies?
A: Yes, you can freeze decorated cookies. Place them in a single layer on a baking sheet and freeze until solid. Then, transfer them to an airtight container or freezer bag.
Q: What’s the best way to decorate these cookies?
A: The possibilities are endless! Use your favorite frosting recipe and decorate with sprinkles, candies, edible glitter, or even food coloring.
Final Thoughts
These Old-Fashioned Cut-Out Frosted Butter Cookies are more than just a recipe; they’re a chance to create memories and traditions that will last a lifetime. Whether you’re baking with your children, grandchildren, or friends, the joy of creating something delicious together is truly special. Don’t be afraid to experiment with different flavors, shapes, and decorations to make these cookies your own. So, gather your ingredients, preheat your oven, and get ready to spread some holiday cheer with every bite!