
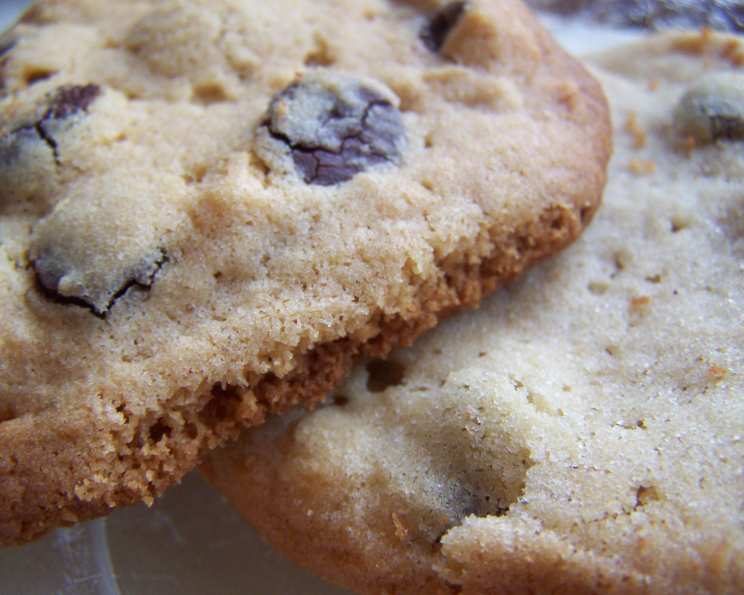
Old-Fashioned Peanut Butter Chocolate Chip Cookies
The scent of peanut butter cookies baking always takes me straight back to my grandmother’s kitchen. She had this well-worn metal tin, always overflowing with them. More often than not, there were milk chocolate chips mixed in, lending a smooth sweetness to the nutty dough. Every time I bite into one, I’m instantly transported to that warm, comforting space, feeling the love baked into each and every cookie.
Recipe Overview
- Prep Time: 15 minutes
- Cook Time: 8-10 minutes
- Total Time: 1 hour 25 minutes (includes chilling)
- Yields: Approximately 42 cookies
- Dietary Type: Not specified (contains egg and dairy)
Ingredients
- 1 1/2 cups flour
- 1 teaspoon baking soda
- 1 cup butter or margarine, softened
- 1/2 cup peanut butter
- 1/2 cup sugar
- 1/2 cup packed brown sugar
- 1 teaspoon vanilla
- 1 large egg
- 1 (11 1/2 ounce) package milk chocolate chips
Equipment Needed
- Mixing bowls
- Electric mixer
- Measuring cups and spoons
- Spatula
- Baking sheets
- Cookie scoop or tablespoon
- Glass or flat-bottomed measuring cup
- Wire rack
- Plastic wrap
Instructions
-
In a medium bowl, combine the flour and baking soda. Whisk to ensure the baking soda is evenly distributed. This step is crucial for achieving the right texture in your cookies.
-
In a large mixing bowl, beat together the softened butter (or margarine), peanut butter, sugar, brown sugar, and vanilla until the mixture is light and creamy. This usually takes about 3-5 minutes with an electric mixer. Be sure to scrape down the sides of the bowl occasionally to ensure everything is evenly incorporated.
-
Beat in the egg until well combined. Don’t overmix at this stage, just enough to incorporate the egg.
-
Gradually beat in the flour mixture until just combined. Be careful not to overmix, as this can lead to tough cookies. Mix until the flour is just incorporated.
-
Stir in the milk chocolate chips. Distribute them evenly throughout the dough.
-
Cover the dough with plastic wrap and refrigerate for about 1 hour. This chilling time is important, as it allows the gluten in the flour to relax, preventing the cookies from spreading too thin during baking. It also helps to intensify the flavors.
-
Preheat your oven to 375 degrees F (190 degrees C). Make sure your oven rack is in the center position for even baking.
-
Drop the chilled dough by rounded tablespoons onto ungreased baking sheets. You can use a cookie scoop for uniform sizes or simply use a spoon. Leave about 2 inches between each cookie to allow for spreading.
-
Press down each cookie slightly with the bottom of a glass or flat-bottomed measuring cup. You can dip the bottom of the glass in sugar to prevent sticking, but this is optional. The goal is to flatten the cookies slightly for even baking.
-
Bake for 8-10 minutes, or until the edges are golden brown and the centers are set. Keep a close eye on them, as baking times may vary depending on your oven.
-
Cool the cookies on the baking sheets for 4 minutes before transferring them to a wire rack to cool completely. This allows them to firm up slightly and prevents them from breaking when moved.
Expert Tips & Tricks
-
Soft Butter is Key: Make sure your butter is truly softened, not melted. This will ensure a creamy dough. Take the butter out of the fridge an hour or two before you plan to bake.
-
Don’t Overmix: Overmixing the dough develops the gluten, resulting in tough cookies. Mix until just combined.
-
Chilling is Crucial: Don’t skip the chilling step! It prevents the cookies from spreading too much and enhances the flavor. If you are in a rush, 30 minutes is better than nothing. You can even chill the dough overnight.
-
Even Baking: Use a cookie scoop to ensure all the cookies are the same size for even baking.
-
Prevent Sticking: Line your baking sheets with parchment paper for easy cleanup and to prevent sticking.
-
Peanut Butter Power: For an even stronger peanut butter flavor, use natural peanut butter without added sugar. Be sure to stir it well before measuring.
Serving & Storage Suggestions
Serve these cookies with a tall glass of cold milk, a scoop of vanilla ice cream, or a warm cup of coffee. They are perfect for snacking, desserts, or gifting.
Store cooled cookies in an airtight container at room temperature for up to 5 days. For longer storage, you can freeze them for up to 2 months. To freeze, arrange the cooled cookies in a single layer on a baking sheet and freeze until solid. Then, transfer them to a freezer-safe bag or container. Thaw at room temperature before serving.
Nutritional Information
| Nutrient | Amount per Serving | % Daily Value (approximate) |
|---|---|---|
| Calories | 136 kcal | 7% |
| Total Fat | 8.4 g | 12% |
| Saturated Fat | 4.6 g | 23% |
| Cholesterol | 17.8 mg | 6% |
| Sodium | 91.3 mg | 4% |
| Total Carbohydrate | 13.6 g | 5% |
| Dietary Fiber | 0.6 g | 2% |
| Sugars | 9.2 g | N/A |
| Protein | 2 g | 4% |
Note: Nutritional information is approximate and may vary based on specific ingredients and serving sizes.
Variations & Substitutions
-
Gluten-Free: Substitute the all-purpose flour with a gluten-free all-purpose flour blend. You may need to add a little extra liquid if the dough seems dry.
-
Different Chocolate: Use dark chocolate chips, white chocolate chips, or even chopped chocolate bars instead of milk chocolate chips.
-
Nut-Free: Substitute the peanut butter with sunflower seed butter or another nut-free alternative.
-
Add-Ins: Get creative with other add-ins! Try chopped nuts, pretzels, toffee bits, or sprinkles.
-
Vegan: Replace the butter with vegan butter, the egg with a flax egg (1 tablespoon ground flaxseed mixed with 3 tablespoons water), and use vegan chocolate chips.
FAQs (Frequently Asked Questions)
Q: Can I make the dough ahead of time?
A: Yes, the dough can be made up to 2 days in advance and stored in the refrigerator. Just be sure to wrap it tightly in plastic wrap. You might need to let it sit at room temperature for a few minutes to soften slightly before scooping.
Q: What if my cookies spread too thin?
A: This is usually due to the butter being too soft or not chilling the dough long enough. Make sure your butter is softened but not melted, and chill the dough for at least an hour.
Q: Can I freeze the baked cookies?
A: Yes, baked cookies can be frozen for up to 2 months. Allow them to cool completely before freezing. Thaw at room temperature.
Q: Why are my cookies dry?
A: Overbaking is a common cause of dry cookies. Bake them until the edges are golden brown but the centers are still slightly soft. Also, be sure to measure your flour accurately.
Q: How do I prevent the bottom of the glass from sticking when flattening the cookies?
A: Dip the bottom of the glass in sugar before pressing down on the cookies. You can also use a piece of parchment paper to prevent sticking.
Final Thoughts
These Old-Fashioned Peanut Butter Chocolate Chip Cookies are more than just a sweet treat; they’re a little piece of home, a reminder of simpler times, and a delicious way to share some love. Don’t be afraid to experiment with variations and make them your own. And most importantly, enjoy the process of baking and the joy of sharing these cookies with friends and family. I encourage you to give this recipe a try – and don’t hesitate to leave a comment sharing your own twists or favorite memories associated with these classic cookies! Pair them with a scoop of vanilla ice cream and a drizzle of chocolate sauce for an extra-special treat. Happy baking!