
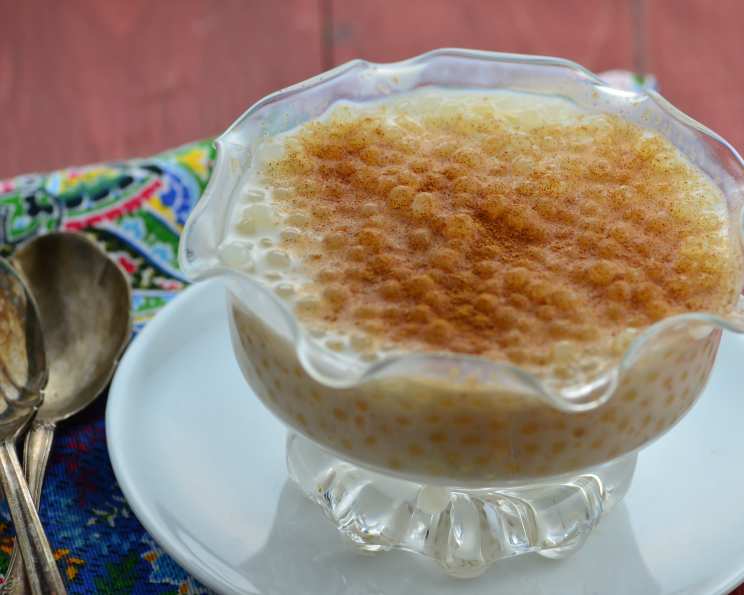
Old Fashioned Tapioca Pudding: A Taste of Nostalgia
There’s something utterly comforting about a bowl of tapioca pudding, isn’t there? I remember my grandmother always had a batch chilling in the fridge, ready for a sweet treat after Sunday dinner. The tiny, translucent pearls suspended in creamy sweetness, the gentle vanilla aroma…it was pure love in a spoonful. Even now, the first bite transports me back to her sunny kitchen, filled with the warmth of family and the simple joy of homemade goodness.
Recipe Overview
- Prep Time: 12 hours 15 minutes
- Cook Time: 1 hour
- Total Time: 13 hours 15 minutes
- Servings: 4-6
- Yield: Approximately 4 cups
- Dietary Type: Gluten-Free
Ingredients
- 1/2 cup pearl tapioca
- 1 1/2 cups milk
- 1 1/2 cups heavy cream
- 1 fresh vanilla bean
- 1/2 cup sugar
- 1 pinch salt
- 2 egg yolks
Equipment Needed
- Large bowl
- Heavy-bottomed pot
- Whisk
- Measuring cups and spoons
Instructions
-
Begin by preparing the tapioca pearls. Place them in a large bowl and cover generously with water. Ensure all the pearls are submerged. Cover the bowl and let the tapioca soak overnight in the refrigerator, for at least 12 hours. This allows the pearls to soften and plump up, which is crucial for the pudding’s signature texture.
-
The next day, drain the water from the soaked tapioca pearls. Discard the soaking water, making sure to strain the tapioca well.
-
In a heavy-bottomed pot, combine the milk, heavy cream, and the drained tapioca pearls.
-
Prepare the vanilla bean: Using a sharp knife, carefully split the vanilla bean lengthwise. Use the back of the knife to scrape out the vanilla seeds. Add both the vanilla bean pod and the seeds to the pot with the milk, cream, and tapioca. The pod infuses the mixture with a subtle vanilla flavor, while the seeds provide those beautiful, telltale specks of vanilla goodness.
-
Place the pot over medium-low heat. Bring the mixture to a slow simmer, stirring frequently to prevent the tapioca from sticking to the bottom of the pot and scorching.
-
Cook for 1 hour, continuing to stir often. The mixture should thicken gradually, and the tapioca pearls will become translucent. Be patient; this slow cooking process is essential for achieving the right consistency.
-
After an hour, remove the vanilla bean pod from the pot.
-
Add the sugar and salt to the pot. Stir well to dissolve the sugar completely and ensure the salt is evenly distributed.
-
Continue to simmer the mixture, stirring constantly, being extra careful to prevent the tapioca from sticking to the bottom of the pan. The mixture should be nicely thickened now.
-
In a separate bowl, whisk the egg yolks until they are light and slightly frothy. This step is important for tempering the eggs.
-
Gradually temper the egg yolks by slowly drizzling in about 1/2 cup of the hot tapioca mixture into the bowl with the whisked yolks, whisking constantly as you pour. This process raises the temperature of the yolks gradually, preventing them from scrambling when added to the hot pot.
-
Slowly pour the tempered egg yolk mixture back into the pot with the remaining tapioca mixture, stirring constantly to ensure everything is well combined.
-
Continue to cook the pudding over low heat for another 2-3 minutes, stirring constantly, until the pudding has thickened slightly. Be careful not to overcook the pudding at this stage, as the egg yolks can curdle if heated too much.
-
Remove the pot from the heat and pour the tapioca pudding into a bowl or individual serving dishes.
-
Cool the pudding completely at room temperature. Then, cover the bowl or dishes with plastic wrap, pressing the wrap directly onto the surface of the pudding to prevent a skin from forming.
-
Chill the tapioca pudding in the refrigerator for at least several hours, or preferably overnight, before serving. Chilling allows the pudding to fully set and the flavors to meld together beautifully.
Expert Tips & Tricks
-
Don’t skip the overnight soak! It’s crucial for the tapioca to achieve the proper texture. If you’re short on time, you can try a quick soak in hot water for a couple of hours, but the overnight soak yields the best results.
-
Stir, stir, stir! Constant stirring is essential to prevent the tapioca from sticking and burning to the bottom of the pot.
-
Tempering the eggs is key to preventing scrambled eggs in your pudding. Take your time and drizzle the hot mixture in slowly while whisking vigorously.
-
Adjust the sweetness: Feel free to adjust the amount of sugar to your liking. Start with the recommended amount and add more to taste.
-
For a richer flavor, use whole milk instead of low-fat or skim milk. The higher fat content will create a creamier and more decadent pudding.
-
If you find that your pudding is too thick, you can stir in a little extra milk or cream to thin it out to your desired consistency.
Serving & Storage Suggestions
Serve the old fashioned tapioca pudding chilled, straight from the refrigerator. A dollop of fresh whipped cream adds a touch of elegance and enhances the creamy texture. You can also garnish it with fresh berries, a sprinkle of cinnamon, or a drizzle of caramel sauce.
Leftover tapioca pudding should be stored in an airtight container in the refrigerator. It will keep for up to 3-4 days. It’s best not to freeze the pudding, as the texture can change upon thawing.
Nutritional Information
| Nutrient | Amount per Serving | % Daily Value |
|---|---|---|
| Calories | 350 kcal | 18% |
| Total Fat | 20g | 31% |
| Saturated Fat | 13g | 65% |
| Cholesterol | 150mg | 50% |
| Sodium | 80mg | 3% |
| Total Carbohydrate | 35g | 12% |
| Dietary Fiber | 0g | 0% |
| Sugars | 25g | N/A |
| Protein | 5g | 10% |
Note: Nutritional information is an estimate and may vary based on specific ingredients and portion sizes.
Variations & Substitutions
-
Dairy-Free Tapioca Pudding: Substitute the milk and heavy cream with coconut milk or other non-dairy milk alternatives. Keep in mind that coconut milk will impart a slight coconut flavor.
-
Chocolate Tapioca Pudding: Add 2-3 tablespoons of cocoa powder to the milk and cream mixture. Adjust the sugar as needed to compensate for the bitterness of the cocoa.
-
Citrus Zest: Add the zest of an orange or lemon to the milk and cream mixture for a bright, refreshing flavor.
-
Spice It Up: Add a pinch of ground cinnamon, nutmeg, or cardamom to the pudding for a warm, cozy flavor.
FAQs (Frequently Asked Questions):
Q: Can I use quick-cooking tapioca instead of pearl tapioca?
A: While quick-cooking tapioca can be used, the texture will be different. Pearl tapioca provides a more distinct, chewy texture that is characteristic of old-fashioned tapioca pudding.
Q: Why do I need to soak the tapioca overnight?
A: Soaking the tapioca pearls allows them to absorb moisture and soften, which is essential for achieving the right consistency in the pudding. Without soaking, the pearls will remain hard and won’t cook properly.
Q: How can I prevent the pudding from forming a skin on top while cooling?
A: To prevent a skin from forming, press a piece of plastic wrap directly onto the surface of the pudding while it cools.
Q: Can I freeze tapioca pudding?
A: Freezing is not recommended, as the texture of the pudding can change upon thawing. It’s best to store it in the refrigerator and consume it within 3-4 days.
Q: Is it normal for the tapioca pearls to be slightly chewy?
A: Yes, a slight chewiness is characteristic of tapioca pudding made with pearl tapioca. The pearls should be translucent and tender, but not completely dissolved.
Final Thoughts
So there you have it: a journey back in time with a bowl of creamy, dreamy old fashioned tapioca pudding. This recipe is a classic for a reason – it’s simple, comforting, and utterly delicious. Don’t be intimidated by the soaking time; the result is well worth the wait. Gather your ingredients, put on some good music, and enjoy the process of creating this delightful treat. I encourage you to try this recipe and share it with loved ones. And if you have any variations or serving suggestions, I’d love to hear them!