
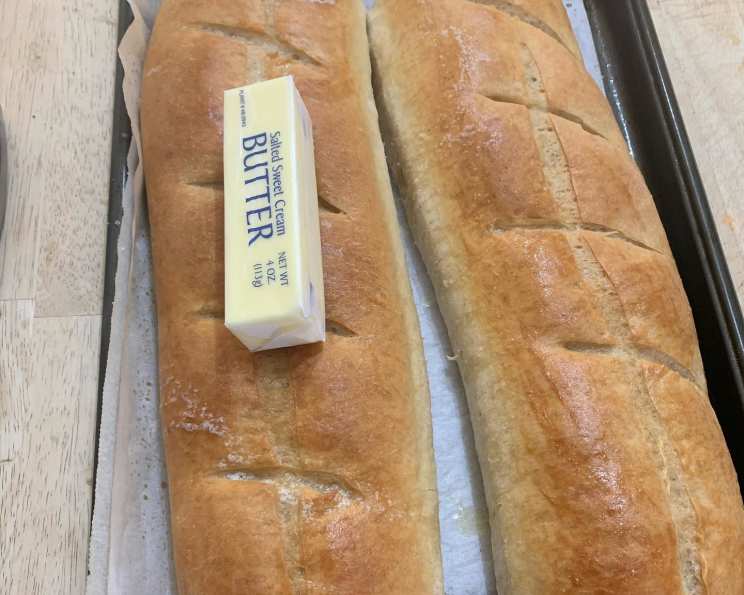
“Old Reliable” French Bread (for KitchenAid Mixers)
I remember the day my grandmother received her KitchenAid mixer. It was a gleaming, almost otherworldly appliance in her modest kitchen. While she made many wonderful things with it, it was her French bread that truly stood out. The aroma of that baking bread, the almost ceremonial first slice, the satisfying crust giving way to a soft, airy interior – it’s a memory etched in my heart, a simple pleasure I’ve been chasing in my own kitchen ever since.
Recipe Overview
- Prep Time: 2 hours 20 minutes
- Cook Time: 30 minutes
- Total Time: 2 hours 50 minutes
- Yield: 2 loaves (approximately 15 slices per loaf)
- Servings: 30
- Dietary Type: Vegetarian
Ingredients
- 2 packages active dry yeast
- 2 ½ cups water (105°F to 115°F)
- 1 tablespoon salt
- 1 tablespoon melted margarine or butter
- 7 cups all-purpose flour
- 2 tablespoons cornmeal
- 1 egg white
- 1 tablespoon cold water
Equipment Needed
- KitchenAid stand mixer with dough hook
- Large mixing bowl
- Measuring cups and spoons
- Greased baking sheets
- Sharp knife
- Wire cooling racks
Instructions
-
Begin by dissolving the yeast in the warm water in the bowl of your KitchenAid mixer. Ensure the water is between 105°F and 115°F for optimal yeast activation. Too hot, and you’ll kill the yeast; too cold, and it won’t activate properly. Let it stand for about 5 minutes until foamy. This step is crucial to guarantee the bread will rise.
-
Add the salt, melted margarine (or butter), and flour to the yeast mixture.
-
Attach the bowl and dough hook to your KitchenAid mixer. Turn the mixer to Speed 2 and mix for about 1 minute, or until the ingredients are well blended.
-
Continue to knead the dough on Speed 2 for approximately 2 minutes longer. The dough will be sticky; this is expected. Don’t be tempted to add more flour at this stage, as it will make the bread denser.
-
Place the sticky dough in a large, greased bowl, turning it to coat all sides. This prevents the dough from drying out during the rising process.
-
Cover the bowl and let it rise in a warm place, free from drafts, for about 1 hour, or until the dough has doubled in bulk. A slightly warm oven (turned off!) or a sunny spot in your kitchen works well.
-
Once the dough has doubled, punch it down to release the trapped air. This step is important to redistribute the yeast and create a more even texture in the final loaf.
-
Divide the dough in half.
-
Roll each half into a 12″ x 15″ rectangle. Use a rolling pin on a lightly floured surface to achieve the desired size and shape.
-
Roll the dough tightly from the longest side, tapering the ends if desired. This technique creates the characteristic French bread shape and ensures a good crust formation. Pinch the seam closed firmly.
-
Place the shaped loaves on greased baking sheets that have been dusted with cornmeal. The cornmeal will prevent the loaves from sticking and add a subtle, delightful texture to the bottom crust.
-
Cover the loaves and let them rise again in a warm place, free from drafts, for another hour, or until they have doubled in bulk.
-
Preheat your oven to 450°F (232°C).
-
Using a very sharp knife, make 4 diagonal cuts on the top of each loaf. These slashes not only look beautiful, but they also allow the bread to expand properly in the oven, preventing it from cracking unpredictably.
-
Bake the loaves at 450°F for 25 minutes, then remove them from the oven.
-
In a small bowl, beat the egg white and cold water together until frothy.
-
Brush each loaf with the egg white mixture. This will give the bread a beautiful, glossy sheen.
-
Return the loaves to the oven and bake for 5 minutes longer, or until they are golden brown and sound hollow when tapped on the bottom.
-
Immediately remove the loaves from the baking sheets and cool them on wire racks. This prevents the bottoms from becoming soggy.
-
Serve the freshly baked French bread with your favorite spread, such as herbed butter, garlic bread topping, or simply enjoy it plain.
Expert Tips & Tricks
- Water Temperature: Using a thermometer to verify the water temperature is crucial for yeast activation. Too hot and you kill the yeast.
- Sticky Dough: Resist the urge to add more flour while kneading. A slightly sticky dough results in a lighter, airier bread.
- Sharp Knife: A very sharp serrated knife is essential for making clean diagonal cuts on the loaves. A dull knife will tear the dough, affecting the bread’s rise and appearance.
- Oven Temperature: Oven temperatures can vary. Keep an eye on the bread during baking and adjust the time as needed. If the loaves are browning too quickly, reduce the oven temperature slightly.
- Steam: For an even crispier crust, you can create steam in the oven during the first 10 minutes of baking. Pour a cup of hot water into a preheated baking pan on the lower rack of the oven.
Serving & Storage Suggestions
Serve the French bread warm, sliced, and accompanied by your favorite dips, spreads, or as a side to soups and stews. Freshly baked bread is best enjoyed on the same day, but it can be stored at room temperature in a bread box or airtight container for up to 2 days. For longer storage, wrap the bread tightly in plastic wrap and freeze it for up to 2 months. To reheat frozen bread, thaw it completely and then bake it in a preheated oven at 350°F (175°C) for 10-15 minutes, or until warmed through.
Nutritional Information
| Nutrient | Amount per Serving | % Daily Value |
|---|---|---|
| Calories | 113.5 kcal | – |
| Calories from Fat | 6 g | 6% |
| Total Fat | 0.7 g | 1% |
| Saturated Fat | 0.1 g | 0% |
| Cholesterol | 0 mg | 0% |
| Sodium | 240.4 mg | 10% |
| Total Carbohydrate | 22.9 g | 7% |
| Dietary Fiber | 0.9 g | 3% |
| Sugars | 0.1 g | 0% |
| Protein | 3.4 g | 6% |
Variations & Substitutions
- Whole Wheat French Bread: Substitute 2-3 cups of the all-purpose flour with whole wheat flour for a nuttier flavor and increased fiber.
- Herb-Infused French Bread: Add 1-2 tablespoons of your favorite dried herbs, such as rosemary, thyme, or oregano, to the dough for an aromatic twist.
- Garlic French Bread: Before baking, brush the loaves with garlic-infused olive oil for a flavorful crust.
- Sourdough French Bread: Use a sourdough starter in place of the active dry yeast for a tangier flavor and chewier texture. You will need to adjust the rising times accordingly.
FAQs (Frequently Asked Questions)
Q: My dough isn’t rising. What could be the problem?
A: The most common reason for dough not rising is inactive yeast. Ensure your water temperature is between 105°F and 115°F, and that your yeast isn’t expired. Also, a cold environment can inhibit rising, so find a warm, draft-free spot.
Q: Can I use bread flour instead of all-purpose flour?
A: Yes, you can substitute bread flour for all-purpose flour. Bread flour has a higher protein content, which will result in a chewier, more structured loaf.
Q: How can I tell if the bread is done?
A: The bread is done when it’s golden brown and sounds hollow when tapped on the bottom. An internal temperature of 200-210°F (93-99°C) also indicates doneness.
Q: My bread is browning too quickly. What should I do?
A: If the bread is browning too quickly, lower the oven temperature by 25°F (15°C) and cover the loaves loosely with foil during the last 10-15 minutes of baking.
Q: Can I make the dough ahead of time?
A: Yes, you can prepare the dough ahead of time. After the first rise, punch down the dough, wrap it tightly in plastic wrap, and refrigerate it for up to 24 hours. Let the dough come to room temperature before shaping and baking.
Final Thoughts
This “Old Reliable” French bread recipe, perfected with the help of a KitchenAid mixer, is a testament to the simple joys of homemade baking. It’s more than just a recipe; it’s an invitation to create memories, share warmth, and savor the unparalleled pleasure of fresh, crusty bread. Don’t hesitate to experiment with variations, add your personal touch, and most importantly, enjoy the process. I encourage you to give this recipe a try and share your creations! Consider serving it with a hearty bowl of French onion soup or a platter of artisanal cheeses for the ultimate culinary experience. Bon appétit!