
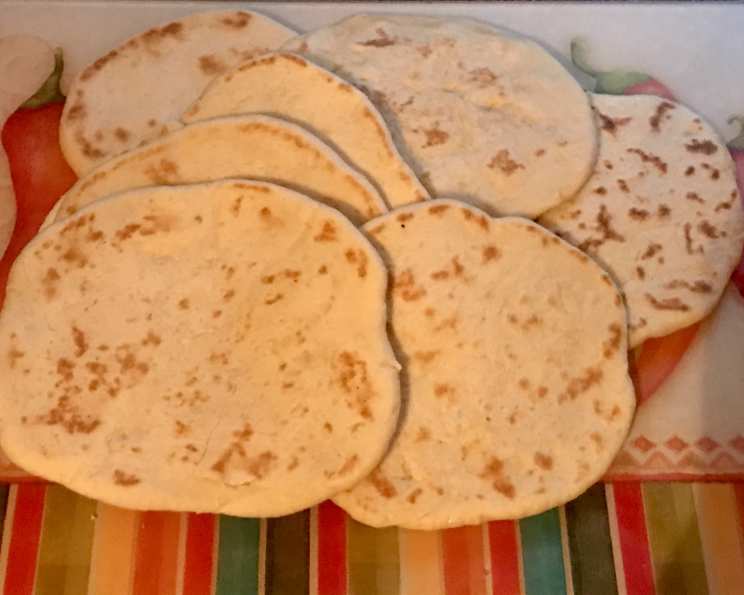
Olga Bread: A Taste of Nostalgia
The memory is etched in my mind: the scent of warm, subtly sweet flatbread mingling with the chatter of my family. Growing up, Olga bread was a staple during our casual dinners. These weren’t just ordinary breads; they were tender circles, lightly browned and perfect for scooping up savory stews or wrapping around grilled meats. Each bite was a comforting reminder of home, a simple pleasure that elevated any meal. Now, after years of searching, I’m thrilled to share a recipe that captures the essence of those cherished memories.
Recipe Overview
- Prep Time: 30 minutes
- Cook Time: 20 minutes
- Total Time: 50 minutes
- Servings: 16
- Yield: 16 Olgas
- Dietary Type: Vegetarian
Ingredients
- 1 cup milk
- 1/4 cup honey
- 1/4 cup margarine
- 1 teaspoon salt
- 2 1/4 teaspoons active dry yeast (1 package)
- 1/4 cup warm water
- 1 teaspoon sugar
- 4 cups flour, divided
- 1 egg
Equipment Needed
- Large mixing bowl
- Measuring cups and spoons
- Dry skillet
- Plastic wrap
- Oiled bowl
Instructions
-
Begin by scalding the milk. Heat the milk in a saucepan until it just begins to simmer, then immediately remove it from the heat and pour it into a large bowl. This process helps to activate the yeast properly.
-
Add the honey, margarine, and salt to the scalded milk. Stir until the margarine is completely melted and the mixture is well combined. Set this aside to cool until it reaches a lukewarm temperature. This is crucial because hot liquid can kill the yeast, while cold liquid won’t activate it.
-
In a separate small bowl, combine the yeast, warm water, and sugar. Stir well until the sugar is dissolved. Allow this mixture to sit for about 5-10 minutes until it becomes frothy, which indicates that the yeast is active and ready to use. This step is often called “proofing” the yeast.
-
To the lukewarm milk mixture, add 1 1/2 cups of the flour. Beat well with a spoon or mixer until a smooth batter forms. This initial addition of flour helps to develop the gluten structure of the bread.
-
Mix in the egg and the yeast mixture. Ensure everything is thoroughly combined. The egg adds richness and helps to bind the ingredients together.
-
Gradually add the remaining flour, a little at a time, until a sticky dough is formed. It’s important to add the flour slowly to avoid adding too much, which can result in a dry, tough bread.
-
Turn the dough out onto a lightly floured surface and knead it for about two minutes. The dough will be sticky, but resist the urge to add more flour. The stickiness is what contributes to the bread’s tender texture.
-
Place the dough in an oiled bowl, turning it once to coat the entire surface. This prevents the dough from drying out as it rises.
-
Cover the bowl with plastic wrap and let it stand in a warm place until the dough has doubled in bulk. This may take about 1 to 1.5 hours, depending on the temperature of your environment.
-
Once the dough has doubled, punch it down to release the air. Divide the dough into 16 equal pieces.
-
Roll each piece into a thin, rough circle about 8-10 inches in diameter.
-
Heat a large dry skillet over medium-high heat; do not use any oil. It’s very important to use a dry skillet for this recipe.
-
Bake each circle for about 15 seconds on one side, then flip and bake for about 10 seconds on the other side, until mottled brown spots appear. The bread will puff up slightly as it cooks. Watch carefully to avoid burning.
-
Remove the cooked bread from the skillet and allow it to cool completely. Store in a plastic bag to maintain its softness.
Expert Tips & Tricks
- Don’t overmix the dough. Overmixing can lead to a tough bread. Mix just until the ingredients are combined.
- Proof your yeast. Always proof your yeast to ensure it’s active. If the yeast doesn’t bubble, it’s likely dead and you’ll need to start with fresh yeast.
- Control the heat. Keep a close eye on the skillet temperature. If it gets too hot, the bread will burn before it cooks through. If it’s not hot enough, the bread will be pale and won’t develop the desired brown spots.
- Work in batches: Roll out a few circles at a time and keep them covered while you’re cooking the previous batch. This prevents the dough from drying out.
Serving & Storage Suggestions
Olga bread is incredibly versatile. Serve it warm with soups, stews, or dips. It’s also delicious as a wrap for sandwiches or grilled meats. Store leftover bread in a plastic bag at room temperature for up to 3 days, or in the freezer for up to 2 months. To reheat, simply warm the bread in a dry skillet or microwave for a few seconds. If frozen, thaw completely before reheating.
Nutritional Information
| Nutrient | Amount per Serving | % Daily Value |
|---|---|---|
| Calories | 159.6 kcal | – |
| Calories from Fat | 23 g | 15% |
| Total Fat | 2.6 g | 4% |
| Saturated Fat | 0.8 g | 3% |
| Cholesterol | 13.8 mg | 4% |
| Sodium | 175.1 mg | 7% |
| Total Carbohydrate | 29.4 g | 9% |
| Dietary Fiber | 1 g | 4% |
| Sugars | 4.7 g | – |
| Protein | 4.4 g | 8% |
Note: Nutritional information is an estimate and may vary based on specific ingredients and serving sizes.
Variations & Substitutions
- Gluten-Free Olga Bread: Substitute the all-purpose flour with a gluten-free flour blend. Be sure to add a binder like xanthan gum to help with the dough’s structure.
- Whole Wheat Olga Bread: Replace half of the all-purpose flour with whole wheat flour for a nuttier flavor and added fiber.
- Dairy-Free Olga Bread: Use a plant-based milk alternative like almond or soy milk, and substitute the margarine with a dairy-free butter substitute.
- Herb-Infused Olga Bread: Add dried herbs like rosemary, thyme, or oregano to the dough for a savory twist.
FAQs (Frequently Asked Questions)
Q: Why is my Olga bread tough?
A: Overmixing the dough or adding too much flour can result in tough bread. Be sure to mix gently and add flour gradually until just combined.
Q: Can I use instant yeast instead of active dry yeast?
A: Yes, you can use instant yeast. You can add it directly to the flour without proofing it first. Use the same amount as the active dry yeast called for in the recipe.
Q: How do I keep the Olga bread soft after cooking?
A: Store the cooked bread in a plastic bag or airtight container to prevent it from drying out.
Q: Can I make the dough ahead of time?
A: Yes, you can make the dough ahead of time. After the dough has risen, punch it down, cover it tightly, and refrigerate it for up to 24 hours. Let it come to room temperature before rolling and cooking.
Q: What’s the best way to reheat Olga bread?
A: The best way to reheat Olga bread is in a dry skillet over medium heat, or in a microwave for a few seconds. Avoid overheating, as this can make the bread tough.
Final Thoughts
This Olga bread recipe isn’t just about following steps; it’s about recreating a taste of home, a comforting memory, and a simple pleasure to share with your loved ones. I encourage you to try it, experiment with different flavors, and make it your own. Whether you serve it alongside a hearty stew or simply enjoy it warm with a pat of butter, I hope this bread brings as much joy to your table as it has to mine. Don’t hesitate to share your feedback and photos; I’d love to see your Olga bread creations!