
Olive Oil Pizza Dough – No Kneading Needed!
Pizza night was a sacred event in our house growing up. My grandmother, a woman who believed deeply in the power of simple, home-cooked meals, would always let me “help” her make the dough. I mostly just made a mess, flouring my face and giggling as she patiently showed me how to knead. While I cherish those memories, I’ve since discovered that great pizza doesn’t always require hours of kneading. This olive oil pizza dough is proof – easy, flavorful, and utterly delicious!
Recipe Overview
- Prep Time: 10 minutes
- Rise Time: 2 hours
- Cook Time: 12 minutes
- Total Time: 2 hours 22 minutes
- Yield: Two 10-inch pizza crusts
- Dietary Type: Vegetarian
Ingredients
- 1 3/8 cups lukewarm water
- 3/4 tablespoon granulated yeast (3/4 packet, room temperature)
- 3/4 tablespoon salt
- 1/2 tablespoon sugar
- 1/8 cup extra virgin olive oil (the fruitier the oil, the better the flavor)
- 3 1/4 cups unbleached all-purpose flour
Equipment Needed
- 5-quart bowl or lidded (not air-tight) food container
- Spoon, large capacity food processor (with dough attachment), or heavy-duty stand mixer (with dough hook)
- Baking stone
- Pizza Peel (optional, but helpful)
Instructions
-
In a large 5-quart bowl or a lidded (but not airtight) food container, combine the lukewarm water, granulated yeast, salt, sugar, and extra virgin olive oil. Make sure the water isn’t too hot, or you risk killing the yeast. Lukewarm, almost body temperature, is perfect.
-
Add the unbleached all-purpose flour to the wet ingredients. Mix everything together until just combined. You can use a spoon, a large capacity food processor with a dough attachment, or a heavy-duty stand mixer with a dough hook. If using a spoon or your hands, you might need to wet your hands slightly to incorporate the last bit of flour, ensuring it’s all well mixed. Avoid overmixing; we’re not aiming for a perfectly smooth dough at this stage.
-
Cover the bowl or container with a lid (again, making sure it’s not airtight). Allow the dough to rest at room temperature until it rises and collapses (or flattens on top). This usually takes approximately 2 hours. The exact time can vary depending on the temperature of your room; warmer temperatures will speed up the process.
-
After the initial rise, the dough can be used immediately. However, it’s often easier to handle when cold. To store it, refrigerate the dough in a lidded (but not airtight) container for up to 12 days. This slow fermentation in the refrigerator develops a deeper, more complex flavor.
-
Thirty minutes before you plan to bake your pizza, preheat your oven to 500°F (260°C) with a baking stone inside. The baking stone needs ample time to heat up thoroughly; this is crucial for a crispy crust.
-
Instead of kneading this dough, you’ll “cloak” it. This process is very important and should take no more than 30 seconds from start to finish. Sprinkle a little flour on the surface of the dough you’ve made. Pull or cut off a grapefruit-sized ball – this is enough for one pizza. Sprinkle a bit more flour on top of that ball.
-
Using the entire length of the sides of your thumbs, gently stretch the top surface of the dough around to the under part of the ball. Be gentle! You’re not tearing the dough, but think of it as lengthening the fibers on the very top surface by stretching it just a bit. The goal is to create surface tension that will help the crust rise in the oven.
-
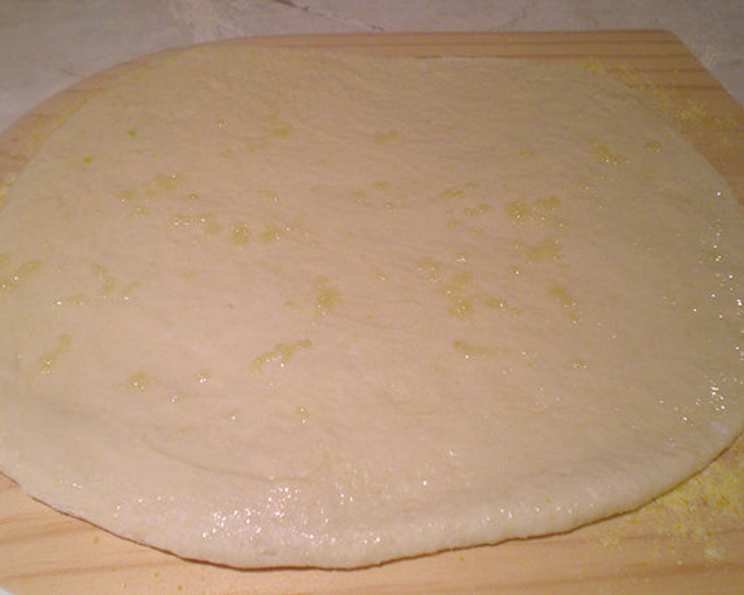
Now, go ahead and roll out the dough for your pizza. Aim for a thin, even crust. If the dough is sticking, add a bit more flour to your work surface.
-
Brush the thinly rolled-out dough with garlic oil (or regular olive oil). Sprinkle on your favorite prepared toppings. Don’t overload the pizza with toppings, or the crust may become soggy.
-
Carefully transfer the pizza to the preheated baking stone. This is where a pizza peel comes in handy! Bake for 6 minutes.
-
Give the pizza a 1/2 turn and continue baking for another 6 minutes, being careful that the crust doesn’t burn. Keep a close eye on it, as oven temperatures can vary. The pizza is done when the crust is golden brown and the cheese is melted and bubbly.
-
Remove the pizza from the oven and let it rest for 1 minute before slicing and serving. This allows the cheese to set slightly, making it easier to slice.
Expert Tips & Tricks
- Don’t skip the resting time: The 2-hour rise is crucial for developing flavor and texture.
- Use a good quality olive oil: The olive oil significantly impacts the flavor of the dough, so choose one you enjoy.
- Preheat your baking stone properly: A well-heated baking stone is essential for a crispy crust.
- Don’t overwork the dough: The cloaking technique should be quick and gentle.
- Control the heat: If your crust is browning too quickly, lower the oven temperature slightly or move the pizza to a lower rack.
- Make garlic oil: Infuse some olive oil with minced garlic for an extra layer of flavor. Simply heat the oil with minced garlic over low heat until fragrant, then strain and let cool.
- Freeze individual portions: Divide the dough into individual portions before refrigerating and freeze for later use. Thaw in the refrigerator overnight before using.
Serving & Storage Suggestions
Serve your freshly baked pizza immediately for the best flavor and texture. Garnish with fresh basil or a sprinkle of red pepper flakes for added appeal. Pair it with a crisp salad and your favorite beverage.
Leftover pizza can be stored in the refrigerator for up to 3 days. To reheat, preheat your oven to 350°F (175°C) and bake for a few minutes until warmed through. You can also reheat it in a skillet on the stovetop for a crispy crust. For the best texture, avoid microwaving leftover pizza.
Nutritional Information
| Nutrient | Amount per Serving | % Daily Value |
|---|---|---|
| Calories | 366 kcal | 18% |
| Total Fat | 6.6g | 10% |
| Saturated Fat | 0.9g | 4% |
| Cholesterol | 0mg | 0% |
| Sodium | 1053mg | 43% |
| Total Carbohydrate | 65.5g | 21% |
| Dietary Fiber | 3.6g | 14% |
| Sugars | 1.5g | 5% |
| Protein | 10.6g | 21% |
Variations & Substitutions
- Whole Wheat Pizza Dough: Substitute up to half of the all-purpose flour with whole wheat flour for a heartier flavor and added fiber.
- Gluten-Free Pizza Dough: Use a gluten-free all-purpose flour blend designed for baking. You may need to adjust the amount of liquid slightly.
- Herb-Infused Dough: Add dried herbs like oregano, basil, or rosemary to the dough for extra flavor.
- Spicy Pizza Dough: Incorporate a pinch of red pepper flakes or a dash of hot sauce into the dough for a little heat.
- Sweet Pizza Dough: Reduce the salt to 1/4 teaspoon and add 2 tablespoons of sugar for a slightly sweet dough that’s perfect for dessert pizzas.
- Vegan Pizza: Top with dairy-free cheese alternatives and plant-based toppings.
FAQs (Frequently Asked Questions)
Q: Can I use active dry yeast instead of instant yeast?
A: Yes, you can. However, you’ll need to proof the active dry yeast in the lukewarm water for about 5-10 minutes before adding the other ingredients. Look for a frothy mixture before proceeding.
Q: My dough didn’t rise. What went wrong?
A: There are several reasons why your dough might not rise. The yeast could be old or expired, the water might have been too hot and killed the yeast, or the room temperature might have been too cold. Make sure to use fresh yeast and lukewarm water, and find a warm place for the dough to rise.
Q: Can I make this dough in a bread machine?
A: Yes, you can. Add the ingredients to the bread machine according to the manufacturer’s instructions, and select the dough cycle.
Q: How can I get a crispier crust?
A: Make sure your baking stone is preheated properly, and don’t overload the pizza with toppings. You can also try brushing the crust with olive oil before baking.
Q: Is it essential to use a baking stone?
A: While a baking stone is ideal for achieving a crispy crust, you can also use a baking sheet. Preheat the baking sheet in the oven before placing the pizza on it.
Final Thoughts
This no-knead olive oil pizza dough has become a staple in my kitchen. It’s incredibly easy to make, surprisingly versatile, and delivers a delicious, flavorful crust every time. Don’t be intimidated by making your own dough – this recipe proves that you don’t need to be a professional baker to create a fantastic homemade pizza. Gather your favorite toppings, invite some friends over, and enjoy the simple pleasure of a freshly baked pizza made with love. I encourage you to give this recipe a try and share your experiences with me! Let me know what creative toppings you use and how your pizza turns out. Buon appetito!