
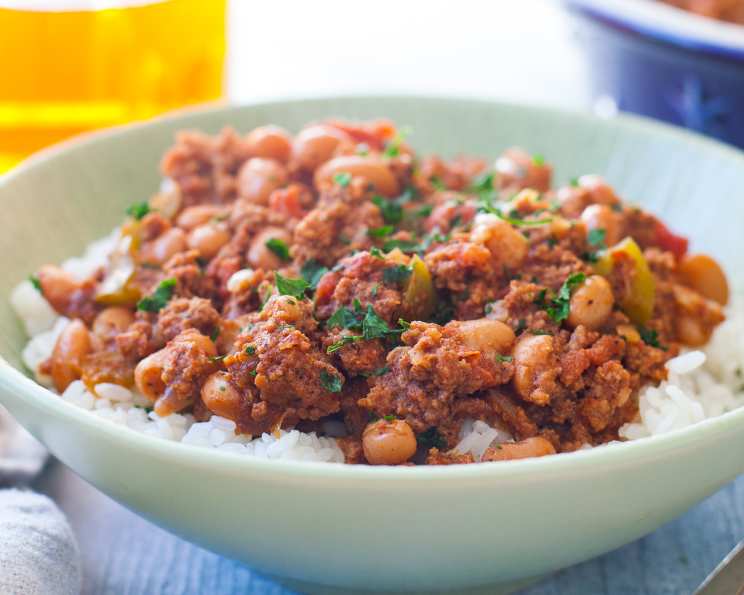
One-Step Chili: Comfort in a Bowl, Simplified
I can almost smell it now: the distinct aroma of chili simmering on the stove, a scent so intrinsically tied to memories of blustery autumn evenings huddled around a table with family. My grandmother, bless her heart, always made the most elaborate chili – a two-day affair involving soaking dried beans and roasting peppers. While delicious, sometimes you just need that comforting warmth without the all-day commitment. That’s where this one-step chili comes in – a culinary hug that requires minimal effort but delivers maximum flavor. It’s the perfect weeknight meal when you crave something hearty and satisfying, without spending hours in the kitchen.
Recipe Overview
- Prep Time: 10 minutes
- Cook Time: 25 minutes
- Total Time: 35 minutes
- Servings: 6
- Dietary Type: Adaptable (see variations)
Ingredients
- 1 lb lean ground beef
- 1/4 cup chopped green pepper
- 1 3/4 cups pinto beans, and liquid
- 1 crushed garlic clove
- 2 tablespoons chili powder
- 1 (14 1/2 ounce) can cut up peeled whole tomatoes with juice
- 1 teaspoon salt
- 1/2 teaspoon cumin
- 1 (6 ounce) can tomato paste
- 1/4 teaspoon red pepper flakes
- 1/2 cup chopped onion
Equipment Needed
- Microwave-safe 2-quart casserole dish (for microwave method)
- Large pot or Dutch oven (for stovetop method)
- Microwave or Stove
Instructions
Here are two methods, one for the microwave and one for the stovetop, for making this incredible chili.
Microwave Method:
- In a microwave-safe 2-quart casserole dish, combine all the ingredients: lean ground beef, chopped green pepper, pinto beans (with their liquid), crushed garlic clove, chili powder, cut up peeled whole tomatoes (with juice), salt, cumin, tomato paste, red pepper flakes, and chopped onion.
- Cover the casserole dish.
- Microwave on high for 5 minutes.
- Stir thoroughly to break up the ground beef.
- Microwave for an additional 20 minutes, stirring every 10 minutes. This ensures even cooking and prevents sticking.
- If your beef is less lean, you may want to microwave it first and drain off any excess fat before combining it with the other ingredients. This will help keep the chili from becoming greasy.
Stovetop Method:
- In a large pot or Dutch oven, brown the lean ground beef over medium-high heat with the chopped green peppers, chopped onion, and spices (chili powder, cumin, red pepper flakes, and salt). Stir frequently to prevent sticking.
- Drain off any excess fat. This will prevent your chili from becoming greasy.
- Add the pinto beans (with their liquid), cut up peeled whole tomatoes (with juice), and tomato paste to the pot.
- Bring the mixture to a simmer.
- Reduce heat to low and simmer until the green peppers and onions are tender, about 20-25 minutes, or longer if you prefer a thicker consistency.
- If the chili becomes too thick during simmering, add water or salt-free beef broth to reach your desired consistency.
Vegetarian Variation:
- Swap the ground beef for 1 lb of frozen vegetable mix, such as a California blend or mixed vegetables.
- In a large pot, sauté the chopped green peppers and chopped onion in 1 tablespoon of vegetable oil over medium heat, along with the spices (chili powder, cumin, red pepper flakes, and salt).
- When the onions are clear, add the frozen vegetable mix, cut up peeled whole tomatoes (with juice), and tomato paste.
- Bring the mixture to a simmer.
- Reduce heat to low and simmer until the vegetables are tender, about 15-20 minutes.
- If the chili becomes too thick during simmering, add vegetable broth or water to reach your desired consistency.
Expert Tips & Tricks
- Spice it up! If you like a spicier chili, add more red pepper flakes or a dash of your favorite hot sauce. A chopped jalapeño pepper, added along with the green pepper and onion, will also provide some heat.
- Deepen the flavor: For a richer, more complex flavor, add a tablespoon of unsweetened cocoa powder or a teaspoon of ground coffee to the chili while it’s simmering.
- Thicken it up: If you prefer a thicker chili, mash some of the pinto beans against the side of the pot. You can also mix a tablespoon of cornstarch with a tablespoon of cold water and stir it into the chili during the last few minutes of cooking.
- Make it ahead: This chili is even better the next day! The flavors have more time to meld together. You can make it a day or two in advance and store it in the refrigerator.
- Adjust the seasoning: Taste the chili before serving and adjust the seasoning as needed. You may want to add more salt, chili powder, or cumin to taste.
Serving & Storage Suggestions
Serve this one-step chili hot, garnished with your favorite toppings. Some popular choices include:
- Shredded cheddar cheese
- Sour cream or Greek yogurt
- Chopped green onions
- Diced avocado
- Crushed tortilla chips
- A dollop of salsa
Leftover chili can be stored in an airtight container in the refrigerator for up to 3-4 days. It can also be frozen for up to 2-3 months. To reheat, simply microwave or simmer on the stovetop until heated through. You may need to add a little water or broth if the chili has thickened during storage.
Do not leave the chili at room temperature for more than 2 hours to prevent bacterial growth.
Nutritional Information
Here’s an estimated nutritional breakdown per serving:
| Nutrient | Amount per Serving | % Daily Value |
|---|---|---|
| Calories | 255 kcal | – |
| Calories from Fat | 77 g | 30% |
| Total Fat | 8.6 g | 13% |
| Saturated Fat | 3.3 g | 16% |
| Cholesterol | 49.1 mg | 16% |
| Sodium | 806.5 mg | 33% |
| Total Carbohydrate | 24.4 g | 8% |
| Dietary Fiber | 7.7 g | 30% |
| Sugars | 6.2 g | – |
| Protein | 22 g | 44% |
Note: Nutritional information is an estimate and may vary based on specific ingredients and portion sizes.
Variations & Substitutions
- Spicy Chorizo Chili: Substitute half of the ground beef with spicy chorizo sausage for an extra kick.
- Turkey Chili: Use ground turkey instead of ground beef for a leaner option.
- White Bean Chicken Chili: Replace the ground beef and pinto beans with shredded cooked chicken and white beans (such as Great Northern or cannellini beans).
- Sweet Potato Chili: Add diced sweet potatoes to the chili for a touch of sweetness and extra nutrients.
- Vegan Chili: Use a plant-based ground meat substitute, vegetable broth, and omit any dairy toppings.
- Black Bean Chili: Substitute pinto beans for black beans.
FAQs (Frequently Asked Questions)
Q: Can I use dry beans instead of canned beans?
A: Yes, but you’ll need to soak and cook them before adding them to the chili. This will significantly increase the prep time. Use approximately 3/4 cup of dry pinto beans to replace the 1 3/4 cups of cooked beans and liquid.
Q: Can I use different types of tomatoes?
A: Absolutely. Diced tomatoes, crushed tomatoes, or even tomato sauce can be used in place of the cut-up peeled whole tomatoes. The flavor will vary slightly depending on the type of tomato used.
Q: How can I make the chili less spicy?
A: Reduce or omit the red pepper flakes. You can also add a dollop of sour cream or Greek yogurt to each serving to help cool it down.
Q: Can I freeze this chili?
A: Yes, chili freezes very well. Allow the chili to cool completely before transferring it to a freezer-safe container. Thaw overnight in the refrigerator before reheating.
Q: What’s the best way to reheat frozen chili?
A: Reheat frozen chili slowly on the stovetop over low heat, stirring occasionally, until heated through. You may need to add a little water or broth if the chili has thickened during freezing.
Final Thoughts
This one-step chili is a true testament to the fact that delicious, comforting food doesn’t have to be complicated. It’s a recipe that’s forgiving, adaptable, and perfect for busy weeknights. So, grab your ingredients, fire up the microwave or stovetop, and get ready to enjoy a warm and satisfying bowl of chili. Don’t hesitate to experiment with different variations and toppings to make it your own. I encourage you to share your feedback and culinary creations – happy cooking!