
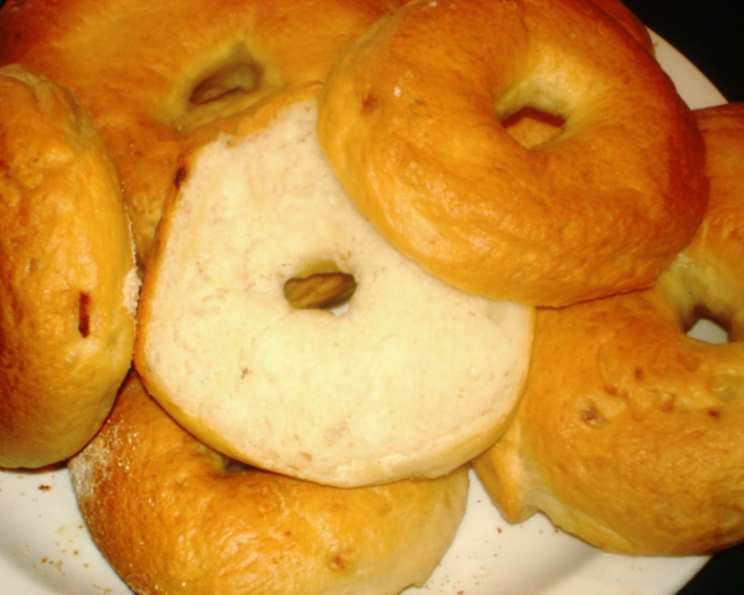
The Irresistible Allure of Homemade Onion Bagels
The aroma of freshly baked bagels is one of my earliest and fondest childhood memories. My grandfather, a baker by trade, would often bring home a bag of onion bagels still warm from the oven. Their intensely savory aroma would fill the entire house, instantly making it feel like a special occasion. Biting into one was an experience – the slight chew of the crust giving way to a soft, flavorful interior, studded with the pungent sweetness of perfectly caramelized onions. Those bagels were pure magic, and this recipe is my attempt to recreate that magic in my own kitchen.
Recipe Overview
- Prep Time: 1 hour
- Cook Time: 40 minutes
- Total Time: 2 hours 20 minutes (includes rise time)
- Servings: 12
- Yield: 12 bagels
- Dietary Type: Vegetarian
Ingredients
- 2 cups warm water (not too hot, about 105-115°F)
- 2 (1/4 ounce) packets active dry yeast
- 4 tablespoons sugar, divided
- 1 tablespoon salt
- 1/2 cup chopped dehydrated onion
- 5 – 5 3/4 cups all-purpose flour, plus more for dusting
- Cornmeal, for sprinkling on baking sheet
- 1 egg yolk
- 1 tablespoon water
Equipment Needed
- Large mixing bowl
- Stand mixer (optional, but recommended)
- Measuring cups and spoons
- Baking sheet
- Large kettle or Dutch oven
- Slotted spoon
- Cooling rack
Instructions
-
In a large mixing bowl or the bowl of your stand mixer, combine the warm water, yeast, and 3 tablespoons of sugar. Let stand for 5 minutes, or until the mixture becomes foamy. This indicates that the yeast is active and ready to work its magic.
-
Stir in the salt and dehydrated onion into the yeast mixture. The onion will start to rehydrate as it sits in the water.
-
Gradually mix in 4 cups of the flour. If using a stand mixer, beat on medium speed for 5 minutes. If mixing by hand, use a sturdy spoon or your hands to incorporate the flour.
-
Continue adding the remaining flour, a little at a time, until the dough becomes stiff and slightly sticky. You may not need all of the flour, so add it gradually until you reach the desired consistency.
-
Turn the dough out onto a lightly floured surface and knead for about 15 minutes, or until it is smooth and no longer sticky. If using a stand mixer with a dough hook, knead for 2 minutes, adding more flour as needed. The dough should be elastic and spring back when pressed.
-
Place the dough in a greased bowl, turning to coat all sides. This will prevent the dough from drying out as it rises. Cover the bowl with plastic wrap or a clean kitchen towel.
-
Let the dough rise in a warm place until it has doubled in size, about 40 minutes to 1 hour. The rising time will depend on the temperature of your kitchen.
-
Once the dough has doubled, gently punch it down to release the air. Knead the dough lightly for a minute or two.
-
Divide the dough into 12 equal pieces. For smaller bagels, you can divide the dough into 16 pieces, but remember to adjust the baking time accordingly.
-
To shape the bagels, knead each piece into a smooth ball. Holding the ball with both hands, poke your thumbs through the center to create a hole. With one thumb in the hole, work around the perimeter, shaping the dough into a doughnut shape about 3-3 1/2 inches across.
-
Place the shaped bagels on a lightly floured board, cover them lightly with plastic wrap or a towel, and let them rest in a warm place for 20 minutes. This allows the gluten to relax, resulting in a more tender bagel.
-
While the bagels are resting, bring 3 quarts of water and the remaining 1 tablespoon of sugar to a boil in a large kettle or Dutch oven. The sugar adds a subtle sweetness and helps the bagels to brown nicely. Adjust the heat to keep the water gently boiling.
-
Lightly grease a baking sheet and sprinkle it with cornmeal. The cornmeal will prevent the bagels from sticking and add a pleasant texture to the bottom crust.
-
Preheat your oven to 400 degrees Fahrenheit (200 degrees Celsius).
-
Gently lift one bagel at a time and drop it into the boiling water, boiling 4-5 at a time, depending on the size of your pot. Boil for 5 minutes, turning them often with a slotted spoon to ensure even cooking. This boiling step is crucial for creating the characteristic chewy texture of a bagel.
-
Lift the boiled bagels out of the water with a slotted spoon, drain them briefly on a towel to remove excess water, and then place them on the prepared baking sheet.
-
In a small bowl, combine the egg yolk with 1 tablespoon of water. Brush this egg wash on top of each bagel. This will give them a beautiful golden-brown color and a slightly shiny finish.
-
Bake the bagels for 35-40 minutes, or until they are well browned and crusty. If you made smaller bagels, bake for 30-35 minutes. Keep an eye on them to prevent them from burning.
-
Remove the bagels from the oven and let them cool on a wire rack. Cooling them on a rack will prevent them from becoming soggy.
Expert Tips & Tricks
- For extra onion flavor: Add a tablespoon of onion powder to the dough along with the salt.
- Achieving the perfect chew: Don’t skip the boiling step! This is essential for the classic bagel texture.
- Troubleshooting dense bagels: Ensure your yeast is fresh and active. Also, avoid adding too much flour, as this can result in a tough dough.
- Freezing for later: Bagels can be frozen after baking. Slice them before freezing for easy toasting.
- Shiny bagel crust: For an extra shiny crust, brush the bagels with egg wash a second time halfway through baking.
Serving & Storage Suggestions
These onion bagels are best enjoyed fresh, still slightly warm from the oven. Slice them in half and toast them for a crispy exterior. Spread with cream cheese, butter, or your favorite toppings. They also make a fantastic base for sandwiches.
Store leftover bagels in an airtight container at room temperature for up to 2 days, or in the refrigerator for up to 5 days. For longer storage, freeze them in a freezer bag. To reheat, toast from frozen or thaw overnight and toast before serving.
Nutritional Information
| Nutrient | Amount per Serving | % Daily Value |
|---|---|---|
| Calories | 225 kcal | 11% |
| Total Fat | 0.9 g | 1% |
| Saturated Fat | 0.2 g | 1% |
| Cholesterol | 15.7 mg | 5% |
| Sodium | 585.1 mg | 24% |
| Total Carbohydrate | 47.2 g | 15% |
| Dietary Fiber | 2 g | 7% |
| Sugars | 5.6 g | 22% |
| Protein | 6.3 g | 12% |
Variations & Substitutions
- Everything Bagels: Before baking, sprinkle the egg-washed bagels with a mixture of sesame seeds, poppy seeds, dried onion flakes, dried garlic flakes, and salt.
- Garlic Bagels: Add 2-3 cloves of minced garlic to the dough along with the dehydrated onion.
- Whole Wheat Bagels: Substitute up to half of the all-purpose flour with whole wheat flour for a nuttier flavor and added fiber.
- Sweet Bagels: Reduce the salt to 1/2 teaspoon and add a tablespoon of honey to the dough for a slightly sweet bagel.
- Gluten-Free: While adapting this recipe to be gluten-free is possible, it requires significant adjustments to the flour blend and may not yield the exact same chewy texture. Look for gluten-free bagel recipes specifically designed for that purpose.
FAQs (Frequently Asked Questions)
Q: Why do I need to boil the bagels before baking?
A: Boiling the bagels sets the crust and creates the signature chewy texture that distinguishes bagels from other types of bread.
Q: Can I use instant yeast instead of active dry yeast?
A: Yes, you can. If using instant yeast, you can skip the initial proofing step and add the yeast directly to the flour mixture.
Q: How do I know when the dough has risen enough?
A: The dough should have doubled in size and feel light and airy when gently pressed.
Q: My bagels are too dense. What did I do wrong?
A: This could be due to using old or inactive yeast, not kneading the dough enough, or adding too much flour.
Q: Can I make the dough ahead of time?
A: Yes, you can make the dough a day ahead of time and store it in the refrigerator. Let it come to room temperature before shaping and baking.
Final Thoughts
There’s something incredibly satisfying about creating your own onion bagels from scratch. The process is a little time-consuming, but the reward is a batch of warm, flavorful bagels that are far superior to anything you can buy in a store. So, gather your ingredients, clear your schedule, and embark on this culinary adventure. I promise, the aroma alone will make it worth the effort. And don’t hesitate to experiment with different toppings and flavor combinations to create your own signature bagel. I’d love to hear about your baking successes and any variations you try! Enjoy!