
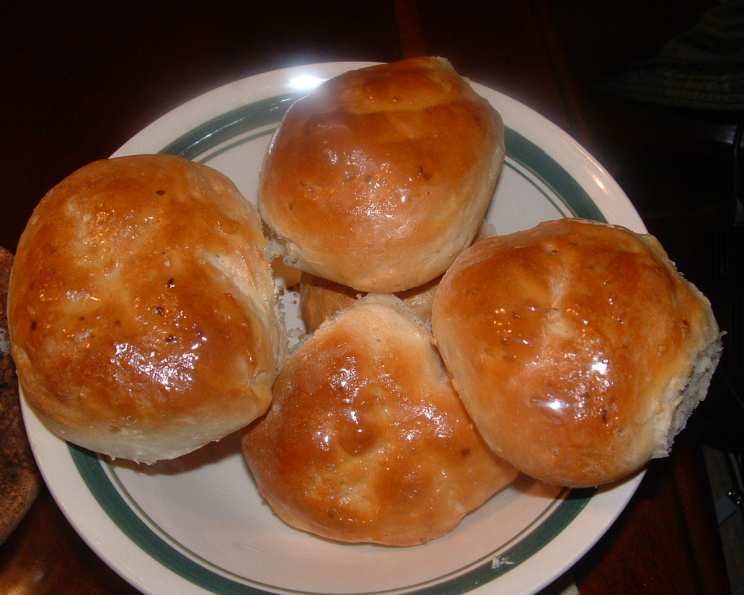
The Quintessential Onion Roll: A Baker’s Delight
The aroma of freshly baked bread, especially onion rolls, always transports me back to my grandmother’s bustling kitchen. She’d be there, flour dusting her apron, a mischievous twinkle in her eye as she pulled a tray of golden-brown onion rolls from the oven. The savory scent of onion mingled with the sweet yeasty dough, a combination so irresistible it became a cornerstone of our family gatherings. That warmth, that sense of home, is what I strive to recreate every time I bake these rolls.
Recipe Overview
- Prep Time: 2 hours 35 minutes
- Cook Time: 25 minutes
- Total Time: 3 hours
- Yields: 14 Rolls
- Dietary Type: Vegetarian
Ingredients
- 1/2 cup warm milk (105-115 F)
- 2 tablespoons sugar
- 2 teaspoons salt
- 3 tablespoons butter or 3 tablespoons margarine
- 1 1/2 cups warm water (105-115 F)
- 1 (1 ounce) package active dry yeast (1 Tablespoon)
- 2 tablespoons instant minced onion
- 5-6 cups all-purpose flour
- Cornmeal
- 1 egg white, slightly beaten with
- 1 tablespoon cold water
Equipment Needed
- Large mixing bowl
- Measuring cups and spoons
- Baking sheets
- Wire racks
- Sharp knife or razor blade
Instructions
-
Begin by combining the warm milk, sugar, salt, and butter (or margarine) in a small bowl. This mixture provides the foundation for a rich and flavorful dough. Ensure the milk is within the specified temperature range to properly activate the yeast without scalding it.
-
In a large, warm mixing bowl, pour in the warm water. Sprinkle the active dry yeast over the water and stir gently until the yeast is fully dissolved. Letting the yeast proof in this manner ensures it is active and ready to leaven the dough.
-
Add the milk mixture, minced onion, and 3 cups of the all-purpose flour to the yeast mixture. Beat with a mixer or by hand until the batter is smooth. The minced onion adds a subtle but distinct savory flavor to these rolls.
-
Gradually add the remaining flour, one cup at a time, until the dough becomes stiff. You may not need to use all 6 cups of flour; add only enough to achieve the right consistency.
-
Turn the dough out onto a lightly floured surface. Knead the dough until it is smooth and elastic, about 8-10 minutes. Proper kneading develops the gluten in the flour, resulting in a chewy, well-structured roll.
-
Place the dough in a greased bowl, turning the dough to coat the top with grease. This prevents the dough from drying out as it rises.
-
Cover the bowl with a clean cloth or plastic wrap and let the dough rise in a warm, draft-free place until it has doubled in bulk, which should take about 1 hour. Patience is key here; allowing the dough to fully rise is crucial for a light and airy texture.
-
Once the dough has doubled, punch it down to release the air. Divide the dough into 14 equal pieces.
-
Shape each piece of dough into a smooth, round ball.
-
Place the dough balls on greased baking sheets that have been sprinkled with cornmeal. The cornmeal adds a subtle crunch to the bottom of the rolls. Space the rolls about 3 inches apart to allow for expansion during the second rise.
-
Cover the baking sheets with a clean cloth or plastic wrap and let the rolls rise again in a warm, draft-free place until they have doubled in bulk, about 1 hour. This second rise is essential for achieving a light and airy final product.
-
Preheat your oven to 400°F (200°C).
-
Just before baking, cut a small “X” into the tops of the rolls with a sharp knife or razor blade. This allows steam to escape during baking and prevents the rolls from bursting.
-
Bake the rolls in the preheated oven for 20 minutes.
-
After 20 minutes, brush the tops of the rolls with the egg white and cold water wash. This creates a glossy, golden-brown crust.
-
Bake the rolls for an additional 5 minutes, or until they are golden brown and sound hollow when tapped on the bottom. Keep a close eye on them to prevent burning.
-
Remove the rolls from the baking sheets and place them on wire racks to cool completely. This prevents the bottoms from becoming soggy.
-
(Optional) Sprinkle the roll tops with a bit of additional minced onion after they are brushed with the egg white wash for an extra burst of onion flavor.
Expert Tips & Tricks
-
Temperature is key: Ensure your milk and water are within the specified temperature range (105-115°F) to properly activate the yeast. Too hot, and you’ll kill the yeast; too cold, and it won’t activate.
-
Kneading is crucial: Don’t skimp on the kneading! A well-kneaded dough will result in a smoother, more elastic texture, which translates to a better rise and a chewier roll.
-
Warm environment for rising: A warm, draft-free environment is essential for optimal rising. If your kitchen is cold, try placing the dough in a slightly warmed oven (turned off!) or near a warm appliance.
-
Don’t overbake: Keep a close eye on the rolls during the final minutes of baking to prevent them from becoming dry or burnt.
-
Crispy bottom: For an extra crispy bottom, place a baking stone or pizza stone in the oven while it preheats.
Serving & Storage Suggestions
These onion rolls are best served warm, ideally straight from the oven. They are delicious on their own, or served alongside soups, stews, or sandwiches.
To store leftover onion rolls, place them in an airtight container at room temperature for up to 2 days. For longer storage, freeze them in a freezer-safe bag for up to 2 months. To reheat, wrap the rolls in foil and warm them in a 350°F (175°C) oven for 10-15 minutes, or until heated through. You can also microwave them for a shorter period, but the texture might not be as good as oven-warmed.
Nutritional Information
| Nutrient | Amount per Serving | % Daily Value |
|---|---|---|
| Calories | 206.6 kcal | – |
| Calories from Fat | 29 g | – |
| Total Fat | 3.3 g | 5% |
| Saturated Fat | 1.8 g | 9% |
| Cholesterol | 7.8 mg | 2% |
| Sodium | 360.5 mg | 15% |
| Total Carbohydrate | 37.7 g | 12% |
| Dietary Fiber | 1.7 g | 6% |
| Sugars | 2.2 g | – |
| Protein | 6 g | – |
Variations & Substitutions
- Vegan Onion Rolls: Substitute the cow’s milk with unsweetened almond or soy milk and use a plant-based butter or margarine. Ensure your sugar is vegan-friendly (some refined sugars are processed using bone char).
- Whole Wheat Onion Rolls: Replace up to half of the all-purpose flour with whole wheat flour for a nuttier flavor and added fiber.
- Garlic Onion Rolls: Add 1-2 teaspoons of garlic powder to the dough along with the minced onion.
- Everything Bagel Onion Rolls: Before baking, brush the rolls with the egg wash and sprinkle with “everything bagel” seasoning.
FAQs (Frequently Asked Questions)
Q: Can I use fresh onion instead of dried minced onion?
A: Yes, you can. Sauté the fresh onion until softened and translucent before adding it to the dough. Use about 1/4 cup of sautéed onion for this recipe. Make sure the sautéed onions are cool before adding them to the yeast mixture.
Q: What if my dough doesn’t rise?
A: The most common reason for dough not rising is inactive yeast. Ensure your yeast is fresh and that the water and milk are at the correct temperature (105-115°F). A cold environment can also inhibit rising; find a warmer spot for the dough.
Q: Can I make the dough ahead of time?
A: Yes, you can prepare the dough the day before and store it in the refrigerator. After the first rise, punch down the dough, wrap it tightly in plastic wrap, and refrigerate. Let it come to room temperature for about an hour before shaping and baking.
Q: How do I know when the rolls are done baking?
A: The rolls are done when they are golden brown on top and sound hollow when tapped on the bottom. An internal temperature of 200-210°F (93-99°C) is also a good indicator of doneness.
Q: My rolls are browning too quickly. What should I do?
A: If the rolls are browning too quickly, tent them with aluminum foil during the last few minutes of baking. This will prevent them from burning without affecting the internal temperature.
Final Thoughts
These onion rolls are more than just bread; they’re a celebration of flavor, texture, and the simple joy of baking. Whether you’re a seasoned baker or just starting out, I encourage you to give this recipe a try. Share them with friends and family, and savor the warmth and deliciousness they bring. Don’t hesitate to experiment with variations and make them your own. And above all, enjoy the process! I hope these rolls become a cherished part of your culinary repertoire.