
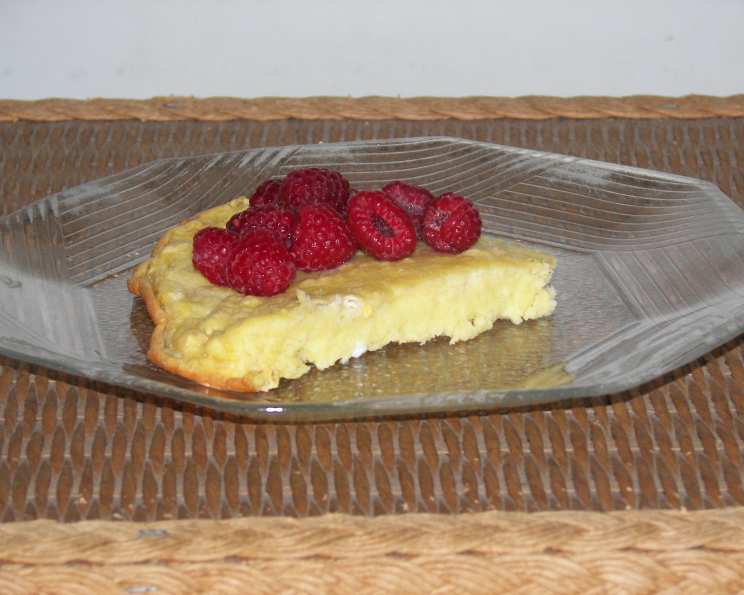
Oops! Dutch Baby: A Happy Pancake Accident
I’ll never forget the morning my husband, bless his heart, sleepily reached for what he thought was all-purpose flour to whip up our usual Sunday Dutch Baby. The aroma filling the kitchen that morning was subtly different, sweeter somehow. As the puffy pancake emerged from the oven, it was clear this was no ordinary Dutch Baby. The texture was delightfully unique – a cross between a classic Dutch Baby and a light, airy cake. That’s how the “Oops! Dutch Baby” was born: a happy accident turned cherished family recipe. This recipe is for all the busy parents who need a simple crowd-pleasing recipe, or for anyone who is seeking a dessert that is as easy as it is delicious.
Recipe Overview
- Prep Time: 5 minutes
- Cook Time: 17 minutes
- Total Time: 22 minutes
- Servings: 6
- Yield: 1 large pancake
- Dietary Type: Not specified
Ingredients
- 1 cup pancake mix
- 1 cup milk
- 1/4 cup sugar
- 4 eggs
- 1/4 cup butter
Equipment Needed
- 9×13 inch baking pan
- Whisk or mixer
- Oven
Instructions
- Preheat your oven to 425 degrees Fahrenheit. This high heat is crucial for achieving that signature puffy rise of a Dutch Baby.
- Place the butter in the 9×13 inch baking pan. Put the pan with the butter into the preheating oven. The butter needs to melt completely and evenly coat the bottom of the pan. This step is essential to prevent the Dutch Baby from sticking and contributes to a beautifully golden and crispy crust. Keep a close eye on it to ensure the butter doesn’t burn.
- While the butter is melting, prepare the batter. In a mixing bowl, combine the pancake mix, milk, sugar, and eggs. Whisk vigorously until you have a smooth batter with no lumps. Overmixing can develop the gluten in the pancake mix, resulting in a tougher texture, so mix just until combined.
- Carefully remove the hot pan with the melted butter from the oven. Be cautious, as the pan and butter will be very hot.
- Pour the batter evenly over the melted butter in the hot pan. The batter will sizzle slightly as it hits the hot butter.
- Return the pan to the oven and bake for 15-17 minutes. The Dutch Baby is done when it is puffed up, golden brown, and the center is set. The edges should be a deeper golden color and slightly crispy. The exact baking time may vary depending on your oven, so keep an eye on it.
- Once baked, carefully remove the Dutch Baby from the oven. Let it cool slightly before slicing and serving. As it cools, the Dutch Baby will deflate a bit, which is perfectly normal.
Expert Tips & Tricks
- Hot Pan is Key: The key to a perfect “Oops! Dutch Baby” is starting with a hot pan and melted butter. This helps create the signature puff and crispy edges. Don’t skip preheating the pan with the butter in the oven.
- Room Temperature Ingredients: Using room temperature eggs can help the batter come together more smoothly and result in a lighter texture.
- Don’t Open the Oven: Resist the urge to open the oven door while the Dutch Baby is baking. Opening the oven can cause the temperature to drop, which can prevent the Dutch Baby from puffing up properly.
- Even Batter Distribution: Ensure the batter is evenly distributed in the pan. This will help the Dutch Baby bake evenly and prevent any soggy spots.
- Creative Toppings: Get creative with your toppings! A simple dusting of powdered sugar is classic, but you can also add fresh fruit, whipped cream, chocolate sauce, or a drizzle of maple syrup.
- Prevent Sticking: Although the melted butter helps, you can also grease the pan with cooking spray before adding the butter for extra insurance against sticking.
- Check for Doneness: If the center seems wobbly after 17 minutes, bake for a few more minutes until it’s set. A toothpick inserted into the center should come out clean.
Serving & Storage Suggestions
Serve the “Oops! Dutch Baby” immediately after baking for the best texture and flavor. It’s delicious warm, with a variety of toppings.
Leftovers can be stored in the refrigerator in an airtight container for up to 2 days. To reheat, you can warm it in a toaster oven or regular oven at a low temperature (around 300°F) for a few minutes, or until heated through. Note that the texture will be different from when it was freshly baked – it will be softer and less puffy. It is not recommended to freeze this dish.
Nutritional Information
Please note that this is an estimate and can vary based on specific ingredients and serving sizes.
| Nutrient | Amount per Serving | % Daily Value |
|---|---|---|
| Calories | 280 kcal | 14% |
| Total Fat | 15g | 23% |
| Saturated Fat | 8g | 40% |
| Cholesterol | 160mg | 53% |
| Sodium | 400mg | 17% |
| Total Carbohydrate | 30g | 10% |
| Dietary Fiber | 1g | 4% |
| Sugars | 10g | – |
| Protein | 8g | 16% |
Variations & Substitutions
- Gluten-Free: Use a gluten-free pancake mix for a gluten-free version.
- Dairy-Free: Substitute the milk with a non-dairy alternative like almond milk, oat milk, or soy milk. Use a dairy-free butter substitute.
- Flavor Variations: Add a teaspoon of vanilla extract or almond extract to the batter for added flavor. You can also add a pinch of cinnamon or nutmeg.
- Fruit Infusion: Incorporate fresh or frozen berries into the batter or sprinkle them on top before baking.
- Chocolate Chip Surprise: Fold in chocolate chips to the batter for a chocolatey twist.
FAQs (Frequently Asked Questions)
Q: Can I use all-purpose flour instead of pancake mix?
A: While this recipe was created as an “oops,” using all-purpose flour will result in a different texture and taste. If you want a traditional Dutch Baby, use all-purpose flour with a touch of baking powder.
Q: Why didn’t my Dutch Baby puff up?
A: Several factors can affect the rise, including not preheating the pan and butter properly, opening the oven door during baking, or using ingredients that are not at room temperature.
Q: Can I make the batter ahead of time?
A: It’s best to make the batter fresh just before baking. Letting it sit for too long can affect the texture. However, if you must prepare it ahead, refrigerate it for no more than an hour.
Q: What’s the best way to prevent the Dutch Baby from sticking to the pan?
A: Ensuring the pan is thoroughly coated with melted butter is crucial. You can also grease the pan with cooking spray before adding the butter for extra protection.
Q: Can I use a different sized pan?
A: Yes, but you may need to adjust the baking time accordingly. Using a smaller pan will result in a thicker Dutch Baby, requiring a longer baking time. A larger pan will result in a thinner pancake that cooks faster.
Final Thoughts
So there you have it – a simple, delightful, and slightly unconventional “Oops! Dutch Baby” recipe that’s sure to become a family favorite. Don’t be afraid to embrace the “oops” moments in the kitchen and experiment with your own creative twists. Whether you stick to the original recipe or add your personal flair, I hope this Dutch Baby brings as much joy to your table as it has to mine. Whip it up, share it with loved ones, and let me know what you think! Bon appétit!