
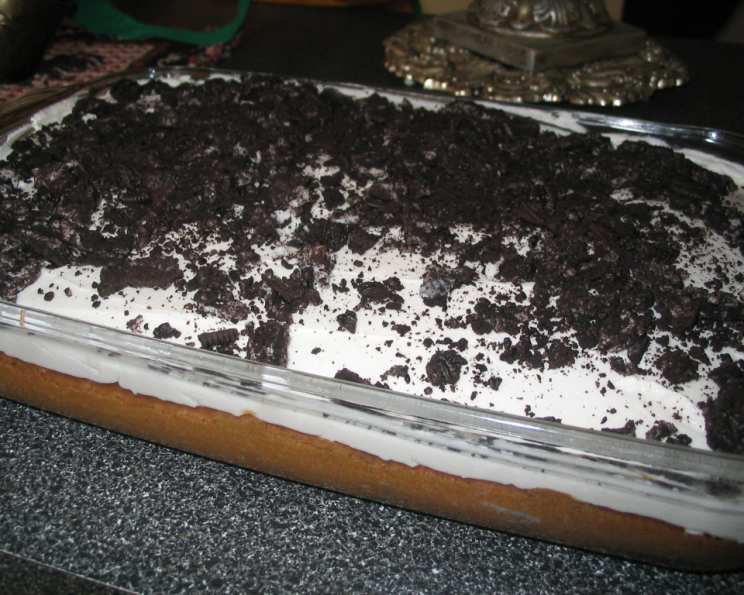
Oreo Cookies and Cream Cake With White Frosting: A Slice of Nostalgia
The scent of white cake always brings me back to my childhood. Every year, my grandmother would bake me a simple white cake with fluffy vanilla frosting for my birthday. It wasn’t fancy, but it was made with love, and that’s what mattered most. This Oreo Cookies and Cream Cake takes that classic flavor combination and elevates it with the irresistible crunch of Oreo cookies. It’s a perfect dessert for kids and adults alike, bringing a touch of whimsy and a whole lot of deliciousness to any celebration.
Recipe Overview
- Prep Time: 20 minutes
- Cook Time: 25-30 minutes
- Total Time: 45-50 minutes
- Servings: 12
- Yield: 1 cake
- Dietary Type: Vegetarian
Ingredients
- 1 (18 1/4 ounce) package white cake mix
- 1 1/4 cups water
- 1/3 cup vegetable oil
- 3 egg whites
- 12 coarsely crushed Oreo cookies (plus additional cookies to sprinkle on top of the cake)
For the Frosting:
- 4 cups confectioners’ sugar (you may need more to achieve desired consistency)
- 1/2 cup white shortening (or use butter, or half shortening and half butter)
- 1/4 cup half-and-half cream (or milk)
- 1/8 teaspoon salt
- 2 teaspoons vanilla extract
Equipment Needed
- 13 x 9-inch baking pan
- Mixing bowls
- Electric mixer
- Measuring cups and spoons
- Rubber spatula
- Cooling rack
Instructions
-
Preheat your oven to 350°F (175°C). Ensure the oven rack is positioned on the second-lowest setting. This helps to prevent the top of the cake from browning too quickly.
-
Grease a 13 x 9-inch baking pan thoroughly. This is crucial to prevent the cake from sticking. You can use butter, shortening, or cooking spray. For extra insurance, you can also lightly dust the greased pan with flour.
-
In a large mixing bowl, combine the white cake mix, water, vegetable oil, and egg whites.
-
Using an electric mixer on medium speed, beat the ingredients until the batter is smooth and well combined. The mixture should resemble a thick marshmallow fluff. This step is essential for incorporating air into the batter, resulting in a light and airy cake.
-
Gently fold in the 12 coarsely crushed Oreo cookies into the batter. Be careful not to overmix, as this can develop the gluten in the cake mix and make the cake tough.
-
Spread the batter evenly into the prepared baking pan.
-
Bake for approximately 25-30 minutes, or until a toothpick inserted into the center of the cake comes out clean. Start checking for doneness around 25 minutes to avoid overbaking. Overbaked cake can be dry and crumbly.
-
Once the cake is done, remove it from the oven and let it cool completely in the pan on a wire rack. Allowing the cake to cool completely before frosting prevents the frosting from melting.
-
While the cake is cooling, prepare the frosting. In a separate bowl, using an electric mixer, beat together the confectioners’ sugar, white shortening, half-and-half cream, salt, and vanilla extract until light and fluffy.
-
Adjust the consistency of the frosting as needed by adding more confectioners’ sugar if it’s too thin or more cream if it’s too thick.
-
Once the cake has cooled completely, spread the frosting evenly over the top.
-
Sprinkle the frosted cake with additional chopped Oreo cookies. Use as many as desired for the top.
-
Refrigerate the cake until ready to serve. This allows the frosting to set and the flavors to meld together. Store any leftover cake in the refrigerator.
Expert Tips & Tricks
- For a more intense Oreo flavor: Consider adding a teaspoon of Oreo cookie crumbs to the cake batter in addition to the coarsely crushed cookies.
- Preventing a dry cake: Avoid overbaking by using an oven thermometer to ensure your oven temperature is accurate. Also, don’t open the oven door frequently during baking.
- Frosting consistency: The key to a perfect frosting is achieving the right consistency. Start with the recommended amount of liquid and gradually add more until you reach a smooth, spreadable texture.
- Make-ahead tip: The cake can be baked a day ahead of time and stored, well-wrapped, at room temperature. Frost just before serving.
- Shortening vs. Butter: Shortening provides a very stable, bright white frosting. Butter adds flavor but can make the frosting slightly yellow and less stable at room temperature. A combination of both offers a good balance.
Serving & Storage Suggestions
Serve this Oreo Cookies and Cream Cake chilled for the best flavor and texture. Cut into squares or slices and enjoy! It pairs well with a glass of cold milk, a scoop of vanilla ice cream, or a cup of coffee.
To store, cover the cake tightly with plastic wrap or place it in an airtight container. It will keep in the refrigerator for up to 3-4 days. You can also freeze the cake for longer storage. Wrap it tightly in plastic wrap and then foil, or place it in a freezer-safe container. Frozen cake will keep for up to 2-3 months. Thaw in the refrigerator overnight before serving.
Nutritional Information
| Nutrient | Amount per Serving | % Daily Value |
|---|---|---|
| Calories | 529 kcal | 26% |
| Total Fat | 22g | 33% |
| Saturated Fat | 4g | 20% |
| Cholesterol | 2mg | 1% |
| Sodium | 378mg | 16% |
| Total Carbohydrate | 81g | 27% |
| Dietary Fiber | 1g | 4% |
| Sugars | 67g | 134% |
| Protein | 4g | 8% |
Note: Nutritional information is an estimate and may vary based on specific ingredients and serving sizes.
Variations & Substitutions
- Chocolate Cake Version: Substitute the white cake mix with a chocolate cake mix for a richer, more decadent treat.
- Gluten-Free Option: Use a gluten-free cake mix and gluten-free Oreo cookies.
- Dairy-Free Frosting: Use a dairy-free butter substitute for the shortening and a non-dairy milk alternative for the half-and-half cream.
- Mint Chocolate: Add a teaspoon of peppermint extract to the frosting for a refreshing mint chocolate flavor. Use Mint Oreos instead of regular Oreos.
- Different Oreo Flavors: Experiment with different Oreo flavors like Golden Oreos, Peanut Butter Oreos, or Birthday Cake Oreos.
- Cupcakes: Bake the batter in cupcake liners instead of a 13×9 pan. Reduce the baking time accordingly.
FAQs (Frequently Asked Questions)
Q: Can I use a different size pan?
A: Yes, you can use two 9-inch round cake pans instead of a 13×9 inch pan. You will need to adjust the baking time accordingly. Start checking for doneness after about 20 minutes.
Q: Can I make this cake ahead of time?
A: Absolutely! The cake can be baked and frosted a day or two in advance. Store it in the refrigerator until you’re ready to serve.
Q: What can I use instead of shortening in the frosting?
A: You can use butter, but the frosting might have a slightly yellowish tint. A combination of half shortening and half butter works well.
Q: How do I prevent the Oreos from sinking to the bottom of the cake?
A: Gently fold the crushed Oreos into the batter right before pouring it into the pan. Do not overmix.
Q: Can I freeze this cake?
A: Yes, you can freeze the cake. Wrap it tightly in plastic wrap and then foil before freezing. Thaw in the refrigerator overnight before serving.
Final Thoughts
This Oreo Cookies and Cream Cake is a crowd-pleaser that’s sure to bring a smile to everyone’s face. It’s simple to make, incredibly delicious, and endlessly customizable. So gather your ingredients, preheat your oven, and get ready to bake a cake that’s as fun to make as it is to eat. Don’t be afraid to experiment with different Oreo flavors or add your own creative touches. And most importantly, have fun! I’d love to hear about your baking adventures, so please share your feedback and any variations you try. Enjoy!