
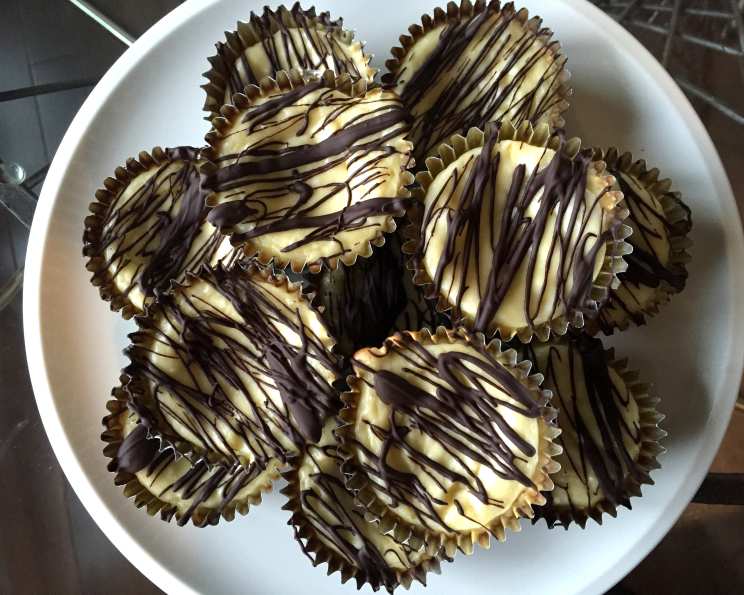
Oreo Mini Cheesecakes: A Bite-Sized Dream
My grandmother always had a stash of Oreo cookies hidden in her pantry, a secret treasure she’d share with me during our afternoon visits. We’d dunk them in milk, the creamy filling softening just so, and then she’d tell me stories of her childhood. These Oreo Mini Cheesecakes bring back those sweet memories – the satisfying crunch of the cookie, the creamy richness of the filling, all in a perfect, poppable bite. Every time I bake them, I’m transported back to her warm kitchen, surrounded by love and the comforting aroma of freshly baked treats.
Recipe Overview
- Prep Time: 15 minutes
- Cook Time: 20 minutes
- Total Time: 3 hours 35 minutes (includes chilling time)
- Servings: 12
- Yield: 12 mini cheesecakes
- Dietary Type: Not Gluten-Free
Ingredients
- 2 (250g) packages cream cheese, softened
- ½ cup sugar
- 2 eggs
- 1 teaspoon vanilla extract
- 12 Oreo cookies
- 3 semi-sweet chocolate baking squares, melted (or 2 tablespoons chocolate chips, melted)
- 1 cup thawed Cool Whip Topping
Equipment Needed
- Electric mixer
- Large mixing bowl
- 12-cup muffin tin
- Paper liners for muffin tin
- Microwave-safe bowl or double boiler (for melting chocolate)
Instructions
- Preheat your oven to 350°F (175°C). Ensure your oven rack is positioned in the center for even baking.
- In a large mixing bowl, combine the softened cream cheese and sugar. Use an electric mixer on medium speed to beat the mixture until it is light and fluffy. This usually takes about 2-3 minutes. Make sure to scrape down the sides of the bowl to incorporate all ingredients evenly.
- Add the eggs one at a time to the cream cheese mixture, beating on low speed after each addition just until blended. Be careful not to overmix, as this can introduce air and cause the cheesecakes to crack during baking.
- Stir in the vanilla extract. This enhances the flavor and adds a touch of warmth to the cheesecakes.
- Place one Oreo cookie in the bottom of each of the 12 paper-lined muffin cups. The Oreo will form the crust of the mini cheesecake.
- Evenly distribute the cream cheese batter among the muffin cups, filling each cup about 3/4 of the way. This prevents overflow during baking and ensures each cheesecake is the perfect size.
- Bake for 20 minutes, or until the centers are almost set. The edges should be slightly firm, and the centers should have a slight jiggle. Keep a close eye on them to prevent overbaking.
- Remove the muffin tin from the oven and allow the mini cheesecakes to cool completely at room temperature. This prevents condensation and helps them set properly.
- Once cooled, refrigerate for at least 3 hours, or preferably overnight. This chilling time is crucial for the cheesecakes to firm up and develop their characteristic creamy texture.
- Before serving, drizzle the tops of the cheesecakes with the melted chocolate. You can melt the chocolate in the microwave in 30-second intervals, stirring in between, or use a double boiler for a smoother melt.
- Top each cheesecake with a dollop of thawed Cool Whip Topping. This adds a light and airy finish to the rich cheesecakes.
Expert Tips & Tricks
- Softening the Cream Cheese: Ensure your cream cheese is fully softened before starting. This will result in a smoother batter and prevent lumps. Leave it out at room temperature for at least an hour, or microwave it in 15-second intervals.
- Preventing Cracks: To avoid cracks in your cheesecakes, don’t overmix the batter. Overmixing incorporates too much air. Also, avoid sudden temperature changes; let them cool gradually.
- Melting Chocolate: For a perfectly smooth chocolate drizzle, add a teaspoon of vegetable oil or shortening to the chocolate while melting. This will help it melt evenly and prevent it from seizing.
- Cookie Base: The original recipe can cause the Oreo base to remain hard. As an alternative, consider using a single chocolate wafer cookie instead, or try crushing the Oreo cookies and mixing them with a tablespoon of melted butter to create a more cohesive crust. Pre-baking the crust for 5 minutes can also help.
Serving & Storage Suggestions
Serve these delightful Oreo Mini Cheesecakes chilled for the best flavor and texture. They make a wonderful dessert for parties, potlucks, or simply as a sweet treat after dinner. Leftover cheesecakes can be stored in an airtight container in the refrigerator for up to 3-4 days. For longer storage, you can freeze them. Wrap each cheesecake individually in plastic wrap and then place them in a freezer-safe container. They can be frozen for up to 2 months. Thaw in the refrigerator overnight before serving. While they can be left at room temperature for a short while during serving, they should be refrigerated promptly to maintain their quality.
Nutritional Information
| Nutrient | Amount per Serving | % Daily Value |
|---|---|---|
| Calories | 306 kcal | N/A |
| Calories from Fat | 207 g | N/A |
| Total Fat | 23.1 g | 35% |
| Saturated Fat | 13.3 g | 66% |
| Cholesterol | 94.8 mg | 31% |
| Sodium | 187.9 mg | 7% |
| Total Carbohydrate | 21.5 g | 7% |
| Dietary Fiber | 0.7 g | 2% |
| Sugars | 16.4 g | N/A |
| Protein | 5.2 g | 10% |
Note: Nutritional information is an estimate and may vary based on specific ingredients and preparation methods.
Variations & Substitutions
- Gluten-Free: Substitute the Oreo cookies with gluten-free chocolate sandwich cookies for a gluten-free version. You can also create a gluten-free crust using almond flour, cocoa powder, and a touch of sweetener.
- Dairy-Free: Use dairy-free cream cheese and Cool Whip alternatives. Be sure to check the ingredient list of your chocolate to ensure it’s dairy-free as well.
- Flavor Variations: Experiment with different Oreo flavors like Golden Oreos, Mint Oreos, or Peanut Butter Oreos for a unique twist.
- Chocolate Swirl: Before baking, swirl melted chocolate into the cream cheese batter for a marbled effect.
- Berry Topping: Instead of melted chocolate and Cool Whip, top with fresh berries and a dusting of powdered sugar for a lighter, more refreshing dessert.
FAQs (Frequently Asked Questions)
Q: Can I use regular Oreos instead of double-stuffed?
A: Yes, you can use regular Oreos. The double-stuffed Oreos just add a bit more sweetness, but regular Oreos will work perfectly well as the crust.
Q: Can I make these ahead of time?
A: Absolutely! These mini cheesecakes are perfect for making ahead. In fact, they taste even better after chilling in the refrigerator for a few hours or overnight.
Q: Can I freeze these cheesecakes?
A: Yes, you can freeze them for up to 2 months. Wrap them individually in plastic wrap and then place them in a freezer-safe container. Thaw in the refrigerator overnight before serving.
Q: My cheesecakes cracked during baking. What did I do wrong?
A: Cracking can occur if the batter is overmixed or if there’s a sudden temperature change. Avoid overmixing and let the cheesecakes cool gradually after baking.
Q: Can I use a different type of topping?
A: Of course! Feel free to experiment with different toppings like fresh fruit, caramel sauce, sprinkles, or even a homemade ganache. The possibilities are endless!
Final Thoughts
These Oreo Mini Cheesecakes are a delightful, easy-to-make treat that are sure to be a crowd-pleaser. Whether you’re looking for a quick dessert for a weeknight dinner or a fun addition to a party spread, these bite-sized cheesecakes are the perfect choice. Don’t be afraid to get creative with the toppings and flavors to make them your own. I encourage you to try this recipe and share your feedback. Perhaps pair them with a scoop of vanilla ice cream or a steaming cup of coffee for the ultimate indulgence. Happy baking!