
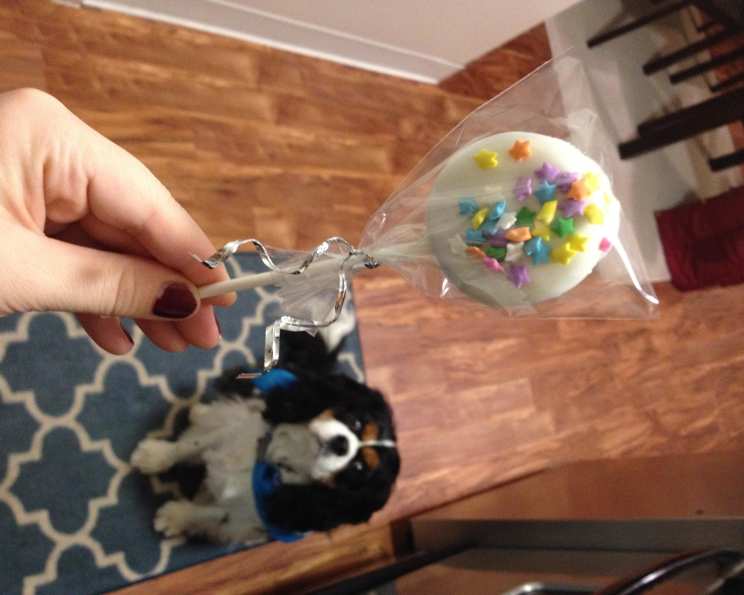
Oreo Party Pops: A Sweet Treat for Every Occasion
I remember the first time I made these Oreo Party Pops. It was for my niece’s 7th birthday, and I wanted to create something fun and personalized. The kids’ faces lit up as they devoured these chocolate-covered treats, adorned with colorful sprinkles and miniature candies. Seeing their joy made all the effort worthwhile, and these pops have been a staple at family gatherings ever since. It’s a simple recipe that brings so much happiness!
Recipe Overview
- Prep Time: 20 minutes
- Cook Time: 5 minutes
- Total Time: 25 minutes
- Servings: 20
- Yield: 20 pops
- Dietary Type: Vegetarian
Ingredients
- 20 wooden popsicle sticks or 20 lollipop sticks
- 20 Oreo Double Stuff cookies (must use Double Stuff or it won’t work)
- 1 (12 ounce) package semi-sweet chocolate chips or 1 (12 ounce) package white chocolate chips
- 1 tablespoon vegetable oil (or 1/4 block paraffin wax)
- Chopped nuts (for decoration)
- Colored sprinkles (for decoration)
- Coconut (for decoration)
- Miniature candies like miniature M&M’s chocolate candies or Reese’s Pieces (for decoration)
Equipment Needed
- Small saucepan
- Greased waxed paper
- Microwave-safe bowl (optional)
- Spoon
- Freezer
- Refrigerator
- Plastic wrap
Instructions
- Begin by carefully inserting the popsicle sticks or lollipop sticks into the Oreo cookies. This is a crucial step, so pay close attention. Gently twist open each Oreo cookie.
- Hold both sides of the Oreo firmly but not too tightly. The key is to apply even pressure to avoid breaking the cookie.
- Carefully slide the stick into the cream filling, gliding it in gently. Be sure not to push the stick completely through to the other side of the cookie. The stick should be securely embedded in the cream filling, providing a stable base for the pop.
- Alternatively, you can microwave the Oreos on the defrost setting for about 10 seconds before inserting the stick. This softens the cream filling, making it easier to insert the stick without damaging the cookie. However, be careful not to overheat the cookies, as this can cause the filling to melt.
- Once the sticks are inserted, place the Oreo pops in the freezer for 10 minutes. This will help to solidify the cream filling and secure the sticks in place.
- Next, prepare the chocolate coating. In a small saucepan over low heat, combine the chocolate chips and vegetable oil. Stir constantly until the chocolate is completely melted and smooth.
- If you prefer to use a microwave, melt the chocolate and oil in a microwave-safe bowl. Heat on 70% power for 1 minute, then stir. Continue heating in additional 20-30 second intervals, stirring in between, until the chocolate is fully melted and smooth.
- Now, it’s time to dip the Oreo pops into the melted chocolate. Hold each pop by the stick and carefully dip it into the chocolate, coating it evenly on all sides.
- Gently shake off any excess chocolate to prevent it from pooling at the bottom of the pop.
- After dipping, immediately place the chocolate-covered Oreo pops on greased waxed paper. This will prevent them from sticking as the chocolate hardens.
- While the chocolate is still wet, decorate the pops with your choice of toppings. Get creative! Sprinkle them with chopped nuts, colored sprinkles, coconut, or miniature candies like M&M’s or Reese’s Pieces.
- Once decorated, place the Oreo pops in the refrigerator for an hour, or until the chocolate is completely set. This will ensure that the chocolate hardens properly and the decorations adhere firmly.
- Finally, wrap each Oreo pop individually in plastic wrap and tie with a bow for gift-giving or easy storage.
Expert Tips & Tricks
- Double Stuff Oreos are a must! The extra cream filling provides a better grip for the sticks.
- If you’re having trouble inserting the sticks, try using a toothpick or skewer to create a small channel in the cream filling before inserting the stick.
- For a smoother chocolate coating, add a small amount of shortening instead of vegetable oil.
- To prevent the chocolate from seizing, make sure your saucepan is completely dry before adding the chocolate chips.
- If the chocolate starts to thicken while you’re dipping, add a small amount of vegetable oil or shortening to thin it out.
- Experiment with different types of chocolate, such as dark chocolate or milk chocolate, to create unique flavor combinations.
- For a festive touch, use colored candy melts instead of chocolate chips for the coating.
- Don’t be afraid to get creative with the decorations! Use different colors and textures to create visually appealing pops.
- If you’re making these pops for a large group, consider using a double boiler to melt the chocolate. This will help to keep the chocolate at a consistent temperature and prevent it from burning.
Serving & Storage Suggestions
Serve the Oreo Party Pops chilled for the best flavor and texture. They are perfect for parties, holidays, or any special occasion. To store, keep the wrapped pops in the refrigerator for up to a week. For longer storage, you can freeze them for up to a month. To thaw, simply place them in the refrigerator for a few hours.
Nutritional Information
| Nutrient | Amount per Serving | % Daily Value |
|---|---|---|
| Calories | 152.4 kcal | – |
| Calories from Fat | 80 g | 53% |
| Total Fat | 9 g | 13% |
| Saturated Fat | 3.8 g | 19% |
| Cholesterol | 0 mg | 0% |
| Sodium | 47.5 mg | 1% |
| Total Carbohydrate | 19.8 g | 6% |
| Dietary Fiber | 1.4 g | 5% |
| Sugars | 15.3 g | 61% |
| Protein | 1.3 g | 2% |
Note: Nutritional information is an estimate and may vary based on specific ingredients and portion sizes.
Variations & Substitutions
- Vegan Oreo Pops: Use vegan Oreo cookies and dairy-free chocolate chips for a completely vegan treat.
- Gluten-Free Oreo Pops: Although standard Oreos are not gluten-free, you can find gluten-free chocolate sandwich cookies to use as a substitute.
- Peanut Butter Oreo Pops: Drizzle melted peanut butter over the chocolate-covered pops for a delicious peanut butter and chocolate combination.
- Mint Chocolate Oreo Pops: Add a few drops of peppermint extract to the melted chocolate for a refreshing mint flavor.
- White Chocolate Raspberry Oreo Pops: Use white chocolate chips for the coating and sprinkle with freeze-dried raspberries.
FAQs (Frequently Asked Questions)
Q: Why do I need to use Double Stuf Oreos?
A: The extra cream filling in Double Stuf Oreos provides a better grip for the sticks, preventing the pops from falling apart.
Q: Can I use regular Oreos instead of Double Stuf?
A: While you can try, it’s more difficult to insert the sticks securely, and the pops are more likely to break. Double Stuf is highly recommended.
Q: What can I use instead of vegetable oil in the chocolate?
A: You can use shortening or paraffin wax, which will help the chocolate to melt smoothly and harden properly.
Q: How long do the Oreo pops last?
A: Stored in the refrigerator, the Oreo pops will last for up to a week. In the freezer, they can last for up to a month.
Q: My chocolate is seizing up. What can I do?
A: Add a small amount of vegetable oil or shortening to the chocolate to thin it out and restore its smooth consistency. Be careful not to add any water, as this can make the problem worse.
Final Thoughts
These Oreo Party Pops are more than just a simple recipe; they are a vehicle for creating memories and sharing joy. I encourage you to gather your ingredients, invite your loved ones, and embark on this delightful culinary adventure. Don’t be afraid to experiment with different flavors and decorations to create your own unique masterpieces. And most importantly, have fun! I’d love to hear about your creations and any variations you come up with. Pair these pops with a tall glass of cold milk for the ultimate treat!