
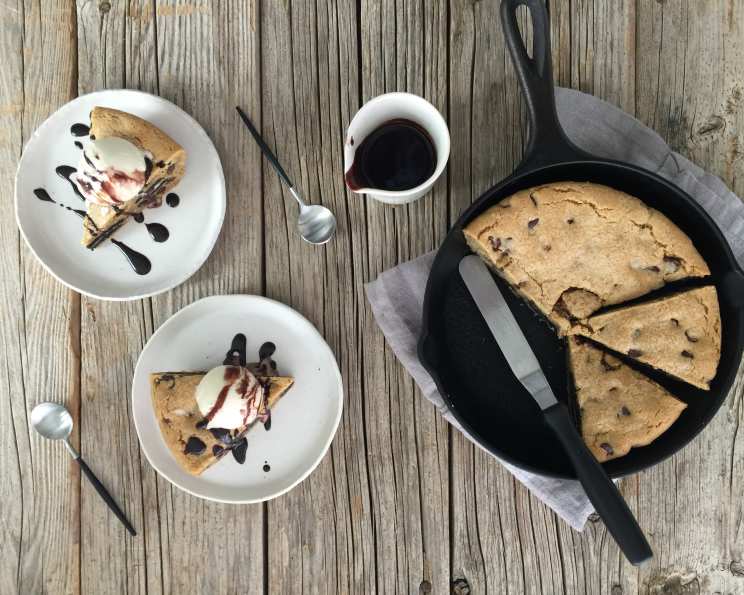
Oreo-Stuffed Panookie: A Skillet Cookie Dream
There’s a particular memory that always floods back to me when I think about skillet cookies. It was a rainy afternoon, and I was probably 10 years old, huddled in my grandmother’s cozy kitchen. The air was thick with the aroma of baking cookies, but instead of individual treats, she pulled out a bubbling skillet of chocolate chip goodness, its edges caramelized to perfection. It was a revelation—a giant, warm, gooey cookie meant for sharing (or, if you were me at age 10, devouring solo). That feeling of pure, unadulterated cookie joy is what I aim to recreate with every skillet cookie I bake, and this Oreo-Stuffed Panookie takes that experience to a whole new level.
Recipe Overview
- Prep Time: 20 minutes
- Cook Time: 20-25 minutes
- Total Time: 45 minutes
- Servings: 8 slices
- Yield: 1 panookie
- Dietary Type: Vegetarian (Can be made vegan with substitutions)
Ingredients
For the Cookie Dough:
- ½ cup (1 stick) butter, softened
- ½ cup granulated sugar
- ½ cup brown sugar, packed
- 1 large egg
- 1 teaspoon vanilla extract
- 1 ¼ cups all-purpose flour
- ½ teaspoon salt
- 1 teaspoon baking powder
- ½ cup chocolate chips
- 7 Oreo cookies
For the Chocolate Syrup:
- 2 ounces dark chocolate, chopped
- 2 ounces granulated sugar
- 2 tablespoons butter
- 2 tablespoons cocoa powder
- ¼ cup water
- ¼ cup heavy cream
To Serve:
- 1 pint vanilla ice cream
Equipment Needed
- 8-inch skillet (oven-safe)
- Mixing bowls
- Measuring cups and spoons
- Sifter or fine-mesh sieve
- Saucepan
- Whisk
Instructions
-
Prepare the Cookie Dough: In a large mixing bowl, cream together the softened butter and both the granulated and brown sugars until light and fluffy. This is best achieved with an electric mixer, but a sturdy whisk and some elbow grease will work too. Make sure the butter is properly softened, not melted, for the best texture.
-
Sift Dry Ingredients: In a separate bowl, sift together the all-purpose flour, salt, and baking powder. Sifting ensures there are no lumps and helps to create a lighter, more tender cookie. If you don’t have a sifter, a fine-mesh sieve works perfectly.
-
Combine Wet and Dry: Add the egg and vanilla extract to the creamed butter and sugar mixture. Beat until well combined. Gradually add the sifted flour mixture to the wet ingredients, mixing until just combined. Be careful not to overmix, as this can lead to a tough cookie.
-
Add Chocolate Chips: Stir in the chocolate chips until they are evenly distributed throughout the cookie dough.
-
Assemble the Panookie: Divide the cookie dough in half. Press one half of the dough evenly into the bottom of an ungreased 8-inch skillet.
-
Oreo Layer: Arrange the Oreo cookies in a single layer over the cookie dough base. Make sure they are evenly spaced.
-
Top with Remaining Dough: Carefully spread the remaining half of the cookie dough over the Oreo cookies. You can gently press it down to seal the edges, but don’t worry about making it perfectly even.
-
Bake: Bake in a preheated oven at 350°F (175°C) for 20-25 minutes, or until the edges are golden brown and the center is set but still slightly soft. The baking time may vary depending on your oven, so keep a close eye on it.
-
Make the Chocolate Syrup: While the panookie is baking, prepare the chocolate syrup. In a small saucepan, combine the dark chocolate, sugar, butter, cocoa powder, and water.
-
Simmer: Place the saucepan over low heat and simmer, stirring constantly, until the chocolate is melted and the mixture is smooth.
-
Add Cream: Stir in the heavy cream and continue to simmer for approximately 3 minutes, stirring constantly, until the syrup is slightly thickened and glossy.
-
Serve: Once the panookie is out of the oven, let it cool slightly before slicing. Serve warm with a scoop of vanilla ice cream and a generous drizzle of the homemade chocolate syrup.
Expert Tips & Tricks
- Soften the Butter Properly: Using softened butter, not melted, is crucial for achieving the right cookie texture. Let the butter sit at room temperature for about 30 minutes to an hour, or until it’s soft but still holds its shape.
- Don’t Overmix: Overmixing the dough develops the gluten in the flour, resulting in a tough cookie. Mix until just combined.
- Customize Your Oreos: Feel free to experiment with different Oreo flavors! Peanut Butter Oreos, Golden Oreos, or even seasonal flavors can add a unique twist to your panookie.
- Add a Pinch of Espresso Powder: For a richer, more intense chocolate flavor, add a pinch (about 1/4 teaspoon) of espresso powder to the cookie dough.
- Make Ahead: The cookie dough can be made ahead of time and stored in the refrigerator for up to 2 days. Just bring it to room temperature slightly before baking.
- Vegan Option: Substitute the butter with vegan butter, the egg with a flax egg (1 tablespoon of ground flaxseed mixed with 3 tablespoons of water, let sit for 5 minutes), and the heavy cream with coconut cream for a delicious vegan version.
- Salted Caramel Drizzle: Elevate your panookie by drizzling salted caramel sauce over the top with the chocolate syrup.
Serving & Storage Suggestions
Serve the Oreo-Stuffed Panookie warm, ideally straight from the oven. The combination of the warm, gooey cookie, the creamy ice cream, and the rich chocolate syrup is simply irresistible. Leftovers can be stored in an airtight container at room temperature for up to 2 days, or in the refrigerator for up to 5 days. To reheat, warm a slice in the microwave for a few seconds or in a low oven until heated through. The panookie can also be frozen for up to 2 months. Wrap it tightly in plastic wrap and then foil. Thaw overnight in the refrigerator before reheating.
Nutritional Information
| Nutrient | Amount per Serving | % Daily Value |
|---|---|---|
| Calories | 567 kcal | 28% |
| Total Fat | 31g | 47% |
| Saturated Fat | 18g | 90% |
| Cholesterol | 86mg | 29% |
| Sodium | 414mg | 17% |
| Total Carbohydrate | 73g | 24% |
| Dietary Fiber | 3g | 13% |
| Sugars | 50g | 100% |
| Protein | 7g | 14% |
Note: Nutritional information is an estimate and may vary based on specific ingredients and portion sizes.
Variations & Substitutions
- Gluten-Free: Use a gluten-free all-purpose flour blend in place of the regular all-purpose flour.
- Different Fillings: Instead of Oreos, try using other cookies, such as peanut butter cookies, chocolate chunk cookies, or even brownies.
- Nuts: Add chopped nuts, such as walnuts or pecans, to the cookie dough for added texture and flavor.
- Seasonal Spices: For a fall-inspired panookie, add a teaspoon of pumpkin pie spice or cinnamon to the dough.
- White Chocolate: Substitute white chocolate chips for the dark chocolate chips in the chocolate syrup for a sweeter variation.
FAQs (Frequently Asked Questions)
Q: Can I use a different size skillet?
A: While an 8-inch skillet is ideal, you can use a slightly larger or smaller skillet. Adjust the baking time accordingly. A larger skillet will result in a thinner panookie, while a smaller skillet will result in a thicker one.
Q: Can I make this without the chocolate syrup?
A: Absolutely! The chocolate syrup is optional, but it adds an extra layer of richness. You can also use store-bought chocolate sauce or caramel sauce instead.
Q: How do I know when the panookie is done?
A: The edges should be golden brown and the center should be set but still slightly soft. A toothpick inserted into the center may come out with a few moist crumbs attached.
Q: Can I add other toppings?
A: Of course! Feel free to add other toppings such as sprinkles, chopped nuts, or whipped cream.
Q: Can I freeze the entire panookie after baking?
A: Yes, you can freeze the entire panookie after baking. Let it cool completely, then wrap it tightly in plastic wrap and then foil. Thaw overnight in the refrigerator before reheating.
Final Thoughts
This Oreo-Stuffed Panookie is more than just a dessert; it’s an experience. The combination of the warm, gooey cookie, the creamy ice cream, and the rich chocolate syrup is guaranteed to bring a smile to your face. Don’t be afraid to get creative with variations and substitutions to make it your own. Gather your loved ones, bake this panookie, and create memories that will last a lifetime. And if you try out this recipe, don’t forget to share your pictures and feedback – I can’t wait to see your creations!