
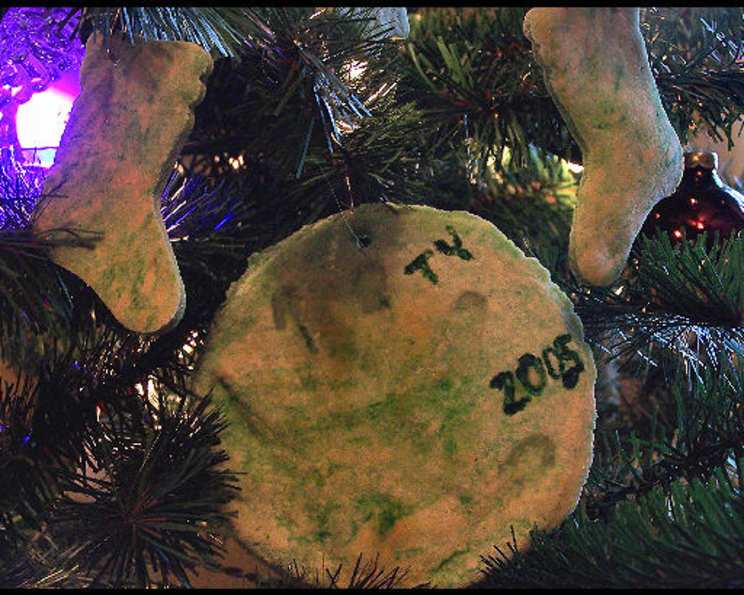
Crafting Memories: The Timeless Charm of Ornament Dough
My grandmother’s kitchen always smelled of cinnamon, pine needles, and something distinctly…salty around the holidays. It wasn’t the usual Christmas cookie baking; it was Ornament Dough. As a child, I’d eagerly anticipate the messy, flour-dusted afternoons spent rolling, cutting, and carefully poking holes in these little creations. They weren’t just decorations; they were tangible memories, each imperfectly shaped star and handprint a tiny monument to family, laughter, and the joy of creating together. Now, I carry on the tradition, passing it down to my own children, ensuring that same salty-sweet aroma fills our home each December.
Recipe Overview
- Prep Time: 20 minutes
- Cook Time: 50 minutes
- Total Time: 1 hour 10 minutes
- Yield: Varies depending on size of ornaments
- Dietary Type: Vegan (if food coloring is vegan)
Ingredients
- 1 cup flour
- 1/2 cup salt
- 1/3 cup water, plus more as needed
- 2-3 drops food coloring (optional)
- Glitter (optional)
Equipment Needed
- Mixing bowl
- Rolling pin
- Cookie cutters
- Baking sheet
- Parchment paper (optional)
- Drinking straw or skewer
Instructions
- In a mixing bowl, combine the flour and salt.
- Gradually add the water to the dry ingredients. The initial amount is 1/3 cup, but you will likely need a bit more. Add water incrementally, mixing until the dough begins to form a moist, pliable consistency, similar to that of biscuit dough. It should be workable and not too sticky.
- If using food coloring, add the drops now, kneading the dough until the color is evenly distributed. Similarly, if you want to incorporate glitter into the dough itself, add it now and knead to combine.
- Turn the dough out onto a lightly floured surface.
- Knead the dough with your hands for about 3 minutes, until it becomes smooth and elastic.
- Roll out the dough to a thickness of 1/2 to 1 inch, depending on the desired thickness of your ornaments. Keep in mind that thicker ornaments will take longer to bake.
- Use cookie cutters to cut out your desired shapes. Alternatively, you can use a knife or other tools to create freehand designs. This is a great opportunity to get creative!
- Carefully transfer the cut-out shapes to an ungreased baking sheet, or one lined with parchment paper to prevent sticking.
- Before baking, use a drinking straw or skewer to create a small hole at the top of each ornament. This hole will be used to hang the ornaments after they are baked and decorated. Be sure the hole is large enough to accommodate your chosen hanging material (string, ribbon, etc.).
- Bake in a preheated oven at 300°F (150°C) for 25 minutes on each side, or until the ornaments are hardened. The baking time will vary depending on the thickness of your ornaments and your oven.
- To ensure even baking, flip the ornaments halfway through the baking time. This will help prevent them from warping or browning unevenly.
- Once the ornaments are hardened, remove them from the oven and let them cool completely at room temperature. This may take several hours.
- Once the ornaments are cool, you can decorate them with paints, glitter, markers, beads, or any other craft supplies you like. Let your creativity shine!
- Finally, thread a piece of string, ribbon, or yarn through the hole at the top of each ornament and hang them on your Christmas tree or use them to decorate your home.
Expert Tips & Tricks
- Don’t overmix the dough: Overmixing can result in tough ornaments. Mix just until the ingredients are combined.
- Adjust water carefully: The amount of water needed may vary depending on the humidity and the type of flour used. Add water slowly, a tablespoon at a time, until the dough reaches the desired consistency.
- Prevent cracking: To minimize cracking during baking, ensure the dough is rolled out to an even thickness and that the oven temperature is accurate. If you notice cracking occurring, reduce the oven temperature slightly.
- Air Dry: For ornaments that will be heavily decorated and you aren’t worried about color, air drying can be a good option. It can take several days for them to fully dry out.
- Customize colors: Instead of food coloring, experiment with natural dyes like beet juice for pink, spinach juice for green, or turmeric for yellow.
- Add scents: Incorporate a few drops of essential oils like cinnamon, clove, or pine for a fragrant touch. Be mindful of the concentration, as some oils can be overpowering.
- Consider texture: Use textured rolling pins or stamps to create intricate patterns on the dough before cutting out the shapes.
- Protect your surfaces: Work on a non-stick surface like parchment paper or a silicone mat to prevent the dough from sticking.
Serving & Storage Suggestions
Once decorated and dried, ornament dough creations are meant to be displayed! Hang them on your Christmas tree, use them as gift tags, string them together as garland, or incorporate them into other holiday decorations. Store finished ornaments in a cool, dry place, away from direct sunlight and moisture. They can last for many years if stored properly. Avoid storing them in airtight containers, as this can trap moisture and lead to mold growth. A breathable container or a simple cardboard box is ideal.
Nutritional Information
Please note that the nutritional information provided is an estimate and can vary depending on specific ingredients and portion sizes.
| Nutrient | Amount per Serving | % Daily Value |
|---|---|---|
| Calories | Approximately 50 kcal | 3% |
| Total Fat | 0g | 0% |
| Saturated Fat | 0g | 0% |
| Cholesterol | 0mg | 0% |
| Sodium | 2900mg | 121% |
| Total Carbohydrate | 12g | 4% |
| Dietary Fiber | 0g | 0% |
| Sugars | 0g | 0% |
| Protein | 1g | 2% |
The high sodium content is due to the significant amount of salt used in the recipe. These are not intended to be eaten.
Variations & Substitutions
- Gluten-Free Ornament Dough: Substitute the all-purpose flour with a gluten-free blend. You may need to adjust the amount of water depending on the blend you use.
- Spiced Ornament Dough: Add 1 teaspoon of ground cinnamon, 1/2 teaspoon of ground ginger, and 1/4 teaspoon of ground cloves to the dry ingredients for a warm, festive aroma.
- Marbleized Ornament Dough: Divide the dough into several portions and color each portion with a different food coloring. Gently twist the portions together before rolling out to create a marbleized effect.
- Herbed Ornament Dough: Add dried herbs like rosemary, thyme, or lavender to the dough for a rustic, fragrant ornament.
FAQs (Frequently Asked Questions)
Q: Why is there so much salt in this recipe?
A: The high salt content acts as a preservative, helping the ornaments harden and last longer. It also makes the dough unpalatable, discouraging pets and children from eating them.
Q: Can I use different types of flour?
A: While all-purpose flour is recommended, you can experiment with other types like whole wheat or rye flour. However, keep in mind that this may affect the texture and baking time of the ornaments. Gluten-free flour is a great substitute!
Q: My dough is too sticky. What should I do?
A: Add a little more flour, one tablespoon at a time, until the dough reaches a workable consistency.
Q: My ornaments are cracking during baking. What can I do?
A: Try reducing the oven temperature slightly and ensure the dough is rolled out to an even thickness. You can also add a small amount of vegetable oil to the dough for added moisture.
Q: How long will these ornaments last?
A: If stored properly in a cool, dry place, these ornaments can last for many years. Avoid exposure to moisture, which can cause them to soften or mold.
Final Thoughts
Ornament dough is more than just a recipe; it’s an invitation to create lasting memories with loved ones. It’s a chance to slow down, embrace imperfection, and revel in the simple joy of making something beautiful with your own hands. So gather your family, roll out the dough, and let your imaginations run wild. These handcrafted treasures will adorn your home with warmth, love, and a sprinkle of holiday magic for years to come. Don’t hesitate to experiment with different shapes, colors, and decorations to create ornaments that are uniquely yours. And most importantly, have fun!