
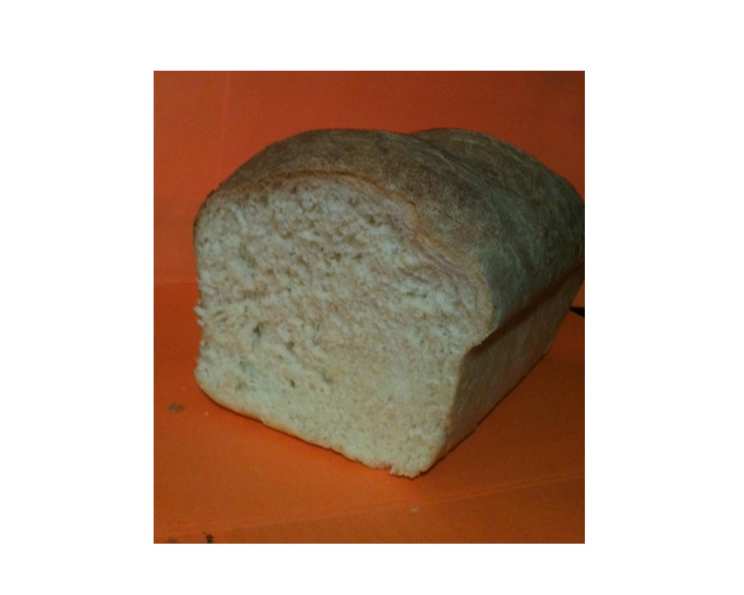
Our Favorite White Bread
The aroma of freshly baked bread has always been a warm hug to me. I remember as a child, my grandmother would bake loaves of white bread every Sunday, the scent permeating the entire house. The soft, pillowy texture, the slightly sweet taste, and the golden-brown crust were pure comfort. To this day, that familiar aroma instantly transports me back to her cozy kitchen, filled with love and laughter. I’ve tweaked her recipe over the years, but the essence remains the same: simple ingredients, careful technique, and a whole lot of love.
Recipe Overview
- Prep Time: 25 minutes
- Cook Time: 25 minutes
- Rise Time: 3.5 – 5 hours
- Total Time: 6 hours 25 minutes
- Yields: 2 loaves
- Serves: 20-24
- Dietary Type: Vegetarian
Ingredients
- 2 1⁄4 cups milk
- 3 tablespoons honey
- 3 tablespoons sugar
- 1 tablespoon salt
- 3 tablespoons butter, divided
- 2 (3/4 ounce) packages active dry yeast
- 7 cups unbleached bread flour
Equipment Needed
- Four-cup measuring cup
- Microwave
- Instant-read thermometer
- Stand mixer
- Large bowl
- Non-terry kitchen towel
- Rolling pin
- Two greased loaf pans
- Cooling rack
Instructions
-
Begin by warming the milk. Using a four-cup measuring cup, heat the milk in the microwave for approximately 2 1/2 minutes on high. You’re aiming for a temperature that’s warm but not scalding.
-
Create the sweet base. Add the honey, sugar, salt, and 2 tablespoons of butter to the warmed milk. Stir until the butter is completely melted and the ingredients are well combined.
-
Temper the mixture. Using an instant-read thermometer, check the temperature of the milk mixture. It should be between 100 and 110 degrees Fahrenheit. This is crucial for activating the yeast without killing it. If it’s too hot, let it cool slightly before proceeding.
-
Activate the yeast. Add both packages of active dry yeast to the warm milk mixture and stir until combined. Let the mixture sit for about 10 minutes, or until the yeast is foamy. This indicates that the yeast is alive and ready to work its magic.
-
Combine the wet and dry ingredients. In the mixing bowl of a stand mixer, add 5 cups of the bread flour. Pour in the milk mixture. Using the paddle attachment, beat until the ingredients are well combined.
-
Knead the dough. Switch to the dough hook attachment. Add the remaining 2 cups of flour. Continue to mix until the ingredients are combined. Once the dough has formed and pulled away from the sides of the mixer, continue to knead on a medium speed for 6-9 minutes.
-
Assess the dough. After kneading, the dough should be smooth and supple, with a slightly tacky feel. If it’s too sticky, add flour one tablespoon at a time until it reaches the desired consistency.
-
First rise. Place the dough on a very lightly floured counter or board and knead by hand until you feel relaxed. Then form the dough into a smooth ball. Place it in a large buttered bowl, flipping it over so the top of the dough is buttered. This prevents the dough from drying out. Cover the bowl loosely with a non-terry kitchen towel. Let it rise for 2-3 hours in a warm place. A cold oven with the interior light turned on works perfectly. The dough should double in size.
-
Divide the dough. After the first rise, remove the dough from the bowl and divide it in half.
-
Shape the loaves. Using your hands or a rolling pin, and working with one piece at a time, roll out each half to a rectangle about 5-6 inches wide and 12-15 inches long (these are very approximate sizes). Starting at the short side of the dough, tightly roll up the dough into a small loaf. Pinch the dough at the seam to seal it, and tuck the ends under to make a neat loaf.
-
Place in loaf pans. Place each loaf, seam-side down, in a greased loaf pan.
-
Second rise. Cover the loaf pans again with a kitchen towel and let the loaves rise for about 1 1/2 – 2 hours. They should nearly double in size again.
-
Preheat the oven. About 30 minutes before the end of the second rise, preheat the oven to 400 degrees Fahrenheit and place a rack on the lowest level.
-
Bake the bread. Place the loaves into the preheated oven on the lowest rack. Immediately turn the temperature down to 375 degrees Fahrenheit and bake for approximately 25 minutes.
-
Monitor the browning. If the loaves start to get too brown on top, loosely lay a piece of aluminum foil over them until they are done. Be sure the loaves are brown on the part that is inside the pan.
-
Finish with butter. As soon as the loaves come out of the oven, brush the tops with a little soft or melted butter. This adds a lovely sheen and a touch of richness.
-
Cool the loaves. Remove the loaves from the pans and cool them on a rack. Be sure not to leave them in the pans or they will not have a nice firm crust.
-
Serve and enjoy! Serve toasted and your family will never forget it!
Expert Tips & Tricks
- Temperature is key: Ensure the milk mixture is between 100-110 degrees Fahrenheit to avoid killing the yeast. Use an instant-read thermometer for accuracy.
- Dough consistency: Adjust the amount of flour as needed to achieve a smooth, supple dough that is slightly tacky but not overly sticky.
- Warm environment for rising: Create a warm, humid environment for the dough to rise. A cold oven with the light turned on or a warm spot in your kitchen works well.
- Don’t over-knead: Over-kneading can result in tough bread. Knead until the dough is smooth and elastic, but avoid excessive kneading.
- Tapping Test: Tap the bottom of the loaf, and it should sound hollow. This is how to confirm the bread is baked all the way through.
Serving & Storage Suggestions
Serve this bread fresh, toasted with butter, or use it for sandwiches. For storage, allow the bread to cool completely before wrapping it tightly in plastic wrap or placing it in an airtight container. At room temperature, it will last for 2-3 days. In the refrigerator, it will last for up to a week. For longer storage, slice the bread and freeze it in an airtight container for up to 3 months. To reheat, thaw at room temperature or toast directly from frozen.
Nutritional Information
| Nutrient | Amount per Serving | % Daily Value |
|---|---|---|
| Calories | 229.7 kcal | N/A |
| Calories from Fat | 33 g | 14% |
| Total Fat | 3.7 g | 5% |
| Saturated Fat | 1.9 g | 9% |
| Cholesterol | 8.4 mg | 2% |
| Sodium | 379.7 mg | 15% |
| Total Carbohydrate | 41.4 g | 13% |
| Dietary Fiber | 1.7 g | 6% |
| Sugars | 4.6 g | N/A |
| Protein | 7.5 g | 15% |
Variations & Substitutions
- Cinnamon Raisin Bread: After the first rise, knead about 1/3 cup raisins into the dough before rolling it out flat. Then after rolling it out flat, brush the dough with melted butter, then sprinkle with a heavy layer of a cinnamon-sugar mixture (1 tsp cinnamon to each Tbsp sugar) and roll up the dough into a loaf as in the recipe. Grease the pan a little more heavily for a Cinnamon Raisin loaf.
- Whole Wheat Bread: Substitute up to half of the unbleached bread flour with whole wheat flour for a nuttier flavor and increased fiber.
- Herb Bread: Add 1-2 tablespoons of chopped fresh herbs, such as rosemary, thyme, or oregano, to the dough during the kneading process.
- Garlic Bread: Brush the baked loaves with garlic butter while they are still warm.
FAQs (Frequently Asked Questions)
Q: Why is my bread dense and not fluffy?
A: This could be due to several factors, including using old yeast, not allowing the dough to rise sufficiently, or using too much flour. Ensure your yeast is fresh, give the dough ample time to rise in a warm place, and measure your flour accurately.
Q: Can I use all-purpose flour instead of bread flour?
A: While you can use all-purpose flour, bread flour has a higher protein content, which helps develop gluten and results in a chewier, more structured loaf. If using all-purpose flour, you may need to adjust the amount of liquid.
Q: How do I prevent the crust from getting too dark?
A: If the crust is browning too quickly, loosely tent the loaves with aluminum foil during the last 10-15 minutes of baking.
Q: Can I freeze the dough after the first rise?
A: Yes, you can freeze the dough after the first rise. Punch it down to release the air, wrap it tightly in plastic wrap, and freeze for up to 3 months. Thaw in the refrigerator overnight before shaping and baking.
Q: Why is my bread gummy in the center?
A: This is usually a sign that the bread wasn’t baked long enough. Be sure to bake the bread until it’s golden brown and sounds hollow when you tap the bottom. Using an oven thermometer can also help ensure accurate baking temperatures.
Final Thoughts
Baking bread is a rewarding experience that fills your home with warmth and delicious aromas. While this recipe may seem intimidating at first, with a little patience and practice, you’ll be creating loaves of homemade white bread that are far superior to anything you can buy in a store. So, gather your ingredients, put on your favorite apron, and get ready to enjoy the simple pleasure of baking your own perfect loaf. Don’t be afraid to experiment with variations and share your creations with friends and family. This bread pairs perfectly with a hearty soup or a simple pat of butter. Happy baking!