
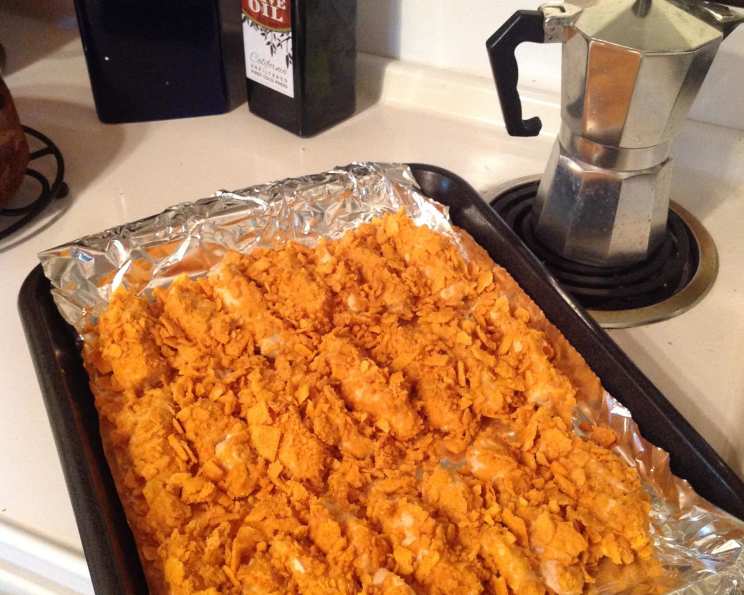
Oven Baked Cheez-It Chicken Tenders
I’ll never forget the first time I saw Cheez-Its used in a savory dish. I was catering a kids’ birthday party, and one of the moms insisted on bringing her “famous” Cheez-It-crusted chicken. I was skeptical, to say the least, but one bite completely changed my mind. The salty, cheesy crunch was a revelation, and it was an instant hit with kids and adults alike. It brought back memories of sneaking Cheez-Its as an after-school snack – a nostalgic flavor that suddenly felt elevated. Since then, I’ve experimented with various versions, but this oven-baked method remains my go-to for a quick, easy, and utterly delicious weeknight meal.
Recipe Overview
- Prep Time: 10 minutes
- Cook Time: 15-20 minutes
- Total Time: 25-30 minutes
- Servings: 4
- Dietary Type: Kid-Friendly
Ingredients
- 3 cups Cheez-It crackers (or similar, small cheddar flavored crackers)
- 2 eggs
- 1/4 cup water
- Nonstick cooking spray (such as Pam)
- 1 lb chicken tenders (or boneless skinless breasts, cut into strips)
Equipment Needed
- Cookie sheet
- Aluminum foil or silicone baking mat (Silpat)
- Zip-lock bag
- Rolling pin
- Shallow bowls or plates
- Whisk
Instructions
- Preheat your oven to 350°F (175°C).
- Line a cookie sheet with aluminum foil or a silicone baking mat. This will help prevent the chicken from sticking and make cleanup a breeze.
- Place the Cheez-It crackers in a zip-lock bag. Now comes the fun part! Seal the bag tightly, ensuring no air escapes.
- Crush the Cheez-Its into a coarse crumb. You can use a rolling pin, or even let the kids have some fun gently smashing them. Don’t worry about achieving a perfectly fine powder; some larger pieces are desirable for added texture.
- Pour the crushed Cheez-Its into a shallow bowl or plate. This will be your breading station.
- In a separate bowl, crack the eggs and add the water.
- Whisk the eggs and water together until they are well combined and slightly frothy. This creates an egg wash that will help the Cheez-It crumbs adhere to the chicken.
- Dip each chicken tender into the egg mixture, ensuring it’s fully coated. Allow any excess egg wash to drip off before moving on to the next step.
- Roll the egg-coated chicken in the crushed Cheez-Its, pressing gently to ensure the crumbs stick to all sides. This is where the magic happens!
- Place the coated chicken tenders on the prepared cookie sheet, spacing them evenly to allow for even cooking.
- Lightly spray all the coated chicken with nonstick cooking spray. This helps the Cheez-Its crisp up and brown beautifully in the oven.
- Bake at 350°F (175°C) for about 15-20 minutes, or until the chicken is cooked through and the Cheez-It crust is golden brown. Start checking the smaller pieces after 10 minutes to prevent them from overcooking. Use a meat thermometer to ensure the internal temperature of the chicken reaches 165°F (74°C). I like to pull out the smaller tenders as they get cooked through, so the larger pieces can finish cooking without drying out the smaller ones.
Expert Tips & Tricks
- For an extra cheesy flavor, consider adding a tablespoon of grated Parmesan cheese to the crushed Cheez-Its.
- If you prefer a spicier kick, add a pinch of cayenne pepper or some smoked paprika to the Cheez-It mixture.
- To ensure the Cheez-Its adhere well, you can lightly dredge the chicken in flour before dipping it in the egg wash.
- Don’t overcrowd the baking sheet. Overcrowding will steam the chicken instead of baking it, resulting in a soggy crust.
- For even browning, you can flip the chicken tenders halfway through the baking time.
Serving & Storage Suggestions
Serve these delicious Oven Baked Cheez-It Chicken Tenders immediately while they are still warm and crispy. They are perfect as a main course with a side of your favorite vegetables or a simple salad. They also make great appetizers for parties or game days.
Leftovers can be stored in an airtight container in the refrigerator for up to 3 days. To reheat, bake them in a preheated oven at 350°F (175°C) for about 5-10 minutes, or until heated through. You can also reheat them in an air fryer for a crispier result. Microwaving is not recommended, as it can make the crust soggy.
Nutritional Information
| Nutrient | Amount per Serving | % Daily Value |
|---|---|---|
| Calories | 270.8 kcal | N/A |
| Calories from Fat | 95 g | 35% |
| Total Fat | 10.6 g | 16% |
| Saturated Fat | 3.4 g | 16% |
| Cholesterol | 168.4 mg | 56% |
| Sodium | 376.6 mg | 15% |
| Total Carbohydrate | 12.4 g | 4% |
| Dietary Fiber | 0.5 g | 2% |
| Sugars | 0.1 g | 0% |
| Protein | 29.4 g | 58% |
Note: Nutritional information is an estimate and may vary based on specific ingredients and preparation methods.
Variations & Substitutions
- Gluten-Free: Use gluten-free Cheez-It crackers or substitute with crushed gluten-free pretzels.
- Dairy-Free: While authentic Cheez-Its contain dairy, some brands offer dairy-free cheese crackers. Alternatively, experiment with a nutritional yeast-based coating for a cheesy flavor.
- Spice It Up: Add a dash of hot sauce to the egg mixture or sprinkle some red pepper flakes into the crushed Cheez-Its for a spicy kick.
- Herbaceous: Mix in some dried Italian herbs or fresh parsley to the Cheez-It crumbs for a more complex flavor profile.
- Different Protein: Try this method with pork tenderloin, cut into strips, or even firm tofu for a vegetarian option.
FAQs (Frequently Asked Questions)
Q: Can I use regular cheese crackers instead of Cheez-Its?
A: Yes, you can use other small, cheddar-flavored cheese crackers. However, Cheez-Its have a unique flavor and texture that works particularly well in this recipe.
Q: Can I prepare these ahead of time?
A: You can coat the chicken with the Cheez-It mixture ahead of time and store it in the refrigerator for up to 2 hours before baking. This is great for busy weeknights.
Q: How do I prevent the Cheez-Its from burning?
A: Keep a close eye on the chicken while it’s baking, especially towards the end of the cooking time. If the Cheez-Its start to brown too quickly, you can loosely cover the baking sheet with aluminum foil.
Q: Can I freeze these chicken tenders?
A: While you can freeze them, the texture of the Cheez-It crust may change upon thawing. For best results, freeze the uncooked, coated chicken tenders on a baking sheet until solid, then transfer them to a freezer bag. Bake from frozen, adding a few extra minutes to the cooking time.
Q: What dipping sauces go well with these chicken tenders?
A: These chicken tenders are delicious with a variety of dipping sauces, such as honey mustard, ranch dressing, barbecue sauce, or even a simple sriracha mayo.
Final Thoughts
I hope this recipe brings as much joy to your kitchen as it has to mine. These Oven Baked Cheez-It Chicken Tenders are a guaranteed crowd-pleaser, perfect for a quick and easy weeknight meal or a fun weekend gathering. Don’t be afraid to experiment with different variations and substitutions to make it your own. And most importantly, have fun in the kitchen and enjoy the delicious results! I encourage you to try this recipe and share your feedback with me. It pairs wonderfully with a crisp green salad or some roasted vegetables for a complete and satisfying meal.