
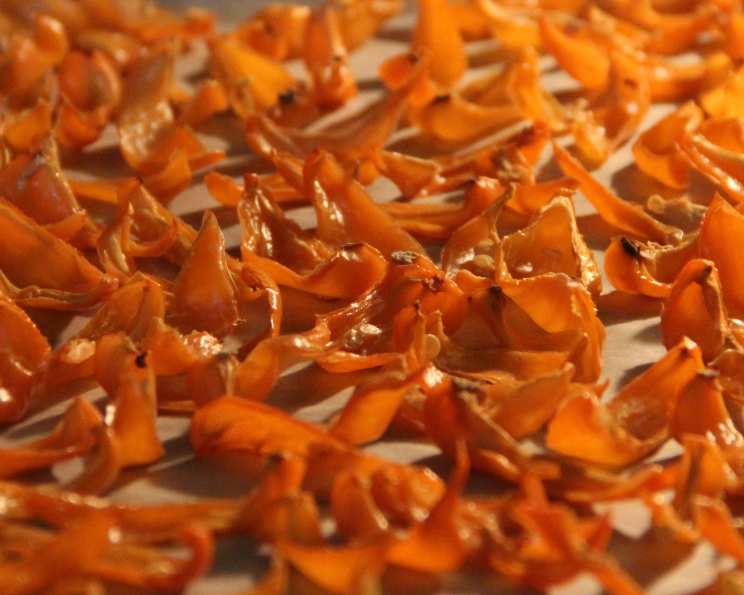
From Garden to Grinder: Crafting Your Own Oven-Dried Hot Pepper Flakes and Powder
The first time I grew peppers, I went a little overboard. Visions of vibrant salsas and fiery stir-fries danced in my head as I planted a rainbow of chilies – jalapenos, serranos, even a few brave habaneros. By late summer, my garden was overflowing, and I realized I needed a plan, fast! I remembered my grandmother always drying herbs from her garden, so I thought, why not peppers? The aroma that filled my kitchen as those peppers slowly transformed was incredible – a pungent, earthy, and undeniably spicy promise of deliciousness to come. Now, I can’t imagine buying chili flakes from the store.
Recipe Overview
- Prep Time: 15 minutes
- Cook Time: 1-3 hours
- Total Time: 1 hour 15 minutes to 3 hours 15 minutes
- Servings: Varies
- Yield: About 1 jar, depending on the quantity of peppers
- Dietary Type: Vegan, Gluten-Free, Paleo
Ingredients
- As many hot peppers as you have (e.g., Cayenne, Habanero, Thai, Jalapeno, or any chili peppers you’ve grown)
- Parchment paper
Equipment Needed
- Baking sheet
- Knife
- Cutting board
- Oven
- Coffee grinder or food processor
- Gloves (highly recommended)
- Glass jar for storage
Instructions
-
Protect Yourself: This is crucial! Put on your gloves. Handling hot peppers, especially cutting them, can leave a burning sensation on your skin for hours. Trust me, you don’t want to accidentally rub your eye later!
-
Prepare the Peppers: Rinse the peppers thoroughly under cool water. Pat them dry. Now, using a knife and cutting board, cut the peppers in half lengthwise, or even into quarters if they are particularly large or thick-fleshed. This will significantly speed up the drying process and ensure even drying. Exposing the inner flesh allows moisture to escape more readily.
-
Line the Baking Sheet: Cover your baking sheet with parchment paper. This prevents the peppers from sticking and makes cleanup a breeze.
-
Arrange the Peppers: Spread the cut peppers on the parchment paper in a single layer. Ensure that the peppers aren’t overlapping, as this will hinder airflow and result in uneven drying.
-
Dry in the Oven: Place the baking sheet in a preheated oven at 200°F (93°C). This low temperature is key to drying the peppers without burning them.
-
Monitor and Adjust: Keep a close eye on the peppers as they dry. The drying time can vary from 1 to 3 hours depending on the size and thickness of the peppers, as well as your oven’s performance. Remove any peppers that are fully dried to prevent them from burning. They should be brittle and easily snap when bent. You’ll want to check on the peppers and move them around on the tray every 30-45 minutes.
-
Cool Completely: Once the peppers are dried, remove them from the oven and let them cool completely on the baking sheet. This step is important because the peppers will continue to release moisture as they cool.
-
Grind to Flakes or Powder: Once the peppers are completely cooled, transfer them to a coffee grinder or food processor. Pulse the peppers until they reach your desired consistency. For chili flakes, pulse briefly and coarsely. For chili powder, grind until a fine powder forms. Be extremely careful when opening the grinder or processor, as the pepper dust can be very irritating to your eyes and respiratory system. Maybe even wear a mask!
-
Store Properly: Transfer the chili flakes or powder to a clean, airtight glass jar. Store the jar in a cool, dark place away from direct sunlight. This will help preserve the flavor and color of your homemade spice.
Expert Tips & Tricks
- Ventilation is Key: Open a window or turn on your kitchen exhaust fan while the peppers are drying. The fumes can be quite strong and may cause sneezing or coughing.
- Even Drying: To ensure even drying, select peppers of similar size and thickness. This will prevent some peppers from drying too quickly while others remain moist.
- Crisp Test: The peppers are done when they snap easily and don’t feel leathery. If they still feel pliable, they need more time in the oven.
- Spice Level Control: Remove the seeds and membranes of the peppers before drying if you prefer a milder heat. The seeds contain the most capsaicin, the compound responsible for the spicy sensation.
- Grinding Technique: When grinding, start with short pulses and gradually increase the duration as needed. This will prevent the peppers from overheating and releasing their oils, which can result in a clumpy powder.
- Don’t Overfill the Grinder: Work in batches to avoid overcrowding the grinder, which can lead to uneven grinding.
Serving & Storage Suggestions
Your homemade chili flakes or powder can be used in countless dishes to add a touch of heat. Sprinkle them on pizzas, tacos, eggs, soups, stews, or stir-fries. They are also a fantastic addition to dry rubs for meats and vegetables.
Properly stored in an airtight container in a cool, dark place, your oven-dried hot pepper flakes or powder will last for up to a year. Check periodically for any changes in aroma or color, which may indicate spoilage.
Nutritional Information
Please note that nutritional information is an estimate and can vary based on the specific type of pepper used and the serving size.
| Nutrient | Amount per Serving (1 tsp) | % Daily Value |
|---|---|---|
| Calories | 2 | 0% |
| Total Fat | 0g | 0% |
| Saturated Fat | 0g | 0% |
| Cholesterol | 0mg | 0% |
| Sodium | 0mg | 0% |
| Total Carbohydrate | 0g | 0% |
| Dietary Fiber | 0g | 0% |
| Sugars | 0g | 0% |
| Protein | 0g | 0% |
| Vitamin A | 2% | |
| Vitamin C | 2% |
Variations & Substitutions
- Smoked Chili Flakes/Powder: For a smoky flavor, use a smoker to partially dry the peppers before finishing them in the oven.
- Garlic Chili Flakes: Add dried garlic cloves to the peppers during the drying process and grind them together for a flavorful garlic chili flake blend.
- Herb-Infused Chili Flakes: Incorporate dried herbs like oregano, thyme, or rosemary into the mix for a more complex flavor profile.
- Sweet Chili Flakes: A touch of brown sugar or honey can be added to the finished chili flakes or powder for a sweet and spicy combination.
- Using a Dehydrator: If you have a food dehydrator, you can use it instead of the oven. Follow the manufacturer’s instructions for drying peppers.
FAQs (Frequently Asked Questions)
Q: Do I really need to wear gloves when handling hot peppers?
A: Yes, absolutely! The oils in hot peppers can cause a burning sensation that lasts for hours, even after washing your hands. Gloves are a simple way to avoid this discomfort.
Q: How can I tell when the peppers are completely dry?
A: The peppers should be brittle and snap easily when bent. If they are still pliable, they need more time in the oven.
Q: Can I dry peppers with different heat levels together?
A: Yes, you can, but be aware that the resulting flakes or powder will be a blend of the different heat levels. If you prefer to keep them separate, dry them in batches.
Q: What if I don’t have a coffee grinder or food processor?
A: You can use a mortar and pestle to crush the dried peppers, but it will require more effort and will result in a coarser texture.
Q: How do I prevent the chili dust from irritating my eyes and respiratory system?
A: Work in a well-ventilated area, and consider wearing a mask and safety glasses when grinding the peppers.
Final Thoughts
Making your own oven-dried hot pepper flakes and powder is a surprisingly easy and rewarding process. Not only does it allow you to control the spice level and flavor profile, but it also gives you a wonderful way to use up a bounty of garden peppers. Embrace the process, experiment with different types of peppers, and enjoy the fiery flavors of your homemade spice! Don’t be afraid to share your creations with friends and family – they’ll be impressed by your culinary skills and the intense flavor of your homemade spice. And remember to always be mindful of the heat!