
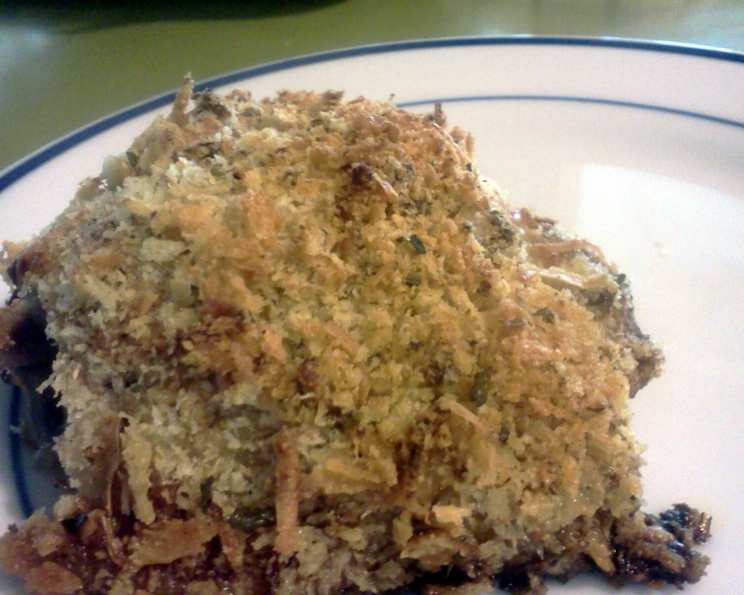
Oven Fried Chicken Thighs With Panko and Parmesan: A Crispy, Flavorful Delight
I can almost smell it now – the savory aroma filling my childhood kitchen as my grandmother pulled a pan of her “oven-fried” chicken from the oven. It wasn’t truly fried, but the crispy coating, golden brown perfection, and juicy tenderness inside tasted just like it! This recipe for Oven Fried Chicken Thighs with Panko and Parmesan reminds me so much of her classic dish, with a modern, flavor-packed twist that elevates it to restaurant-quality. It’s the perfect combination of comfort and sophistication.
Recipe Overview
- Prep Time: 15 minutes
- Cook Time: 40-50 minutes
- Total Time: 55-65 minutes
- Servings: 8
- Dietary Type: Not Gluten-Free
Ingredients
- 8 chicken thighs
- 5 tablespoons melted butter
- 3 tablespoons grainy mustard (or 3 tablespoons spicy mustard)
- 2 teaspoons maple syrup (or 2 teaspoons honey)
- 1/4 teaspoon garlic powder
- 1 1/4 cups panko breadcrumbs
- 1/3 cup shredded parmesan cheese
- 3/4 teaspoon salt
- 1/4 teaspoon pepper
- 2 teaspoons dried parsley flakes
Equipment Needed
- Large baking pan
- Aluminum foil
- Shallow bowls
Instructions
-
Preheat your oven to 400°F (200°C). Line a large baking pan with foil. Lightly grease the foil with cooking spray or a thin layer of oil. This prevents the chicken from sticking and ensures a crispy bottom.
-
Wash the chicken thighs thoroughly under cold water. Trim any excess fat or skin. While removing the skin is optional, it will result in a slightly less fatty final product. Pat the chicken thighs completely dry with paper towels. This is a crucial step for achieving maximum crispiness. Sprinkle both sides of the chicken with salt and pepper.
-
In a shallow bowl, whisk together the melted butter, mustard (either grainy or spicy will work beautifully, depending on your preference), maple syrup (or honey), and garlic powder. This mixture will act as a flavorful binder for the panko coating. Ensure the butter is fully melted and the ingredients are well combined.
-
In another shallow bowl, combine the panko breadcrumbs, shredded Parmesan cheese, 3/4 teaspoon salt, 1/4 teaspoon pepper, and dried parsley flakes. Mix thoroughly to ensure even distribution of the seasonings. The Parmesan cheese adds a lovely savory and nutty flavor to the crust.
-
One at a time, brush or rub each chicken thigh generously with the butter and mustard mixture, ensuring all surfaces are coated. Then, immediately press all sides of the chicken thigh into the panko mixture, making sure the breadcrumbs adhere well. Press firmly to create a thick, even coating.
-
Place the coated chicken thighs on the prepared baking sheet, leaving a little space between each piece. This allows for better air circulation and more even browning.
-
Bake for 40 to 50 minutes, or until the juices run clear when the chicken is pierced with a fork. A meat thermometer inserted into the thickest part of the chicken should register 165°F (74°C). If the panko coating starts to brown too quickly, you can loosely tent the pan with foil during the last 10-15 minutes of baking.
-
Let the chicken rest for a few minutes before serving. This allows the juices to redistribute, resulting in a more tender and flavorful final product.
Expert Tips & Tricks
- For an extra crispy coating, consider using a double-dredging method. After the first coating of panko, dip the chicken back into the butter mixture and then back into the panko crumbs.
- Don’t overcrowd the baking sheet. If necessary, bake the chicken in two batches to ensure even cooking and browning.
- If you don’t have panko breadcrumbs on hand, you can use regular breadcrumbs, but the texture will be slightly different. Panko provides a lighter, crispier coating.
- For a spicy kick, add a pinch of red pepper flakes to the panko mixture.
- Consider marinating the chicken thighs in the butter mixture for at least 30 minutes (or even overnight) for a more intense flavor.
Serving & Storage Suggestions
Serve these Oven Fried Chicken Thighs hot from the oven alongside your favorite side dishes. They pair perfectly with mashed potatoes, roasted vegetables, coleslaw, or a simple green salad. Garnish with a sprinkle of fresh parsley or a squeeze of lemon juice for added brightness.
Leftover chicken can be stored in an airtight container in the refrigerator for up to 3-4 days. To reheat, preheat your oven to 350°F (175°C) and bake for 10-15 minutes, or until heated through. You can also microwave the chicken, but the coating may lose some of its crispiness. For longer storage, you can freeze the cooked chicken for up to 2-3 months. Thaw completely in the refrigerator before reheating.
Nutritional Information
| Nutrient | Amount per Serving | % Daily Value |
|---|---|---|
| Calories | 711 kcal | 36% |
| Calories from Fat | 429 g | 60% |
| Total Fat | 47.7 g | 73% |
| Saturated Fat | 19 g | 95% |
| Cholesterol | 203.4 mg | 67% |
| Sodium | 1209.3 mg | 50% |
| Total Carbohydrate | 27.8 g | 9% |
| Dietary Fiber | 2 g | 8% |
| Sugars | 4.3 g | 17% |
| Protein | 40.9 g | 81% |
Note: Nutritional information is an estimate and may vary based on specific ingredients and portion sizes.
Variations & Substitutions
- Gluten-Free: Substitute the panko breadcrumbs with gluten-free panko or a mixture of almond flour and gluten-free breadcrumbs.
- Dairy-Free: Omit the Parmesan cheese or substitute it with a dairy-free Parmesan alternative.
- Herbed Chicken: Add 1-2 tablespoons of your favorite chopped fresh herbs (such as rosemary, thyme, or oregano) to the panko mixture.
- Lemon-Garlic Chicken: Add the zest of one lemon and 2 cloves of minced garlic to the butter mixture.
- Spicy Chicken: Add a pinch of cayenne pepper or a dash of hot sauce to the butter mixture.
FAQs (Frequently Asked Questions)
Q: Can I use boneless, skinless chicken breasts instead of thighs?
A: Yes, you can, but the cooking time will be shorter, and the chicken may not be as juicy. Reduce the baking time by about 10-15 minutes and monitor closely to prevent overcooking.
Q: Can I prepare the chicken ahead of time?
A: You can coat the chicken with the panko mixture up to 24 hours in advance. Store it covered in the refrigerator and bake as directed when ready to serve.
Q: How do I know when the chicken is fully cooked?
A: The best way to check for doneness is to use a meat thermometer. Insert it into the thickest part of the chicken, and it should register 165°F (74°C). Also, the juices should run clear when the chicken is pierced with a fork.
Q: My panko coating is not sticking to the chicken. What am I doing wrong?
A: Make sure you pat the chicken completely dry before coating it. The butter mixture acts as the glue, so ensure the chicken is thoroughly coated before pressing it into the panko crumbs.
Q: Can I use an air fryer instead of an oven?
A: Yes, you can air fry these chicken thighs! Preheat your air fryer to 375°F (190°C). Place the chicken thighs in the air fryer basket in a single layer (you may need to cook in batches). Air fry for 15-20 minutes, or until cooked through, flipping halfway.
Final Thoughts
This Oven Fried Chicken Thighs recipe is a winner for a reason. It delivers all the satisfying flavor and crispy texture of traditional fried chicken without the mess and extra fat. This recipe is sure to become a family favorite, whether you’re recreating cherished memories or creating new ones. So, gather your ingredients, preheat your oven, and get ready to enjoy a truly delicious and easy-to-make meal. Don’t be afraid to experiment with different seasonings and variations to make it your own! And be sure to share your creations and feedback with me – I’d love to hear how it turns out!