
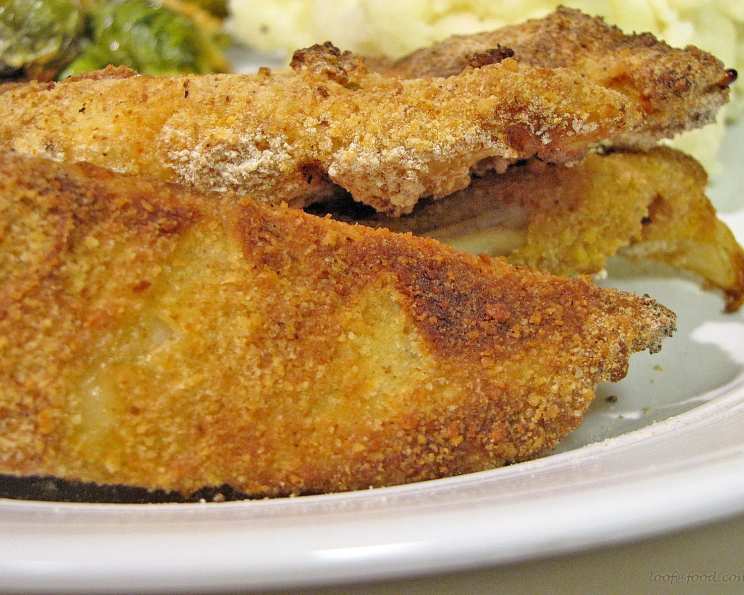
The Crispiest Oven “Fried” Fish: Guilt-Free Comfort Food
I remember summer nights spent at my grandmother’s lake house. The air, thick with humidity, would carry the tantalizing aroma of fried fish wafting from her tiny kitchen. She’d stand by the stove, her brow furrowed in concentration as she carefully lowered battered fillets into bubbling oil. We kids would hover nearby, impatient for our share of the golden, crispy goodness. While I cherish those memories, I know deep-frying isn’t the healthiest habit. That’s why I adore this oven-baked version – it delivers all the satisfying crunch without the extra grease, bringing back those cherished flavors with a healthier twist.
Recipe Overview
- Prep Time: 15 minutes
- Cook Time: 12-15 minutes
- Total Time: 30 minutes
- Servings: 4
- Dietary Type: Dairy-Free
Ingredients
- 4 (6 ounce) tilapia fillets
- 1 egg white
- ½ cup buttermilk
- ½ cup all-purpose flour
- ½ cup dried breadcrumbs
- 2 teaspoons paprika
- ½ teaspoon cayenne pepper
- 1 teaspoon salt
- 1 tablespoon vegetable oil
Equipment Needed
- Rimmed baking sheet
- Wire rack
- Pie plate or shallow dish
- Another dish for dry ingredients
- Paper towels
Instructions
- Position the oven rack on the top shelf. This ensures maximum heat exposure for optimal crisping.
- Preheat the oven to a scorching 500 degrees F (260 degrees C). A high temperature is essential for achieving that “fried” texture.
- Line a rimmed baking sheet with foil for easy cleanup. Then, place a wire rack on top of the foil-lined sheet. This allows air to circulate around the fish, preventing it from becoming soggy.
- Lightly spray or brush the wire rack with vegetable oil. This prevents the fish from sticking.
- Pat the tilapia fillets dry with paper towels. Removing excess moisture is crucial for a crispy coating.
- Slice each fillet in half lengthwise to create long, manageable pieces.
- In a pie plate or wide, shallow dish, whisk together the egg white and buttermilk. This creates a flavorful and binding wet dredge.
- In another dish, stir together the flour, breadcrumbs, paprika, cayenne pepper, and salt. This is your dry coating, responsible for the ultimate crisp.
- Working with one piece of fish at a time, lightly coat it with the flour mixture.
- Shake off any excess flour. A light coating is all you need.
- Dip the floured fish into the buttermilk mixture.
- Turn to evenly coat the fish with the buttermilk mixture.
- Shake off excess liquid. Again, removing excess moisture is key.
- Coat the fish in the flour mixture again. This double coating is what gives this “fried” fish its superior crunch.
- Shake off any excess coating, then place the coated fish on the prepared wire rack.
- Repeat with the remaining fish, working one piece at a time to avoid clumping.
- Discard any remaining buttermilk or flour mixtures.
- Lightly spray the fish with oil or, using a brush, lightly dab about 1 tablespoon of oil as evenly as possible over the coating. Don’t skip this step! It’s essential for getting that golden-brown, crispy exterior.
- Bake on the top rack of the preheated oven until the coating is crisp and golden, approximately 12 to 15 minutes. The exact time will depend on your oven, so keep a close eye on it.
- Do not turn the fish during baking. Let the top heat do its magic!
Expert Tips & Tricks
- For an extra crispy coating, try using panko breadcrumbs instead of regular breadcrumbs.
- Don’t overcrowd the baking sheet. If necessary, bake the fish in batches to ensure even cooking and browning.
- If you prefer a milder flavor, reduce or omit the cayenne pepper.
- To ensure the fish is cooked through, check the internal temperature with an instant-read thermometer. It should reach 145 degrees F (63 degrees C).
- If the breading starts to brown too quickly, loosely tent the baking sheet with foil for the last few minutes of cooking.
Serving & Storage Suggestions
Serve the oven “fried” fish immediately for the best texture. It’s delicious with a squeeze of fresh lemon juice, tartar sauce, or your favorite dipping sauce. Pair it with a side of coleslaw, oven-baked fries, or a simple green salad for a complete and satisfying meal.
Leftovers can be stored in an airtight container in the refrigerator for up to 2 days. To reheat, bake in a preheated oven at 350 degrees F (175 degrees C) for about 10-15 minutes, or until heated through. Reheating in the oven will help to maintain some of the crispness. Microwaving is not recommended, as it will make the fish soggy.
Nutritional Information
| Nutrient | Amount per Serving | % Daily Value |
|---|---|---|
| Calories | 324.1 kcal | N/A |
| Calories from Fat | 68g | 21% |
| Total Fat | 7.6 g | 11% |
| Saturated Fat | 1.8 g | 9% |
| Cholesterol | 86.3 mg | 28% |
| Sodium | 815.7 mg | 33% |
| Total Carbohydrate | 23.9 g | 7% |
| Dietary Fiber | 1.5 g | 5% |
| Sugars | 2.5 g | 10% |
| Protein | 39.7 g | 79% |
Variations & Substitutions
- Gluten-Free: Use gluten-free all-purpose flour and gluten-free breadcrumbs.
- Spice it up: Add a pinch of chili powder or a dash of hot sauce to the buttermilk mixture for an extra kick.
- Herb it up: Mix dried herbs like parsley, dill, or thyme into the flour mixture for added flavor.
- Different Fish: Feel free to substitute the tilapia with other white fish fillets, such as cod, haddock, or pollock. Adjust cooking time as needed based on the thickness of the fillets.
- Air Fryer Adaptation: You can easily adapt this recipe for an air fryer. Preheat your air fryer to 400 degrees F (200 degrees C). Place the coated fish in the air fryer basket in a single layer, being careful not to overcrowd. Cook for 8-10 minutes, or until golden brown and cooked through.
FAQs (Frequently Asked Questions)
Q: Can I use regular milk instead of buttermilk?
A: While buttermilk adds a tangy flavor and helps with browning, you can substitute it with regular milk mixed with a teaspoon of lemon juice or vinegar. Let it sit for a few minutes to slightly curdle before using.
Q: Why is the oven temperature so high?
A: The high oven temperature is crucial for achieving a crispy, “fried” texture without actually deep-frying. It helps the breadcrumbs brown quickly and prevents the fish from becoming soggy.
Q: Can I prepare the fish ahead of time?
A: It’s best to bake the fish immediately after coating it. However, you can prepare the flour and buttermilk mixtures in advance and store them separately.
Q: How do I prevent the breading from falling off?
A: Patting the fish dry, shaking off excess flour and liquid, and ensuring a good double coating are all important steps in preventing the breading from falling off. Also, be gentle when handling the coated fish.
Q: My fish is still soggy. What did I do wrong?
A: Make sure your oven is preheated to the correct temperature, and don’t overcrowd the baking sheet. Ensure the fish is patted dry and that you’ve shaken off any excess flour or buttermilk. The oil spray is also vital for crisping.
Final Thoughts
This oven “fried” fish recipe is a winner in my book – a delightful way to enjoy a classic comfort food without compromising on health. It’s simple, satisfying, and guaranteed to please even the pickiest eaters. So, preheat your oven, gather your ingredients, and get ready to experience the crispy, flavorful goodness of oven-baked fish! Don’t hesitate to experiment with different spices and herbs to create your own unique version. And please, share your feedback; I’d love to hear how it turns out for you! Serve it with a cold glass of iced tea or your favorite local brew for a truly satisfying meal.