
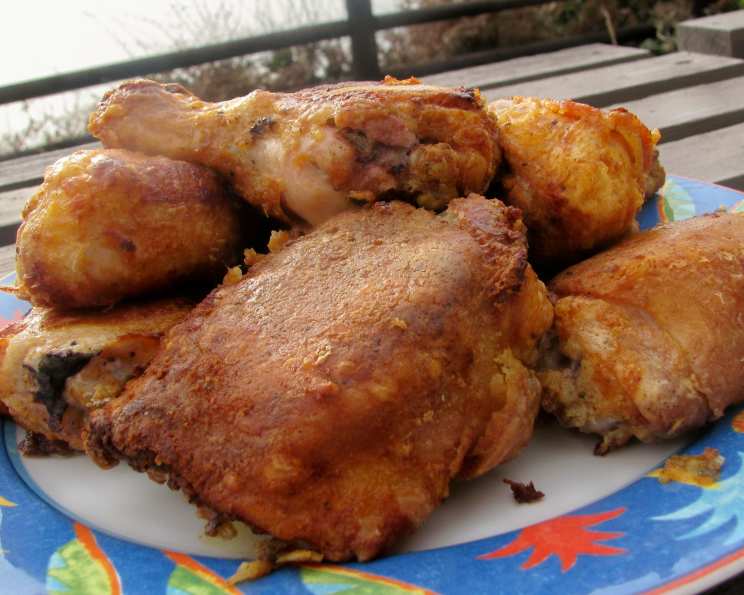
Oven Fried Paprika Chicken: A Crispy, Comforting Classic
The aroma of paprika chicken always takes me back to my grandmother’s kitchen. I can almost see her now, humming a cheerful tune as she carefully dredged each piece of chicken in seasoned flour. The anticipation was palpable, knowing that soon, we’d be gathered around her table, savoring the crispy, flavorful skin and tender, juicy meat. This “oven-fried” version captures that same comforting taste without the fuss and mess of deep-frying – a true weeknight hero.
Recipe Overview
- Prep Time: 30 minutes
- Cook Time: 50 minutes
- Total Time: 1 hour 20 minutes
- Servings: 4-6
- Dietary Type: Gluten Free adaptable
Ingredients
- 3 1⁄2 – 4 lbs bone-in chicken pieces (I use thigh and leg quarters)
- 2 1⁄2 – 3 tablespoons butter
- 1 cup all-purpose flour (see variations for gluten free)
- 2 1⁄2 teaspoons paprika
- 2 teaspoons salt
- 1⁄2 teaspoon fresh ground black pepper
Equipment Needed
- Shallow dish
- Wire rack
- Sheet pan
- 9x13x2 inch baking dish (or larger 18x12x2 inch roaster pan, depending on the size of your chicken portions)
Instructions
- Begin by preparing the seasoned flour. In a shallow dish, thoroughly mix together the flour, paprika, salt, and pepper. Set this aside for later.
- Prepare a wire rack by placing it over a sheet pan. This will allow for air circulation around the chicken as it chills, helping to dry out the skin for maximum crispness. Set this aside as well.
- Rinse the chicken pieces under cold water. Gently pat them completely dry with paper towels. This step is crucial for achieving crispy skin. Excess moisture will steam the chicken instead of allowing it to brown and crisp.
- Thoroughly coat each chicken piece in the prepared flour mixture, ensuring every surface is covered. Place the coated chicken on the wire rack/sheet pan.
- Place the rack with the coated chicken in the refrigerator for 30 minutes. This chilling period allows the flour coating to adhere to the chicken and dry out further, contributing to a crispier final product.
- While the chicken is chilling, preheat your oven to 425°F (220°C). Place the butter into a 9x13x2 inch baking dish (or a larger 18x12x2 inch roaster pan, depending on the size of your chicken portions).
- Put the baking dish with the butter into the preheating oven just until the butter melts completely. This creates a hot, buttery base for the chicken to cook in.
- Once the butter has melted, carefully remove the baking dish from the oven. Tilt the dish around to evenly distribute the melted butter across the entire bottom surface. This ensures that all the chicken pieces will have contact with the butter, promoting even browning and crisping.
- Remove the chicken from the refrigerator. Place the coated chicken pieces, skin side down, directly into the hot, buttered baking dish. Be careful not to overcrowd the pan. If necessary, use two baking dishes or a larger roaster pan. Overcrowding will lower the oven temperature and result in steamed, not crispy, chicken.
- Bake the chicken, uncovered, for 35 minutes undisturbed. Resist the urge to open the oven or move the chicken around. This undisturbed cooking time allows the skin to render its fat and crisp up beautifully. It is not burning, trust the process.
- After 35 minutes, carefully flip the chicken pieces over and bake for an additional 15 minutes.
- Check the chicken to ensure it is fully cooked. The internal temperature of the thickest part of the chicken should reach 165°F (74°C). Make sure that no pink remains and the juices run clear when pierced with a fork. If needed, add another 5-10 minutes of baking time until it is fully cooked.
- Remove the cooked chicken pieces from the oven and transfer them to a platter. Tent the platter loosely with foil and let the chicken rest for 5 minutes before serving. This allows the juices to redistribute, resulting in more tender and flavorful chicken.
- Serve immediately and enjoy!
Expert Tips & Tricks
- For extra crispy skin, pat the chicken pieces extremely dry before coating them in the flour mixture. A dry surface is key to achieving that desirable crunch.
- Don’t skip the refrigeration step. It allows the flour coating to adhere better and dry out, contributing significantly to crispness.
- Use a meat thermometer to ensure the chicken is cooked to a safe internal temperature.
- If you want to add a little heat, add a pinch of cayenne pepper to the flour mixture.
Serving & Storage Suggestions
This Oven Fried Paprika Chicken is delicious served alongside classic comfort food sides like mashed potatoes, creamy coleslaw, corn on the cob, or a simple green salad. For a lighter meal, pair it with roasted vegetables or quinoa.
Leftover chicken can be stored in an airtight container in the refrigerator for up to 3-4 days. It is best consumed within that time frame to ensure the best quality and safety.
To reheat, preheat your oven to 350°F (175°C). Place the chicken pieces on a baking sheet and bake for 10-15 minutes, or until heated through. You can also reheat it in the microwave, but the skin will lose its crispness. For best results, you can use an air fryer to reheat for about 5-7 minutes at 375F.
It is generally not recommended to leave cooked chicken at room temperature for more than 2 hours, as bacteria can grow rapidly.
Nutritional Information
| Nutrient | Amount per Serving | % Daily Value |
|---|---|---|
| Calories | 701.4 kcal | N/A |
| Total Fat | 44.1 g | 67% |
| Saturated Fat | 15.1 g | 75% |
| Cholesterol | 200.2 mg | 66% |
| Sodium | 1396.8 mg | 58% |
| Total Carbohydrate | 24.8 g | 8% |
| Dietary Fiber | 1.4 g | 5% |
| Sugars | 0.2 g | 0% |
| Protein | 48.5 g | 96% |
Note: Nutritional information is an estimate and may vary based on specific ingredients and portion sizes.
Variations & Substitutions
- Gluten-Free: Substitute the all-purpose flour with a gluten-free all-purpose flour blend or a combination of rice flour, tapioca starch, and potato starch.
- Spicy: Add 1/2 teaspoon of cayenne pepper or red pepper flakes to the flour mixture for a spicy kick.
- Herbed: Mix dried herbs like thyme, rosemary, or oregano into the flour mixture for added flavor.
- Buttermilk Brine: For extra tender and flavorful chicken, soak the chicken pieces in buttermilk for 1-2 hours before coating them in the flour mixture.
- Different Cuts of Chicken: While this recipe works best with bone-in, skin-on chicken pieces, you can also use boneless, skinless chicken breasts or thighs. However, the cooking time will need to be adjusted, and the chicken may not be as crispy.
FAQs (Frequently Asked Questions)
Q: Why do I need to chill the chicken after coating it in flour?
A: Chilling the chicken allows the flour coating to adhere better and dry out, which results in a crispier crust when baked.
Q: Can I use a different type of oil instead of butter?
A: While butter provides the best flavor, you can use another type of oil with a high smoke point, such as vegetable oil or canola oil. However, the flavor may not be as rich.
Q: How do I know when the chicken is fully cooked?
A: The internal temperature of the chicken should reach 165°F (74°C). The juices should also run clear when pierced with a fork.
Q: Can I make this recipe ahead of time?
A: You can prepare the chicken up to the point of baking, then store it in the refrigerator for up to 24 hours. Add a few minutes to the baking time if cooking from cold.
Q: My chicken is getting too brown on top. What should I do?
A: If the chicken is browning too quickly, you can loosely tent it with foil during the last 10-15 minutes of baking.
Final Thoughts
Oven Fried Paprika Chicken is a simple yet satisfying dish that’s perfect for a weeknight dinner or a casual weekend gathering. It offers the comforting taste of fried chicken without the mess and added fat. I encourage you to give this recipe a try and experience the joy of crispy, flavorful chicken that’s baked to perfection. Don’t hesitate to experiment with different herbs and spices to create your own unique variation. Share your experiences and feedback – I’d love to hear how it turns out!