
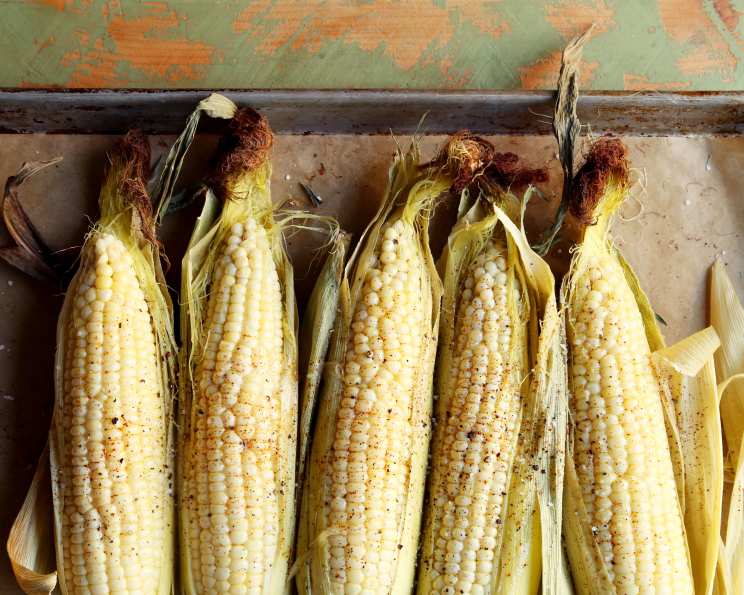
Oven-Roasted Corn on the Cob: An Unexpected Delight
There’s something truly magical about biting into a perfectly cooked ear of corn. For me, it always brings back memories of summer evenings spent at my grandparents’ farm. My grandfather, a man of few words but immense skill, would always grow the sweetest corn. He insisted that the best way to cook it was simply, letting the natural flavors shine. This oven-roasting method echoes that philosophy – simple, effective, and utterly delicious. It’s a revelation, trapping the corn’s inherent sweetness and creating a flavor you won’t soon forget.
Recipe Overview
- Prep Time: 5 minutes
- Cook Time: 30 minutes
- Total Time: 35 minutes
- Servings: 6
- Yield: 6 ears
- Dietary Type: Vegetarian, Vegan, Gluten-Free, Dairy-Free
Ingredients
- 6 ears of corn on the cob, in their husks (Or however many will fit in your oven.)
- Water, to rinse them
Equipment Needed
- Oven
- Oven rack
Instructions
-
Begin by preheating your oven to 350°F (175°C). Make sure the oven rack is positioned in the middle. This ensures even cooking.
-
Prepare the corn by rinsing each ear under cold water. This simple step helps to hydrate the husks, creating steam during baking and preventing them from burning. Don’t worry about removing the husks or silks just yet.
-
Place the rinsed corn cobs directly onto the middle rack of your preheated oven. You don’t need a baking sheet or any other lining. The husks will protect the corn.
-
Bake for 30 minutes. The exact cooking time may vary slightly depending on your oven, so it’s a good idea to check for doneness towards the end. The husks will become dry and slightly browned, and the corn inside should be tender.
-
Carefully remove the corn cobs from the oven using oven mitts or tongs, as they will be hot.
-
To serve, pull back the husks, using them as a natural handle. The silk should come away easily with the husk. If any stubborn strands remain, simply remove them by hand. Now, prepare to enjoy the wonderfully sweet and flavorful oven-roasted corn on the cob!
Expert Tips & Tricks
- Don’t skip the rinsing step: This is crucial for creating steam inside the husk, which helps the corn cook evenly and stay moist.
- Oven variations: Ovens can vary, so check for doneness by gently squeezing an ear through the husk. It should feel slightly softened. If it’s still firm, return it to the oven for a few more minutes.
- Add flavor (optional): While the oven roasting brings out a wonderful natural sweetness, feel free to experiment! Before baking, you can carefully peel back the husk (without removing it) and add a thin smear of butter, herbs, or spices. Then, fold the husk back over the corn before baking.
- Preventing husk burn: If you find the husks are browning too quickly, you can loosely tent the corn with foil for the last 10-15 minutes of cooking.
Serving & Storage Suggestions
Serve your oven-roasted corn on the cob immediately for the best flavor and texture. The natural sweetness of the corn shines on its own, but you can also offer a variety of toppings like butter, salt, pepper, chili powder, or a squeeze of lime juice.
If you have leftovers, remove the corn kernels from the cob. Store the kernels in an airtight container in the refrigerator for up to 3 days. Reheat gently in a skillet with a little butter or oil, or microwave until warmed through.
Avoid leaving cooked corn on the cob at room temperature for more than two hours.
Freezing cooked corn is possible, but the texture may change slightly. Blanch the corn kernels in boiling water for 2-3 minutes, then immediately transfer them to an ice bath to stop the cooking process. Drain well and freeze in a single layer on a baking sheet before transferring to a freezer bag. This will prevent the kernels from clumping together.
Nutritional Information
| Nutrient | Amount per Serving | % Daily Value |
|---|---|---|
| Calories | 123 kcal | 6% |
| Total Fat | 1 g | 1% |
| Saturated Fat | 0 g | 0% |
| Cholesterol | 0 mg | 0% |
| Sodium | 6 mg | 0% |
| Total Carbohydrate | 29 g | 11% |
| Dietary Fiber | 3 g | 12% |
| Sugars | 5 g | – |
| Protein | 4 g | 8% |
Note: Nutritional information is an estimate and can vary based on specific ingredients and portion sizes.
Variations & Substitutions
- Spice it up: Brush the corn with a mixture of melted butter, chili powder, cumin, and a pinch of cayenne pepper before roasting for a spicy kick.
- Garlic Herb Corn: Mix softened butter with minced garlic, fresh herbs like parsley, chives, and thyme, and spread it under the husks before baking.
- Citrus Infusion: Add a few thin slices of lemon or lime under the husk for a bright, citrusy flavor.
- Sweet Heat: Combine honey and sriracha for a sweet and spicy glaze. Brush under the husks before roasting.
- Mexican Street Corn Inspired: After roasting, brush with mayonnaise, sprinkle with cotija cheese, chili powder, and a squeeze of lime juice.
FAQs (Frequently Asked Questions)
Q: Do I need to soak the corn before roasting it?
A: No, soaking is not necessary for this method. The natural moisture in the husk is enough to steam the corn perfectly.
Q: Can I roast the corn without the husks?
A: While possible, roasting without the husks will result in drier corn. If you choose to do so, wrap each ear tightly in foil.
Q: How do I know when the corn is done?
A: The husks will be dry and slightly browned, and the corn inside should feel slightly softened when squeezed through the husk.
Q: Can I cook more or fewer ears of corn than the recipe specifies?
A: Absolutely! Simply adjust the number of ears to suit your needs, keeping the cooking time the same. Ensure the corn is arranged in a single layer on the oven rack.
Q: Can I use frozen corn on the cob for this recipe?
A: This recipe is best suited for fresh corn. Frozen corn tends to release too much moisture and may become mushy.
Final Thoughts
Oven-roasted corn on the cob is a testament to the beauty of simple cooking. It’s a dish that elevates a humble ingredient to something truly special, showcasing the natural sweetness of the corn in a way that boiling simply can’t match. I urge you to try this method – you might just find yourself converting entirely! Don’t hesitate to experiment with different flavor combinations and share your creations with friends and family. And of course, let me know what you think! I’d love to hear about your own experiences with this unexpectedly delightful way to cook corn. Serve it alongside your favorite grilled dishes, salads, or enjoy it all on its own – either way, you’re in for a treat.