
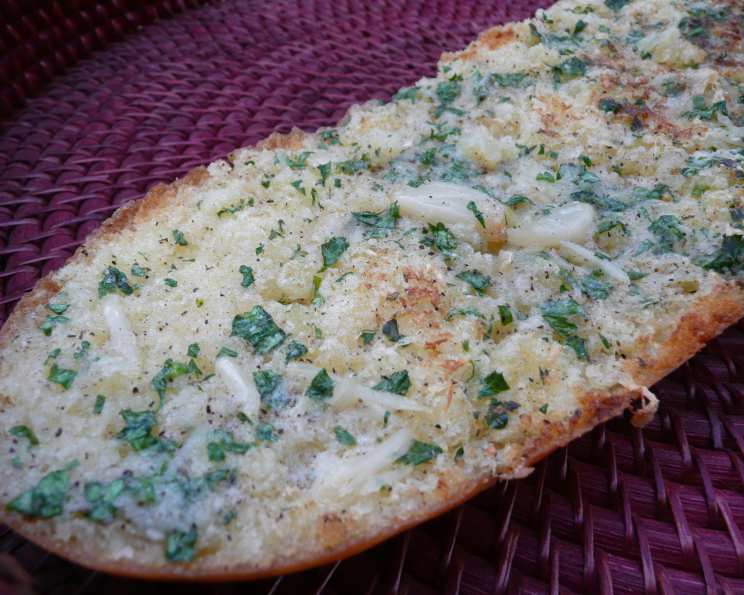
Oven Roasted Garlic Bread: A Symphony of Flavor
The scent of garlic roasting in the oven – it’s a memory etched in my mind from childhood. My grandmother, a woman who expressed love through food, would often make roasted garlic bread to accompany her Sunday pasta dinners. The entire house would fill with that intoxicating aroma, a promise of the deliciousness to come. The best part? Squeezing the softened, caramelized garlic cloves onto the crusty bread, a messy but incredibly rewarding experience. This recipe is a nod to those cherished memories.
Recipe Overview
- Prep Time: 15 minutes
- Cook Time: 30-40 minutes
- Total Time: 45-55 minutes
- Servings: Variable, depending on loaf size
- Yield: 1 loaf
- Dietary Type: Vegetarian (easily adaptable to vegan by using vegan butter)
Ingredients
- 1 head garlic, unpeeled
- Olive oil
- ¾ cup (1 1/2 sticks) butter, softened
- 2-3 tablespoons minced fresh parsley leaves
- ½ teaspoon ground black pepper
- ½ teaspoon salt
- 1 loaf sourdough bread, split horizontally
Equipment Needed
- Aluminum foil
- Medium bowl
- Oven
Instructions
-
Preheat your oven to 425 degrees F (220 degrees C). This high heat is crucial for roasting the garlic and toasting the bread perfectly.
-
Prepare the garlic by cutting off the top of the garlic head, exposing the individual cloves. Don’t be shy – remove enough so you can drizzle oil into the crevices.
-
Place the prepared garlic head on a piece of aluminum foil. Drizzle generously with olive oil, ensuring the exposed cloves are well-coated. The olive oil helps to soften and caramelize the garlic during roasting.
-
Fold the edges of the aluminum foil together to create a sealed pouch. This traps the steam and helps the garlic to cook evenly and become wonderfully tender.
-
Bake the foil-wrapped garlic in the preheated oven for 30-40 minutes. The roasting time will depend on the size of the garlic head. The garlic is ready when the cloves are soft and easily squeezed out of their skins.
-
Remove the garlic from the oven and let it cool slightly. This is important to avoid burning yourself when squeezing out the roasted cloves.
-
While the garlic cools, prepare the garlic butter mixture. In a medium bowl, squeeze the cooked garlic cloves (now soft and sticky) from their skins. Discard the papery skins.
-
Add the softened butter, minced fresh parsley leaves, salt, and ground black pepper to the bowl with the roasted garlic.
-
Stir everything together until well combined. The mixture should be smooth and spreadable. Adjust the amount of parsley, salt, or pepper to your taste.
-
Spread the garlic butter mixture evenly onto the cut halves of the sourdough bread. Ensure every nook and cranny is covered for maximum flavor.
-
Place the bread halves on a baking sheet and position them in the oven so that they are approximately 5 ½ inches (14 cm) from the broiler.
-
Broil the garlic bread with the oven door partially opened for 2-3 minutes, or until the butter melts, the bread is toasted to golden perfection, and the edges are starting to brown. Keep a close eye on the bread while broiling to prevent burning.
-
Remove the garlic bread from the oven and let it cool slightly before cutting into slices. Serve immediately and enjoy the incredible flavor!
Expert Tips & Tricks
- Garlic intensity: For a milder garlic flavor, roast the garlic longer. Longer roasting mellows out the sharpness. Conversely, if you want a more intense garlic punch, reduce the roasting time slightly.
- Butter matters: Use high-quality butter for the best flavor. European-style butter, with its higher butterfat content, will result in a richer, more decadent garlic bread.
- Herb variations: Don’t be afraid to experiment with different herbs. Fresh rosemary, thyme, or oregano would all be delicious additions to the garlic butter.
- Make-ahead tip: The garlic butter can be made a day or two in advance and stored in the refrigerator. Bring it to room temperature before spreading it on the bread. You can also roast the garlic ahead of time and store the cloves in olive oil in the refrigerator for up to a week.
- Bread choice: While sourdough is fantastic, other sturdy breads like baguette or Italian bread work well too. The key is to choose a bread that can stand up to the butter and broiling without becoming soggy.
- Fixing burnt garlic bread: If your garlic bread starts to burn under the broiler, immediately remove it from the oven. Use a serrated knife to gently scrape off the burnt parts. You can then drizzle the remaining bread with a little olive oil and sprinkle with fresh herbs to revive it.
Serving & Storage Suggestions
Serve the oven-roasted garlic bread immediately while it’s warm and crusty. It’s fantastic alongside pasta dishes, soups, salads, or as an appetizer. You can also serve it with a simple tomato bruschetta topping for an extra layer of flavor.
Leftover garlic bread can be stored at room temperature for up to 2 days in an airtight container, but it’s best consumed as soon as possible to prevent it from becoming stale. For longer storage, wrap the bread tightly in foil and freeze it for up to 1 month. To reheat, thaw the bread completely and then broil it for a minute or two until heated through and the crust is crisp again.
Nutritional Information
| Nutrient | Amount per Serving (estimated) | % Daily Value (estimated) |
|---|---|---|
| Calories | 450 kcal | 23% |
| Total Fat | 30g | 46% |
| Saturated Fat | 18g | 90% |
| Cholesterol | 75mg | 25% |
| Sodium | 1100mg | 46% |
| Total Carbohydrate | 40g | 13% |
| Dietary Fiber | 3g | 12% |
| Sugars | 2g | N/A |
| Protein | 8g | 16% |
Note: Nutritional information is an estimate and may vary based on specific ingredients and serving sizes.
Variations & Substitutions
- Vegan Garlic Bread: Substitute the butter with a high-quality vegan butter alternative. Ensure the vegan butter is firm enough to spread easily.
- Cheese Lovers: Sprinkle grated Parmesan, mozzarella, or Asiago cheese over the garlic butter before broiling for a cheesy twist.
- Spicy Garlic Bread: Add a pinch of red pepper flakes to the garlic butter mixture for a touch of heat.
- Italian Herbs: Use a blend of dried Italian herbs such as oregano, basil, and rosemary in place of or in addition to the fresh parsley.
- Garlic Confit Garlic Bread: For an even more mellow and sweeter garlic flavor, try using garlic confit instead of roasted garlic. Garlic confit is garlic cloves slow-cooked in olive oil until they are incredibly tender and sweet.
FAQs (Frequently Asked Questions)
Q: Can I use pre-minced garlic instead of roasting a whole head?
A: While you can, the flavor won’t be nearly as rich or mellow. Roasting the garlic transforms its flavor, making it sweeter and less pungent.
Q: My garlic bread is burning on top but not toasted underneath. What am I doing wrong?
A: The broiler might be too close to the bread. Lower the rack in your oven or reduce the broiling time. Also, make sure the oven door is slightly ajar, as recommended.
Q: How can I prevent my garlic bread from becoming soggy?
A: Make sure your bread is sturdy and not too soft to begin with. Also, don’t over-saturate the bread with the garlic butter.
Q: Can I freeze the garlic butter for later use?
A: Yes! Garlic butter freezes beautifully. Store it in an airtight container or wrapped tightly in plastic wrap for up to 3 months. Thaw in the refrigerator before using.
Q: What is the best way to reheat leftover garlic bread?
A: Preheat your oven to 350°F (175°C). Wrap the garlic bread in foil and bake for about 10-15 minutes, or until heated through. This will help to prevent it from drying out.
Final Thoughts
There’s something truly special about oven-roasted garlic bread. The aroma alone is enough to make mouths water, and the combination of crispy bread, savory garlic, and rich butter is simply irresistible. It’s a simple yet elegant dish that’s perfect for any occasion. I encourage you to try this recipe and experience the magic for yourself. Feel free to experiment with different herbs, cheeses, or spices to create your own unique version. And don’t forget to share your creations and feedback – I’d love to hear how it turns out! Pair it with a robust red wine for the ultimate culinary experience.